

What’s in your build? Building Images in OpenShift with Artifactory and JFrog CLI

Red Hat OpenShift is an enterprise Kubernetes container platform. It lets you build Docker images and use them to deploy your applications on a cloud-like environment (even if it’s not really on the cloud, rather a simulated cloud environment). Images built in OpenShift can be easily pushed into JFrog Artifactory – JFrog’s leading universal repository manager.
With the latest JFrog CLI release, you can now collect build-info as part of your builds in OpenShift to make sure all your build metadata is recorded. Build-info is JFrog’s SBOM format, which includes modules, artifacts, dependencies and more information about the build. This information is useful for tracking vulnerabilities in the code.
Set up your environment
Before getting started, here’s what you’ll need:
- JFrog cloud or self-hosted subscription
- JFrog Artifactory as your Docker Registry set up
- JFrog CLI installed, version 2.4.0 or above
- OpenShift CLI installed, version 3.0.0 or above
Step 1: Log in to your OpenShift environment
Log in to your environment in OpenShift CLI.
Step 2: Create a credentials secret
To access your Artifactory Docker registry securely from OpenShift, you need to create a credentials secret by executing this command:
oc create secret docker-registry rt-docker-registry --docker-server=<Docker registry address> --docker-username=<Artifactory username> --docker-password=<Artifactory password>Step 3: Edit the BuildConfig
In your BuildConfig YAML in OpenShift, configure the Artifactory path and image tag by adding the following lines inside the “spec” block:
  output:
    to:
      kind: DockerImage
      name: ‘<Docker registry address>/<image name>:<image tag>’
    pushSecret:
      name: rt-docker-registry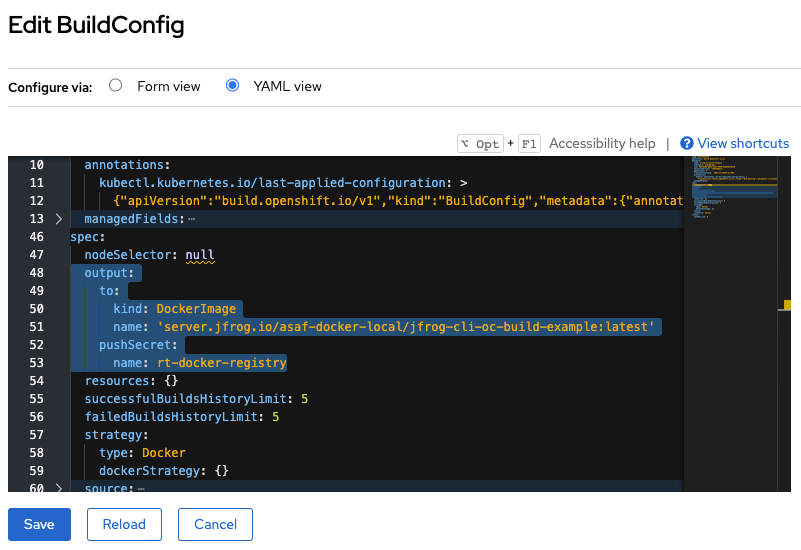
Step 4: Configure JFrog CLI
One last thing you need to configure is JFrog CLI with your JFrog Platform details. To do this, run the following command and follow the instructions:
jf config addStep 5: Let’s build an image and collect the build-info
After setting up all configurations, every time you want to build a new image of your application, just run this command:
jf rt oc start-build <BuildConfig name> --server-id=<JFrog CLI config server ID> --repo=<Docker repository name> --build-name=<to be saved in the build-info> --build-number=<to be saved in the build-info>Your image will then be available for you in Artifactory on the path you provided in the BuildConfig.
The build-info collected during this build is cached locally, and you can publish it to Artifactory by running this command:
jf rt build-publish <build-name> <build-number> --server-id=<JFrog CLI config server ID>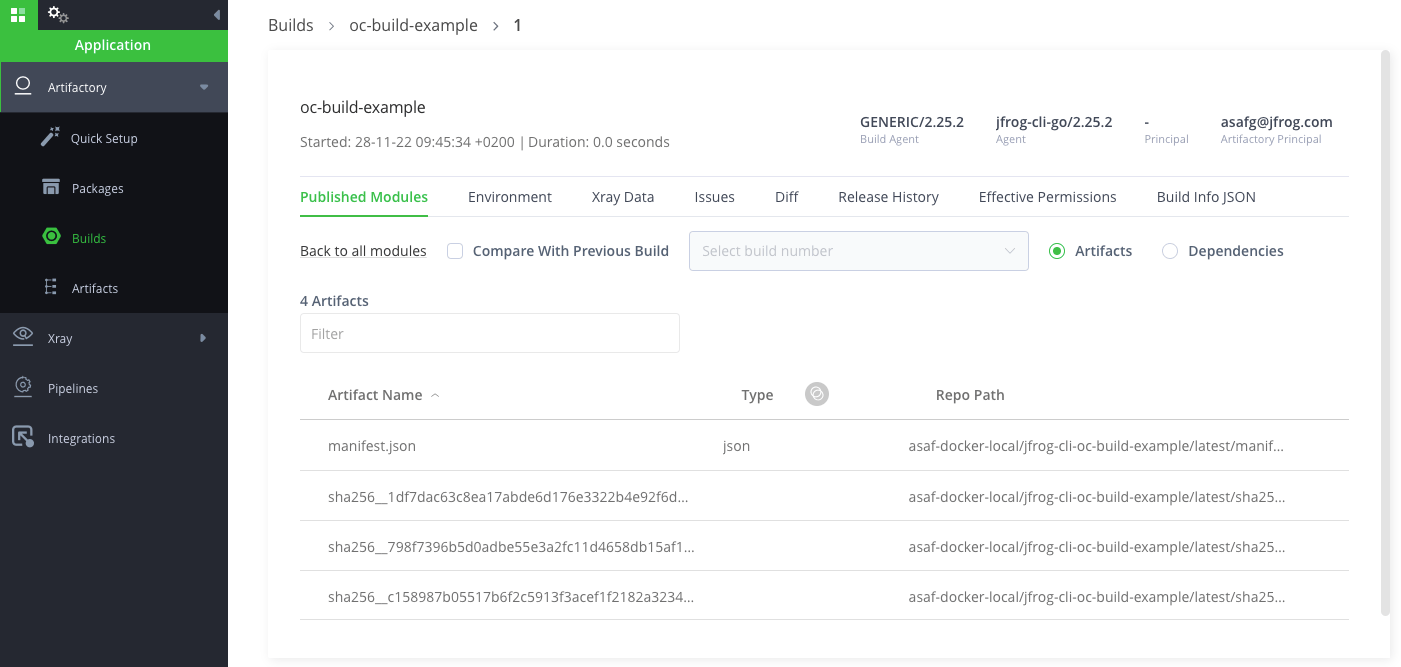
What’s next?
Try it out for yourself! Practice using this feature with this example project we’ve created just for you.
You can generate build-info for your source code project, and even do so right from your code, with our build-info-go library and CLI.
You can also scan your Docker images and builds for security vulnerabilities and license compliance issues, and do many other operations on Artifactory with JFrog CLI.
Find out more in the JFrog CLI documentation.
JFrog CLI is an open source project, we encourage community contributions!
Visit the official JFrog CLI repository on GitHub.
Experience
JFrog Today
Discover how the JFrog Platform unites DevOps, DevSecOps and MLOps for secure, rapid software delivery.


