

How to set up a Private, Remote and Virtual Docker Registry

By
7 min read

The simplest way to manage and organize your Docker images is with a Docker registry. You need reliable, secure, consistent and efficient access to your Docker images that’s shared across your team in a central location, including a place to set up multiple registries that work transparently with the Docker client.
There are three different repository types in JFrog Artifactory that you will use regularly for all of your package types, including Docker container images:
- Local repositories are a place for your internal Docker images.
- Remote repositories are used to proxy remote Docker resources such as Docker Hub.
- Virtual repositories can aggregate multiple Docker registries thus enabling a single endpoint you can use for both pushing and pulling Docker images. This enables the admin to manage the different Docker registries without requiring users of the repository to change repository urls in their environments
Starting with a free trial of the JFrog Platform in the Cloud, you can set up a free local, remote and virtual Docker Registry in minutes. This blog post will take you through the steps.
Before you start
Here’s what you’ll need:
- Docker installed.
- JFrog Platform Cloud Trial. (Free throughout the length of the trial.)
Set Up Your Free Private Docker Registry
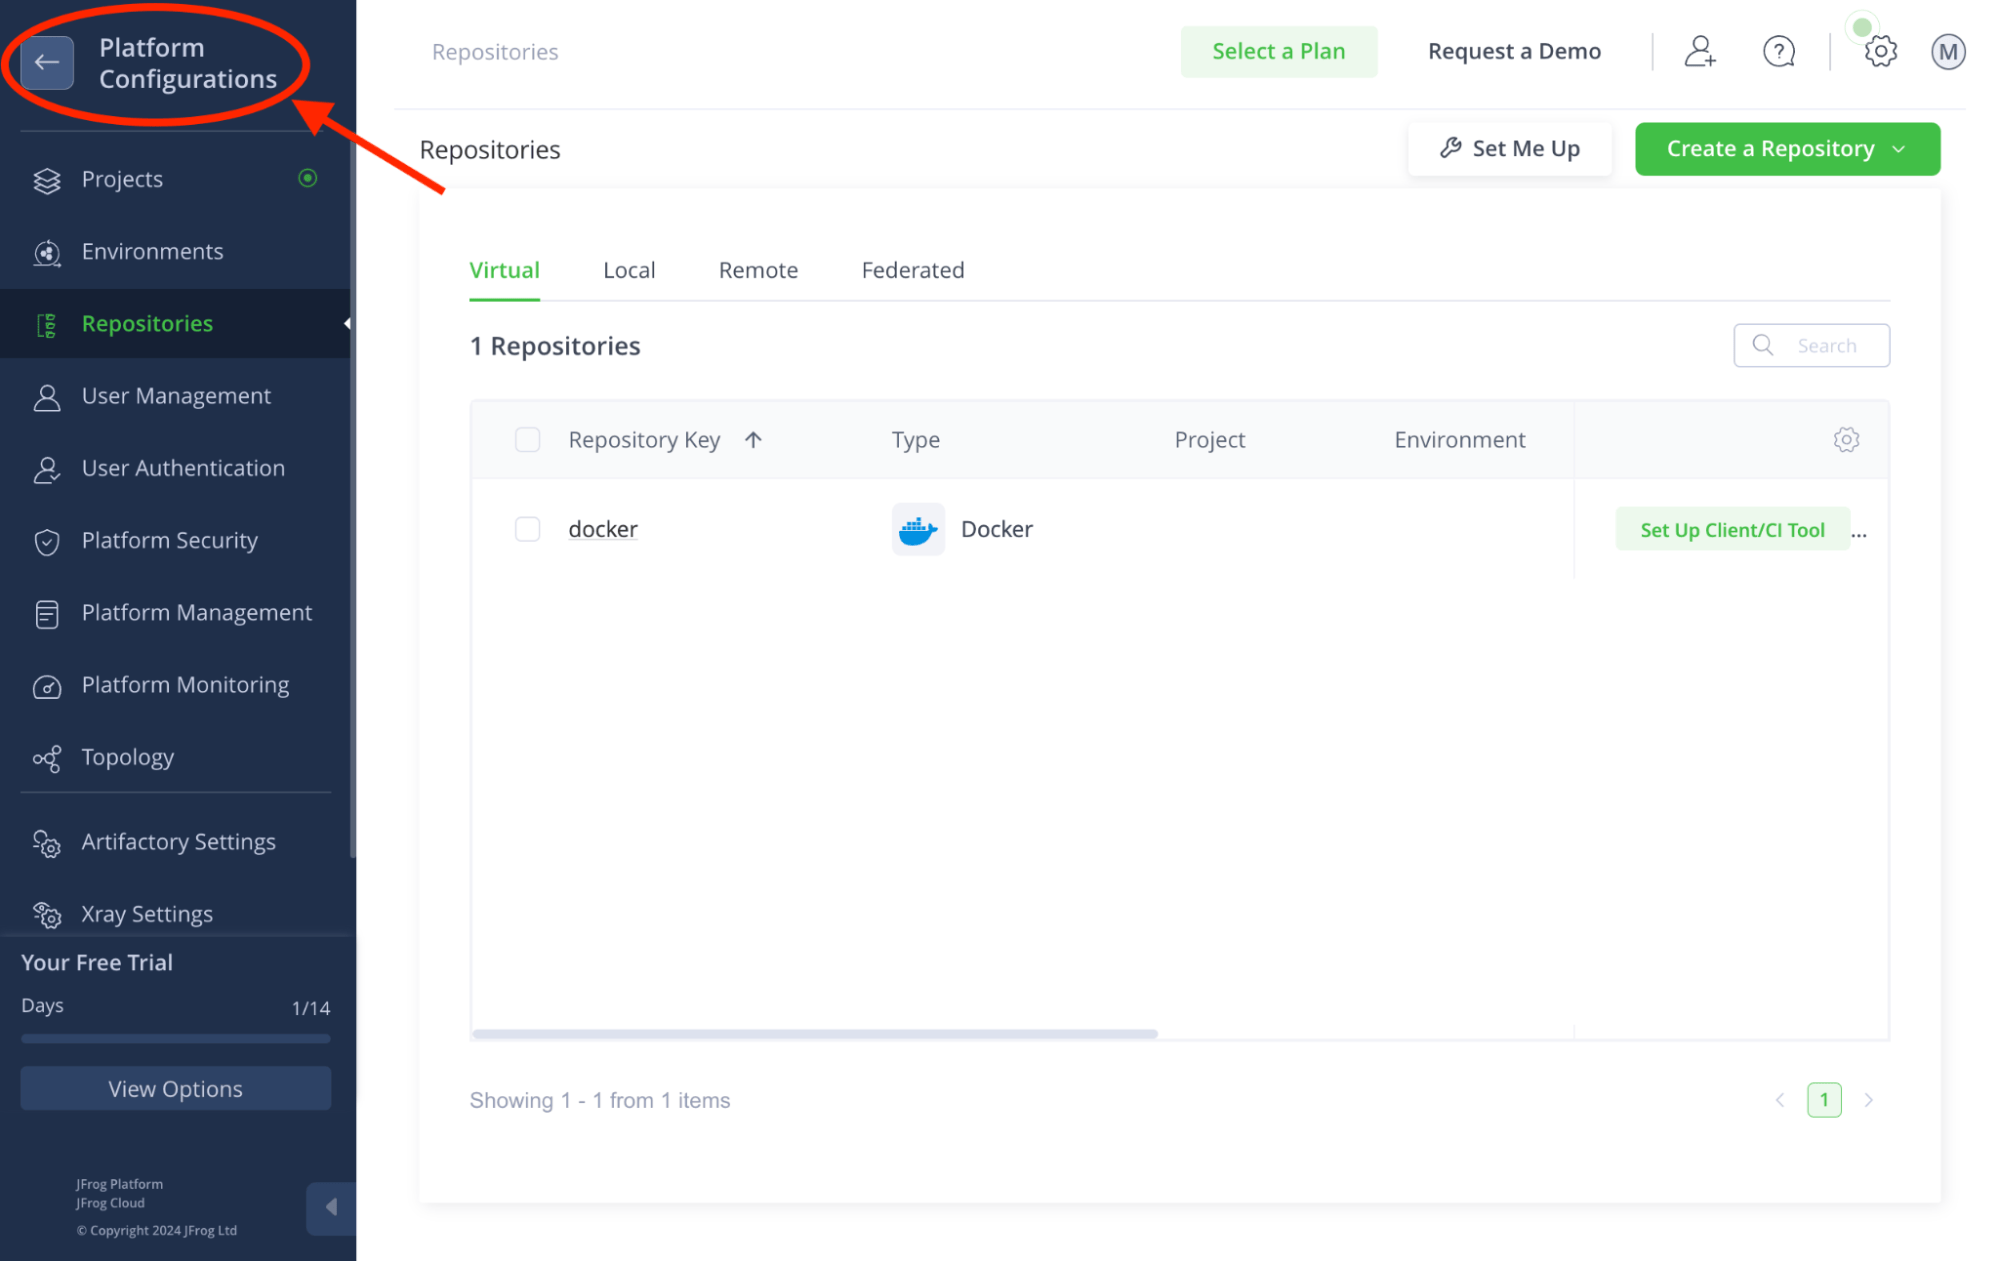
Step 1: Login to your environment and navigate to the Platform Configurations screen
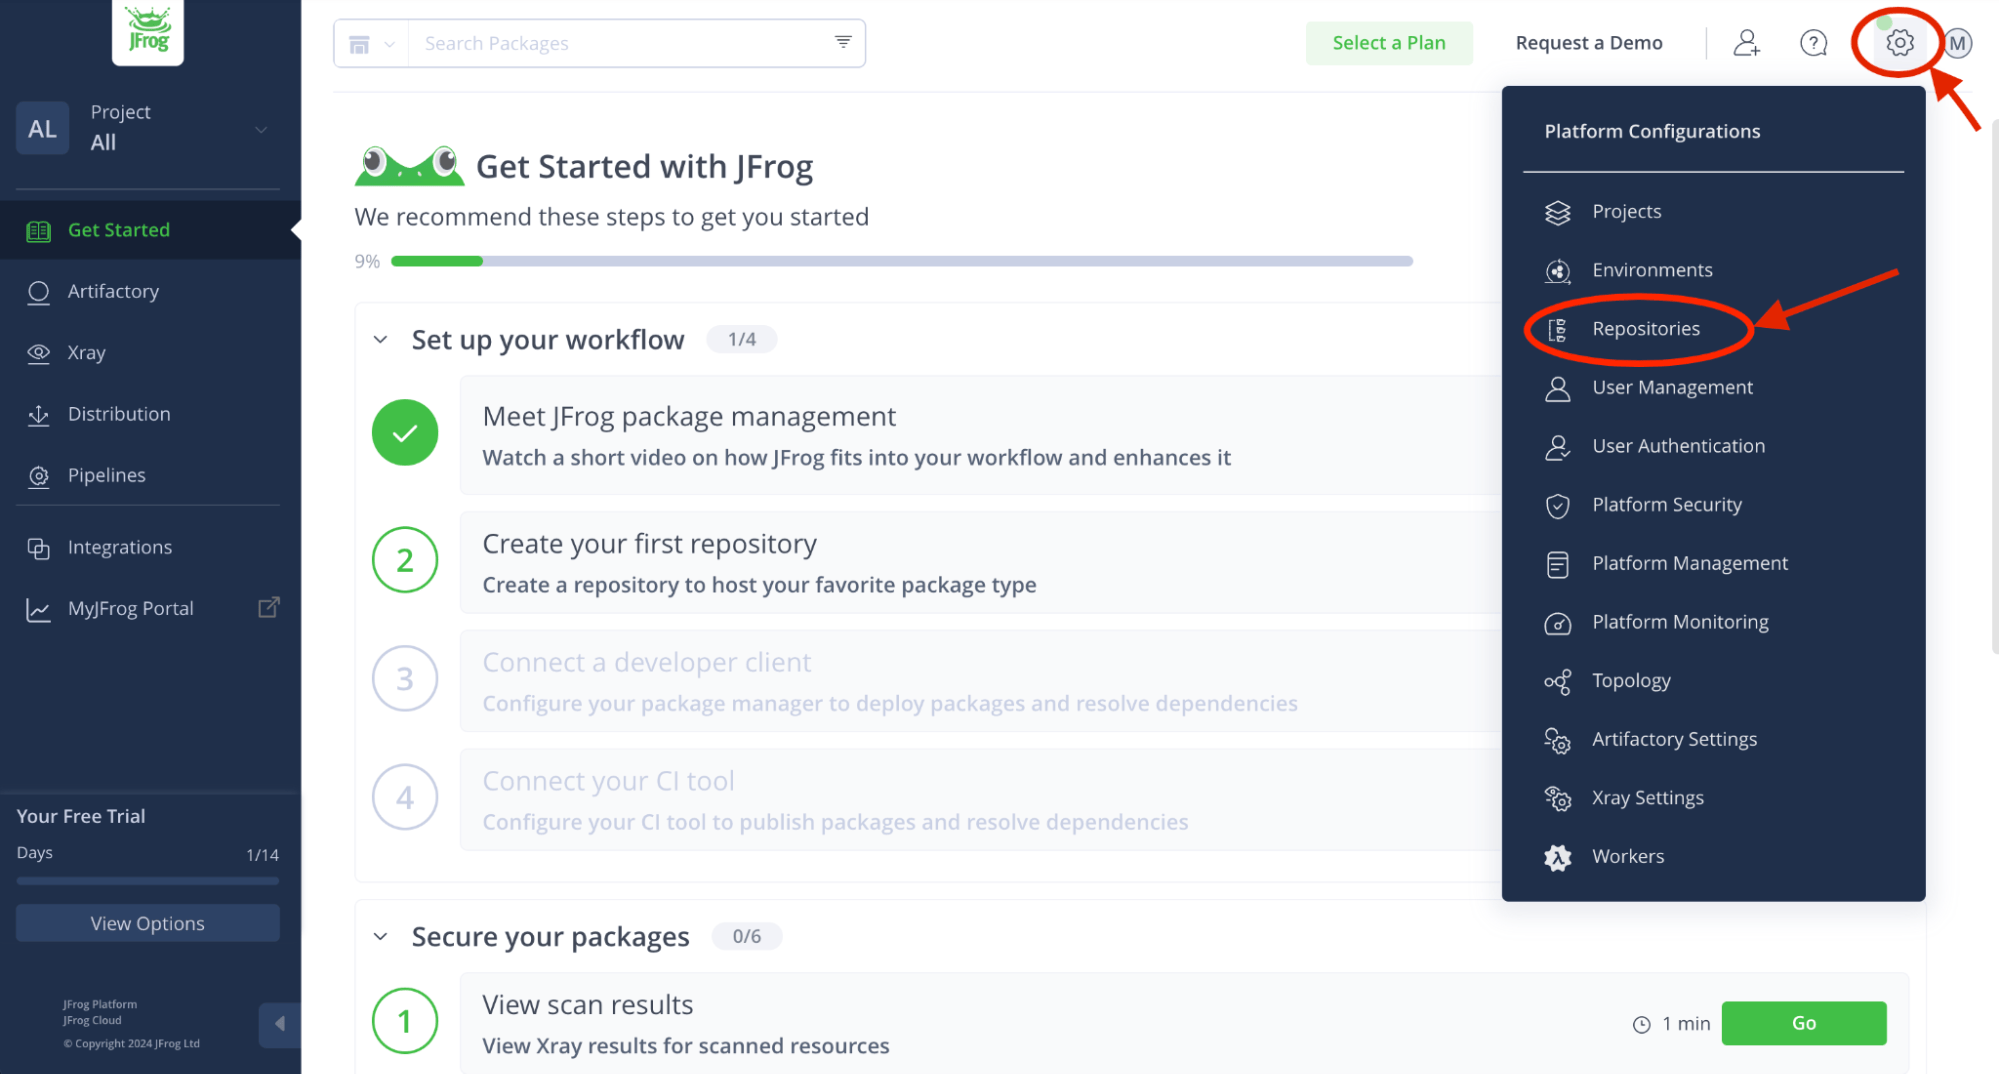
After signing up for a cloud trial, you should have received an email with your environment url and username. The password would have been created during the signup process. Login to your environment, click the Platform Configurations screen gear icon in the upper left corner, and select the Repositories menu item.
Step 2: Add local Docker repository
Used to store your custom Docker image you will create in a later step.
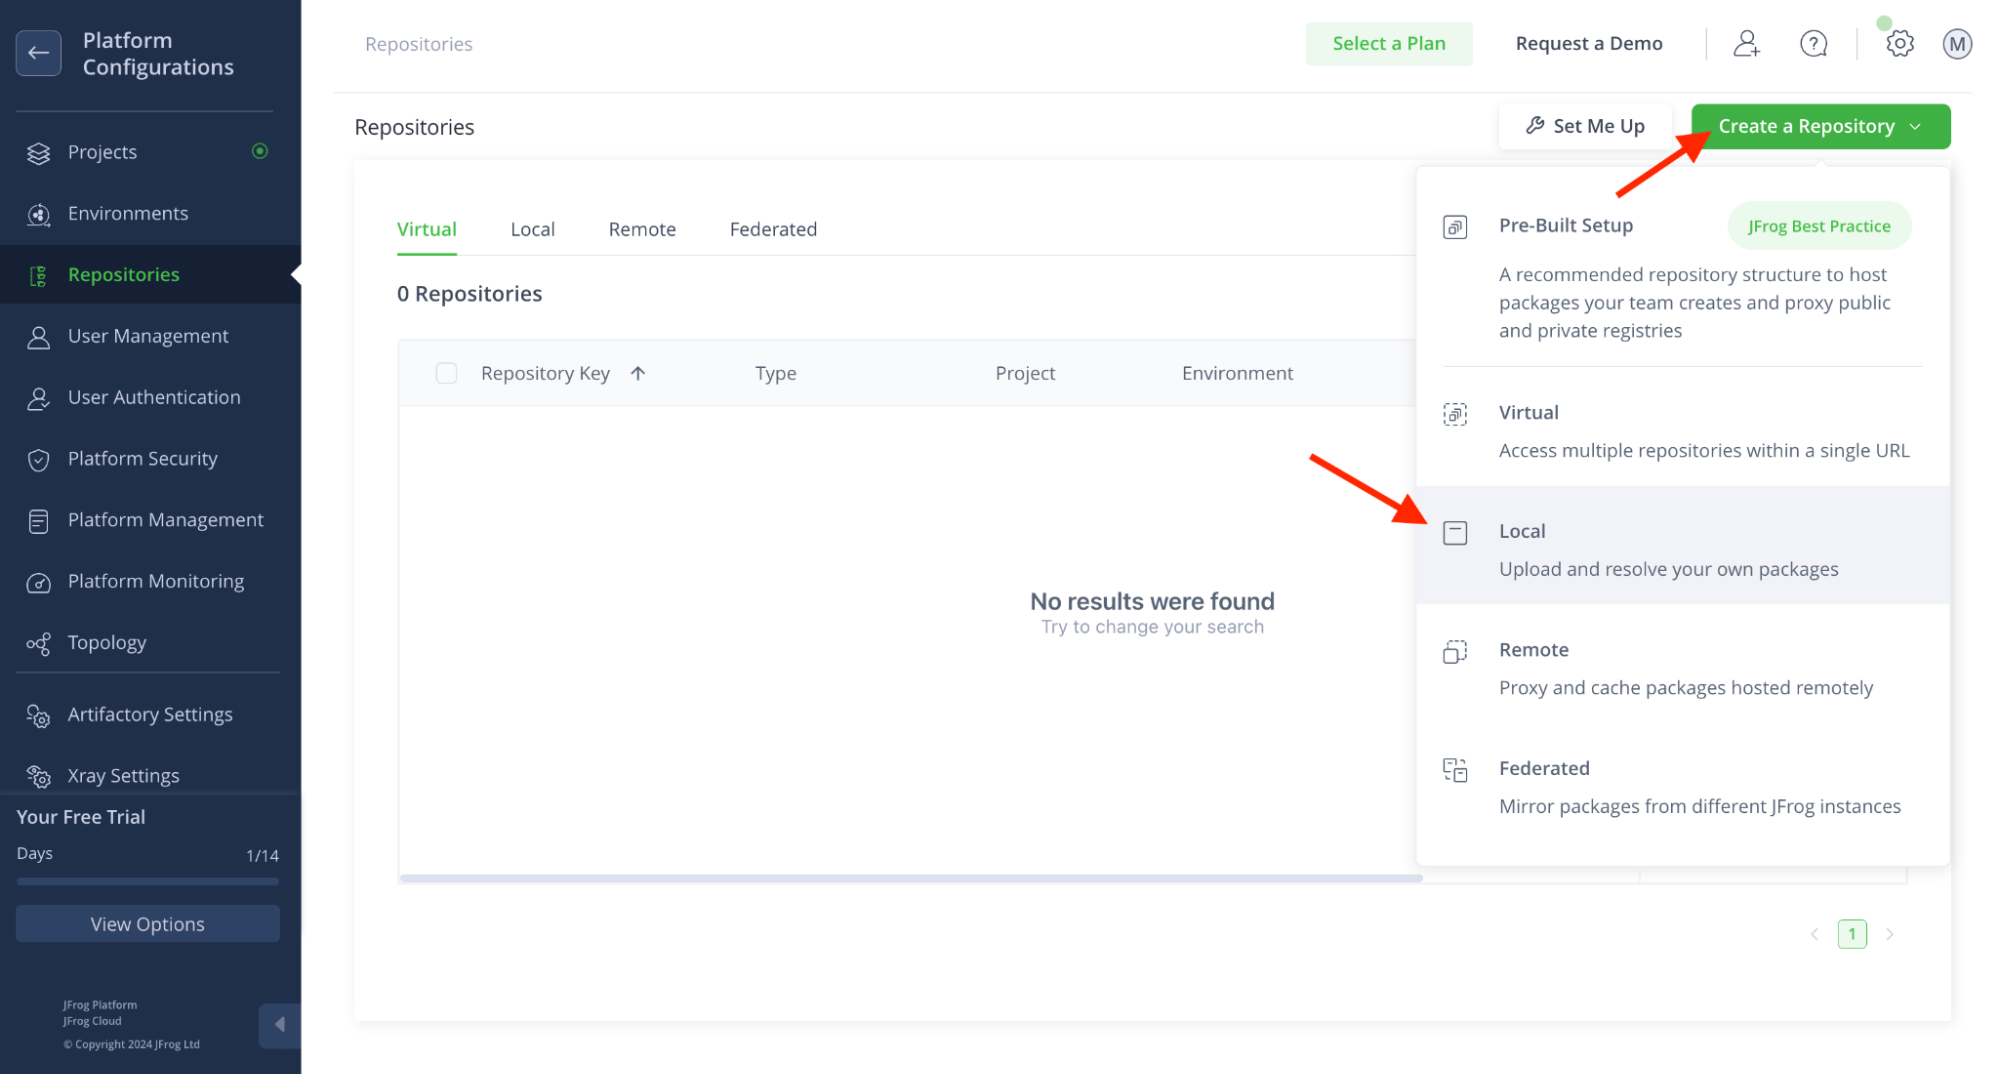
Expand the Create a Repository menu and select the Local menu item. You will be presented with a number of different choices for a package type. Select the Docker package type.
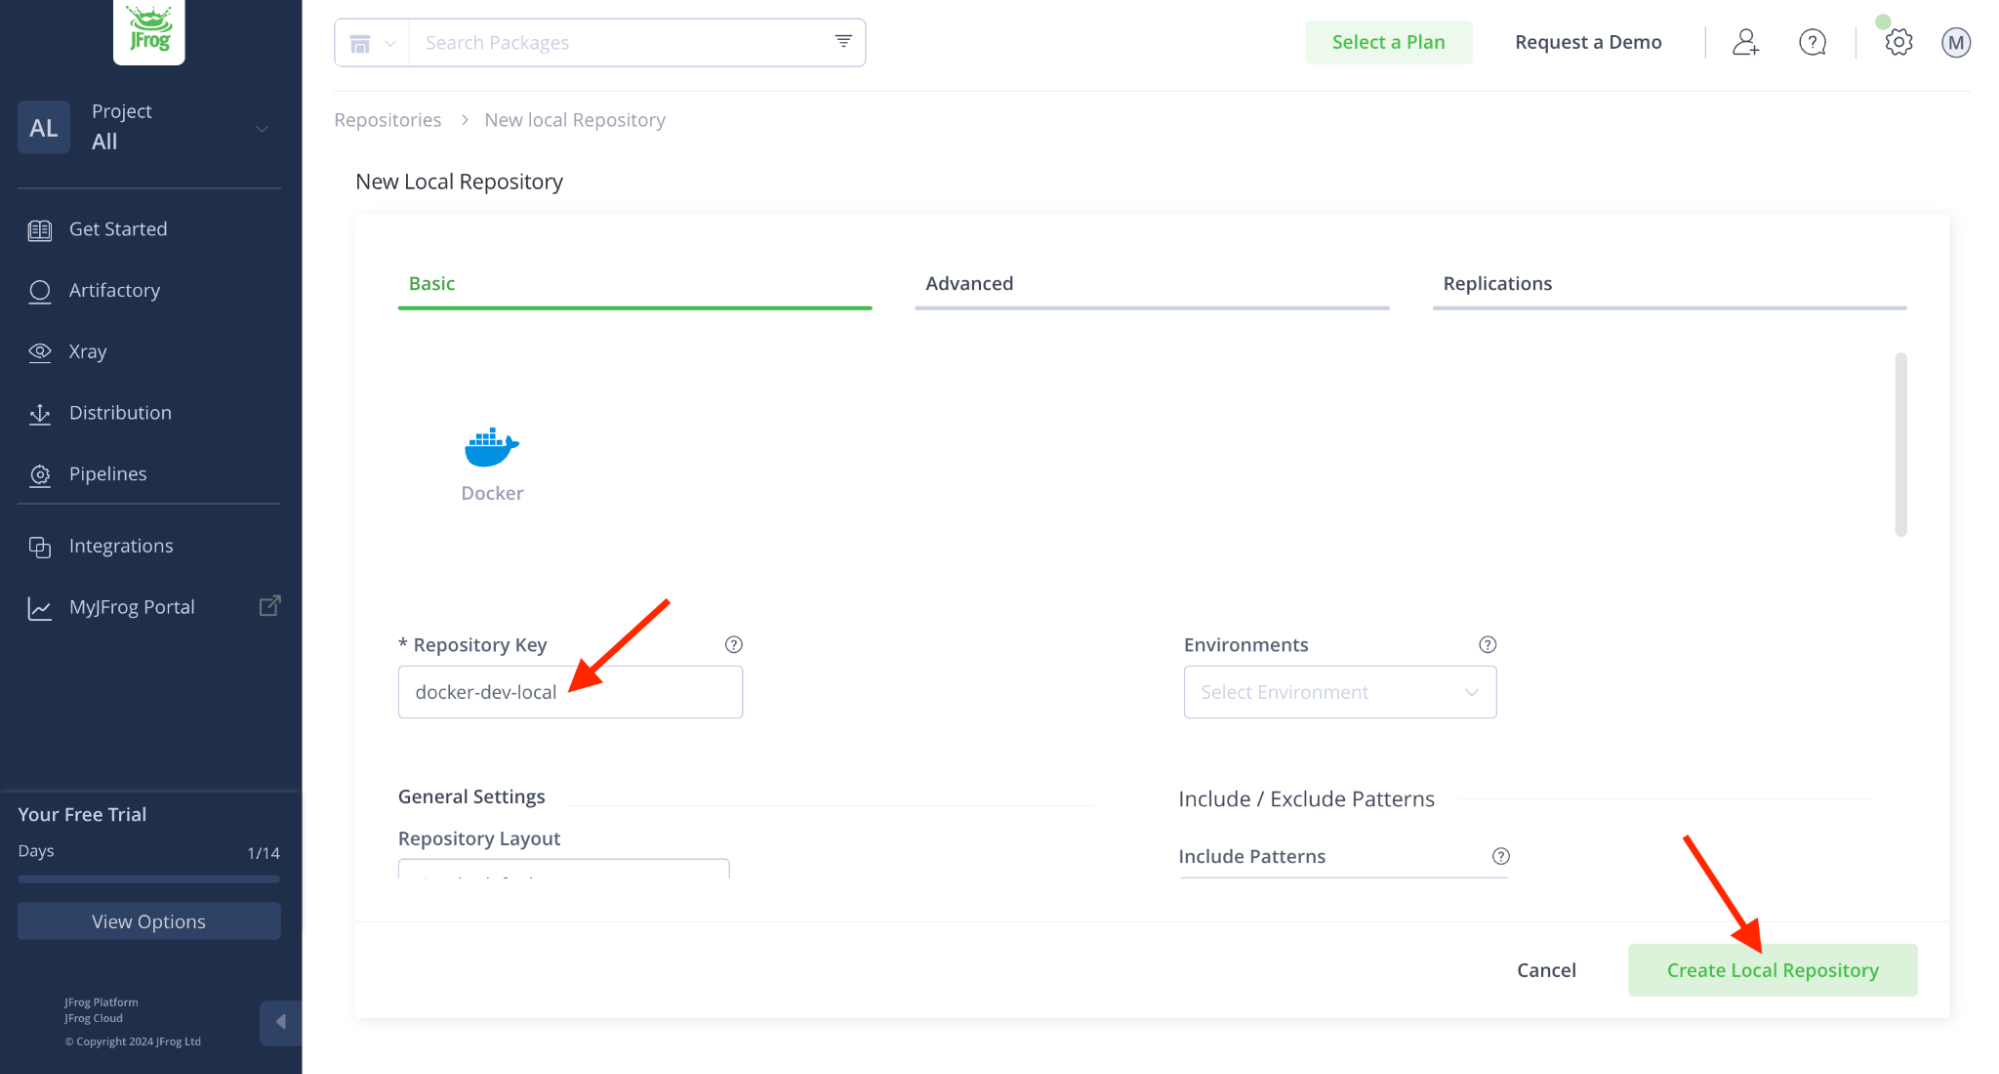
Enter the Repository Key “docker-dev-local” and keep the rest of the default settings. Click the Create Local Repository button.
You may be prompted to set up a Docker client at this point. Skip this for now.
You should now see your new local Docker repository in the Local repository list.
Step 3: Add remote Docker repository
Used as a caching proxy, to store 3rd party images from Docker Hub or any other external registries.
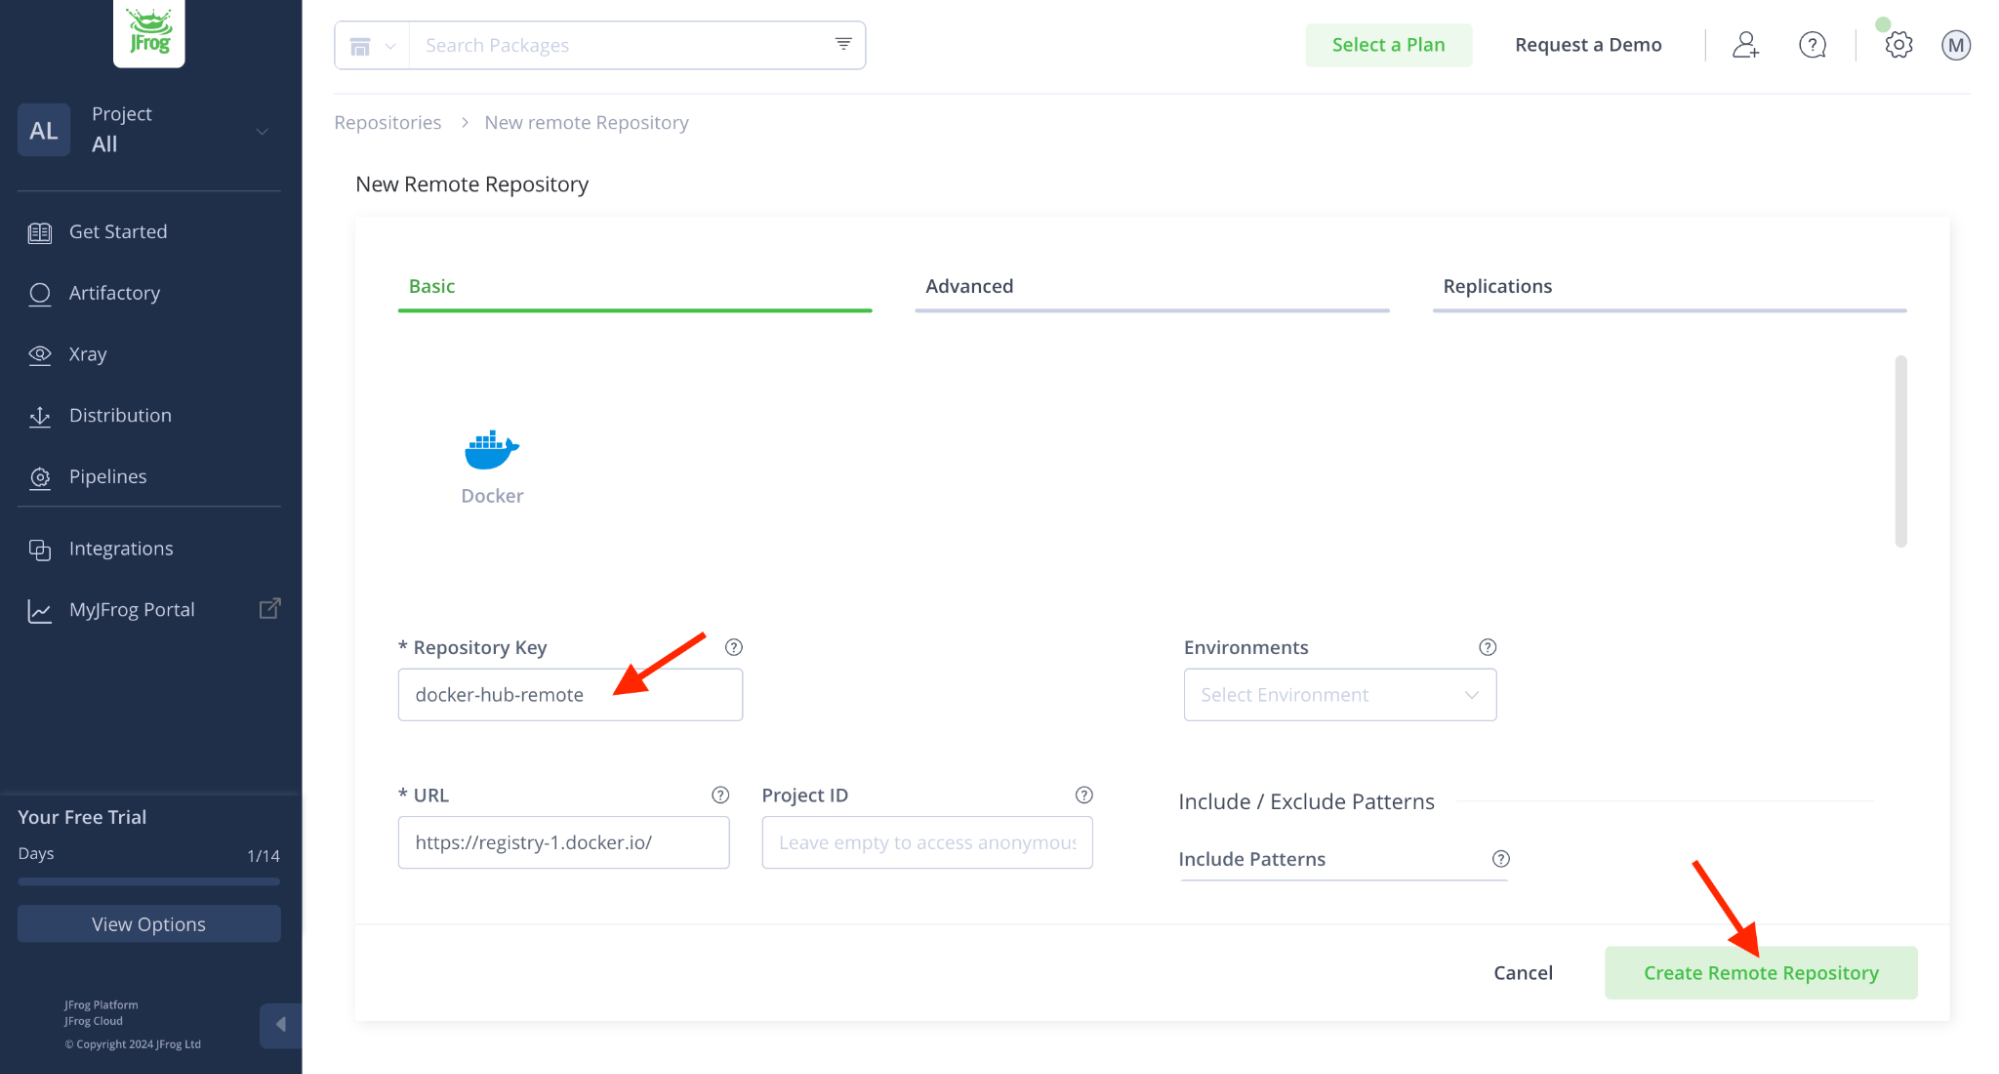
As in the previous step, expand the Create a Repository menu, but this time select the Remote menu item. Again, select the Docker package type. Enter the Repository Key “docker-hub-remote” and keep the rest of the default settings.
If prompted, skip setting up a client. You should now see your new remote Docker repository in the Remote repository list.
Step 4: Add virtual Docker repository
Used when creating your custom Docker image. This repository will be set up so that you can push to your local Docker repository and pull from either your local or remote Docker repository.
Expand the Create a Repository menu and select the Virtual menu item. Select the Docker package type. There are three things you will need to do here:
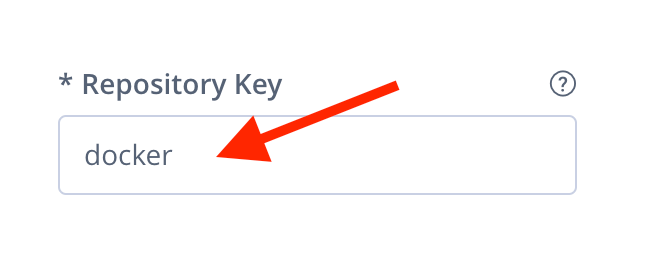
- Enter the Repository Key “docker”

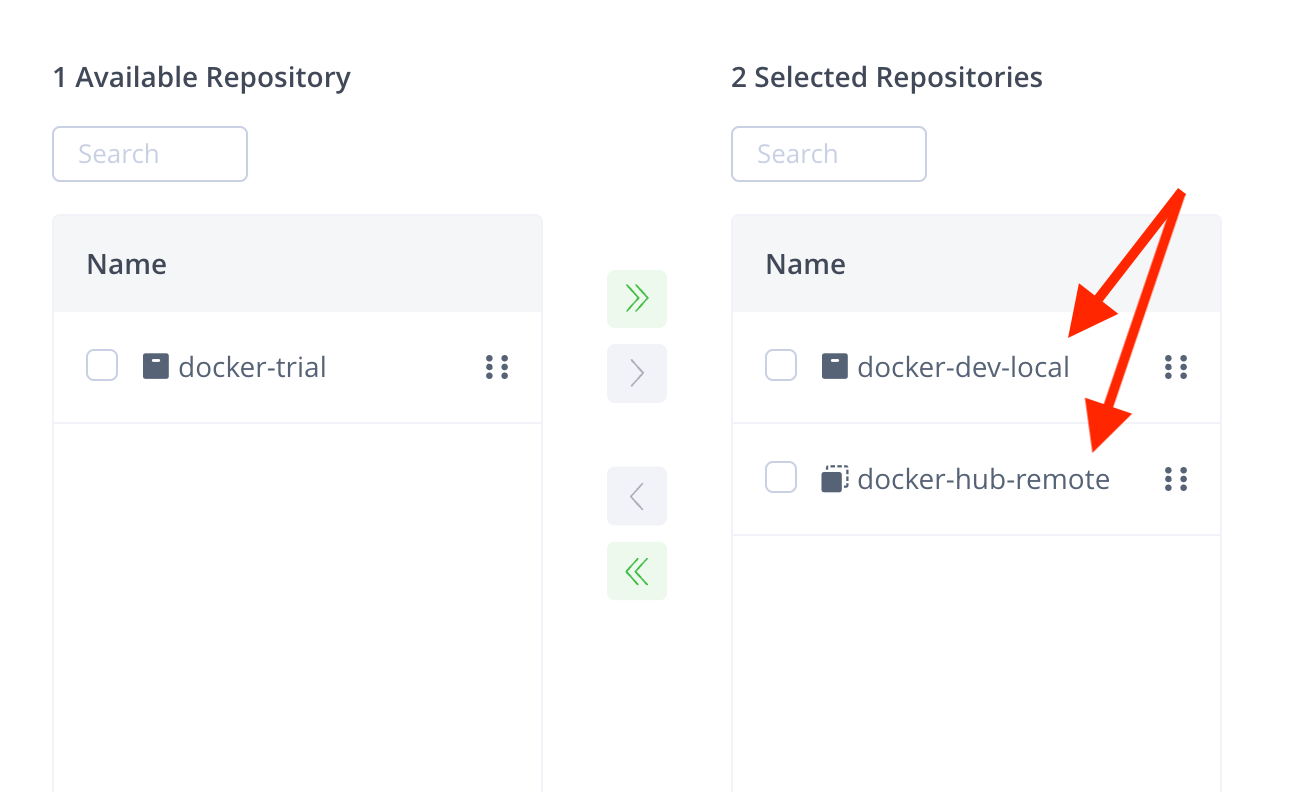
- Scroll down the settings page and add the local and remote docker repositories you created in Steps 2 and 3 (move them from Available Repositories to Selected Repositories using the arrow buttons). The order of these repositories in the list will determine the order used to resolve the dependencies required for building your docker image.

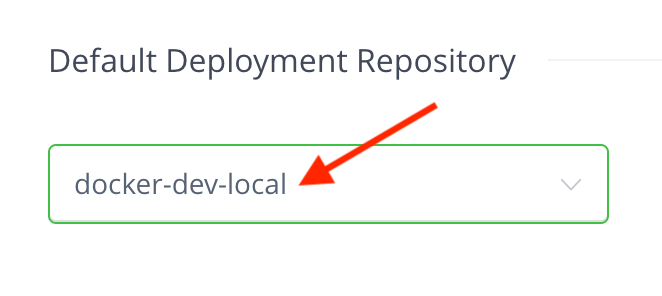
- Select your local repository that you created in Step 2 as the Default Deployment Repository. The Default Deployment Repository is the repository that the docker image you build will be pushed to. Keep the rest of the default settings.

Click the Create Virtual Repository button and skip through the client setup prompt. You should now see your new virtual Docker repository in the Virtual repository list.
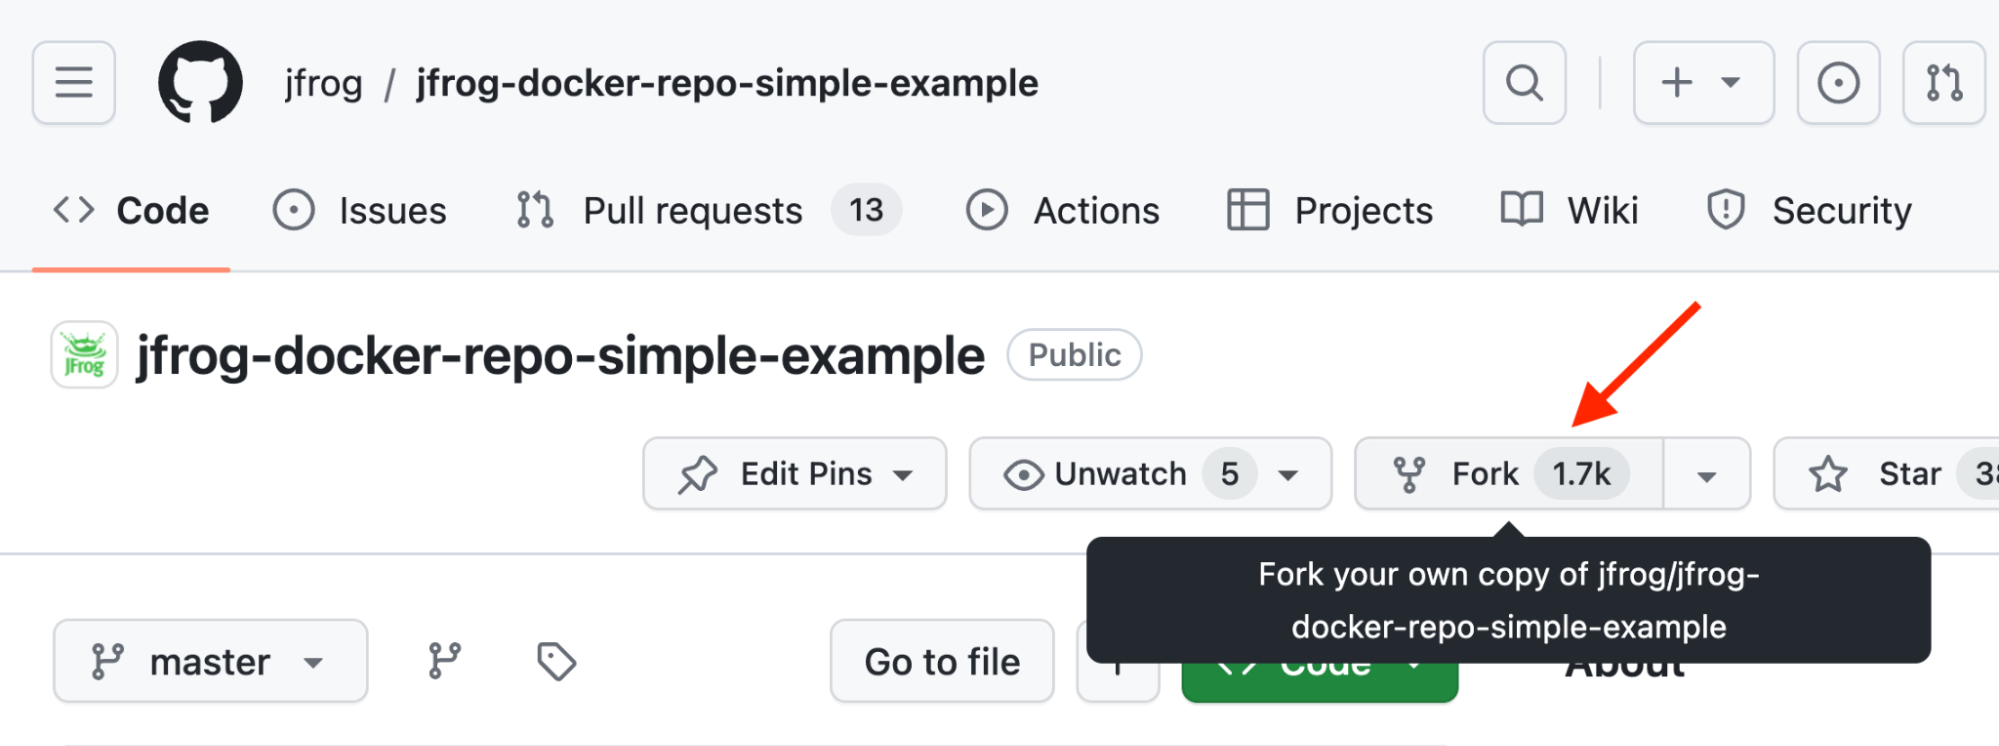
Step 5: Fork the JFrog Docker example GitHub repo
This repository contains a simple Dockerfile you can use to build a custom image and is intended to help you understand the important parts of a Dockerfile that need to change in order to use the new Docker repositories you just created. Fork the repo so that you have your own copy to experiment with.
Step 6: Update the base image reference
Clone your forked repository and using an IDE or a simple text editor on your machine, update the FROM line of the Dockerfile to reference your virtual Docker repository.
FROM ${SERVER_NAME}.jfrog.io/${VIRTUAL_REPO_NAME}/alpine:3.11.5
The SERVER_NAME is the first part of the URL given to you for your environment: https://SERVER_NAME.jfrog.io
The VIRTUAL_REPO_NAME is the name “docker” that you assigned to your virtual repository in Step 4.

Step 7: Push custom image to your Docker repository
Using either your IDE or your terminal, login to your virtual repository, build, tag and push your custom image with the following commands (as in Step 6, use your SERVER_NAME and VIRTUAL_REPO_NAME):
> docker login SERVER_NAME.jfrog.io
> docker build --tag SERVER_NAME.jfrog.io/VIRTUAL_REPO_NAME/my-docker-image:latest .
> docker push SERVER_NAME.jfrog.io/VIRTUAL_REPO_NAME/my-docker-image:latest
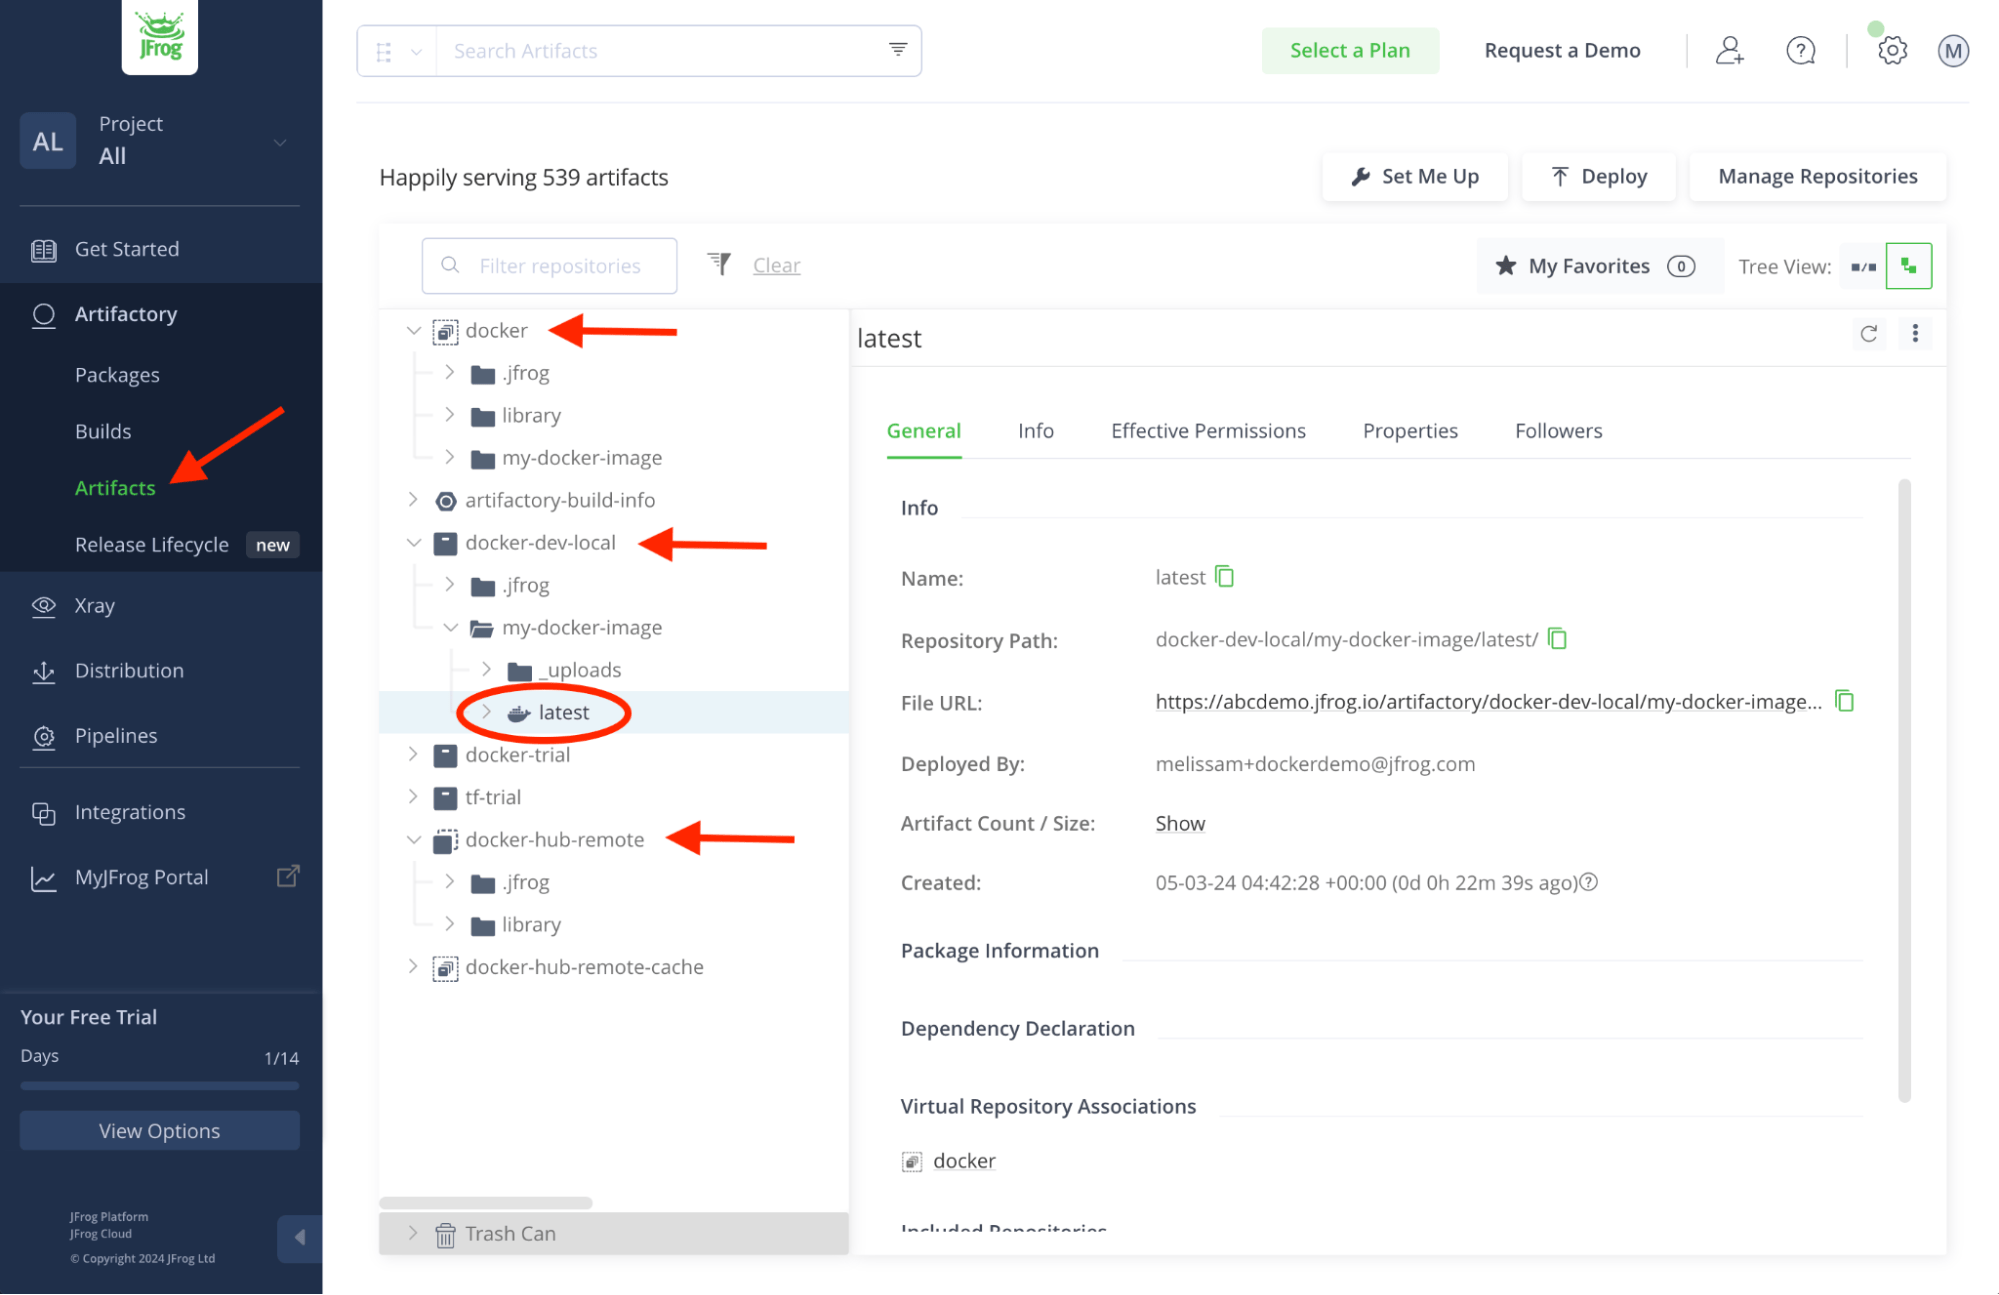
Step 8: View the images in your Docker Registry
Leave the Platform Configurations screen using the navigation at the top left.
Expand the Artifactory menu and click the Artifacts menu item. In the Artifact Tree View, expand the docker, the docker-dev-local and the docker-hub-remote repositories to see your new artifacts. Click on your image in your docker-dev-local repository to see its details.
Your Docker Registries
Once you’re done and configured your Docker registries, you’ll be able to store all your Docker images in your local, remote and virtual repositories.
That’s it!
Now, all that’s left is for you to try it for yourself.
Experience
JFrog Today
Discover how the JFrog Platform unites DevOps, DevSecOps and MLOps for secure, rapid software delivery.


