

Glide to JFrog DevSecOps with the New Experience

By
5 min read

We’re excited to share with you that we have launched a completely new way to start using the JFrog DevOps Platform that you – as a developer – will love. We’ve provided a super-easy, developer-friendly path to discovering how Artifactory and Xray can help you produce safer apps, faster, getting started through the command line shell and IDE that you use every day.
It’s already easy to get a free JFrog cloud account through our website, which equips you with:
- Artifactory – The industry-leading repository manager and secure source of truth for all packages, images, and artifacts.
- Xray – The software composition analysis tool that helps keep out known open source vulnerabilities.
- Pipelines – Natively integrated CI/CD automation for your DevOps pipeline that powers your JFrog circle of trust.
Now you can not only start the same signup process for a free cloud account through your command line, but we’ll automatically install the JFrog CLI and configure your environment to start using your new JFrog account with your projects. All in under 5 minutes!
Just sit back, run a few simple commands, and we’ll do the rest for you.
Developer-Friendly Setup
To start using JFrog, you only have to run one command from your terminal, then follow the instructions.
Mac or Linux
If you’re using Mac or Linux, you can get started using the curl utility:
curl -fL https://getcli.jfrog.io/setup | sh
Windows
If your using Windows, run Powershell:
powershell "Start-Process -Wait -Verb RunAs powershell '-NoProfile iwr https://releases.jfrog.io/artifactory/jfrog-cli/v2/[RELEASE]/jfrog-cli-windows-amd64/jfrog.exe -OutFile $env:SYSTEMROOT\system32\jf.exe'" ; jf setup
Running either of these commands launches the setup of your JFrog environment:
- The JFrog CLI is installed on your workstation.
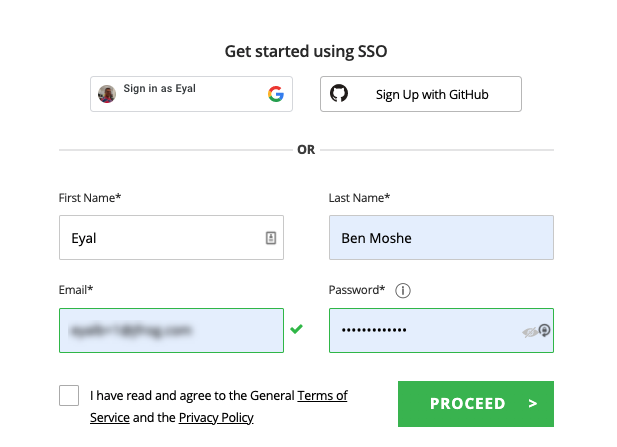
- A browser window opens with a simple registration form.

- After filling out the form and clicking Proceed, we’ll create a new free JFrog account for you. The newly installed JFrog CLI automatically pulls its connection details, and sets up your workstation to work with it.
- In your terminal, you’ll be prompted to run the new jf project init command under the root of your code project.
- Once the project completes initialization, you’ll be able to start using the features of Artifactory and Xray through the JFrog CLI.
Discover the Value
Your new JFrog cloud account is available right away, and you can access it anytime through your browser using your e-mail and password.
But you don’t even have to leave your terminal to start using the JFrog Platform with your projects.
First, change your current directory (through the cd command) to the root directory of your project. Then, initialize your project for use with JFrog.
cd \myworkspace\myproject
jf project init
Once the project completes initialization, you’ll be able to start using the features of Artifactory and Xray through the JFrog CLI.
Auditing and Scanning
From your command line, you can harness JFrog Xray’s component analysis and extensive vulnerabilities database to produce a security report for the project or for any software package on your workstation
Through a simple JFrog CLI command, you can reveal which of your project’s open source components are vulnerable and replace them with safer versions even before you commit your code.
- To audit your code project for security vulnerabilities, while inside the root directory of your project:
-
jf audit
- To scan a particular software package on your local machine for security vulnerabilities:
-
jf scan path/to/dir/or/package
Your security report will be displayed in the terminal.

IDE Integration
You’re also set up to bring this security visibility into your IDE. If you’re using VS Code, IntelliJ IDEA, WebStorm, PyCharm, Android Studio or GoLand, just install the JFrog extension or plugin. Your IDE will magically become aware of the new environment.
Once your IDE plugin is installed, you’ll be able to view security violation information about your local project in the newly activated JFrog panel. For example, in IntelliJ IDEA:

Build and Deploy
You can perform builds and deploys of your projects through the JFrog CLI as well, which will collect build info that you can then publish to Artifactory.
For example, to perform a Maven install and deploy:
jf mvn install deploy
To publish build info for your build to your JFrog environment, run the following command:
jf rt bp
You can learn much more about the kind of builds and deploys you can do for npm, Gradle, pip, or Golang through the JFrog CLI in our Getting Started Guide.
Just the Start
At JFrog, we’ve been putting a lot of thought into trying to make this flow as automatic, easy to use and convenient as it can be. You don’t need to know what Local, Remote or Virtual repositories are in Artifactory. You don’t need to configure Watches, Rules or Policies in Xray.
But after seeing how JFrog can help you as a developer, we hope you’ll want to learn more, use the power of the JFrog Platform to accelerate development, and invite others on your team to give Artifactory and Xray a try!
Experience
JFrog Today
Discover how the JFrog Platform unites DevOps, DevSecOps and MLOps for secure, rapid software delivery.


