

Easy CI with JFrog CLI

Updated on Jan 19th, 2021
Continuous Integration is one of the foundations of a modern software supply chain. Most organizations wouldn’t consider developing software without one. The problem is that these sophisticated platforms require some expertise to set up and manage and usually require a dedicated server, an administrator and other resources. And to make things more complicated, different development groups in the same organization may even be using different CI servers.
This is the first in a series of posts that, among other things, describe some of the new CI-related features of JFrog CLI available since version 1.11.2. These features abstract away your specific CI server giving you a generic way to execute your builds on any platform or environment and with any CI server, or even, without a CI server at all. All this while maintaining the exhaustive build information you are used to seeing in JFrog Artifactory.
Running Maven and Gradle Builds with JFrog CLI
Recent releases of JFrog CLI add new commands that let you:
- Execute your Maven and Gradle builds,
- Configure Maven or Gradle to resolve dependencies through Artifactory and
- Upload the resulting build binaries along with ALL the build information to Artifactory.
In the process, JFrog CLI prompts you for information such as which Artifactory instance to use to resolve dependencies, which repositories to use for release and snapshot builds and more. JFrog CLI asks all the right questions, and you only need to select the desired option.
To actually try the examples in this post, you’ll need JFrog CLI and JFrog Artifactory.
If you haven’t installed JFrog CLI yet, now would be a good time to do that. All you need to do is open a shell on your machine and run:
curl -fL https://getcli.jfrog.io | sh
(More installation options are available on the JFrog CLI Download Page. For documentation, visit the JFrog CLI User Guide).
And if you don’t have Artifactory installed yet, you can download a free trial and have Artifactory up and running in minutes.
Once you have JFrog CLI and JFrog Artifactory installed, all you need to do is:
- Configure the CLI connection to your Artifactory server(s)
- Create a build configuration file
- Run the build
- Upload the build information to Artifactory
Create a Build Configuration File
To create the configuration file, run the command below according to the build tool you are using.
For Maven, use:
$ jfrog rt mvn-config
For Gradle, use:
$ jfrog rt gradle-config
When you run the above commands (according to your build tool), JFrog CLI will prompt you for the information it needs:
- Depending on your build tool, It may ask you for some configuration parameters
- It will ask if you want to resolve dependencies from Artifactory
- If you do, it will then ask from which instance. Hit the “Tab” key to see a list of instances you have already configured into JFrog CLI)
- Then it will ask you for the resolution repository for release dependencies
- … and so forth until JFrog CLI has all the parameters it needs to create the configuration.yaml file it needs to configure your build tool.
The example below shows how JFrog CLI is used to run a Maven build.
Run the Build
Now you’re ready to run the build using any of its standard options and passing in the configuration.yaml file you just created.
For example, for a clean Maven installation you would use:
$ jfrog rt mvn clean install -f path/to/pom-file
And for a Gradle build you could use:
$ jfrog rt gradle clean artifactoryPublish -b path/to/build.gradle
Upload Build Info to Artifactory
To upload exhaustive build information to Artifactory, use the JFrog CLI publish command.
For example, to publish either of the Maven or Gradle builds from the examples above you would use:
$ jfrog rt bp mybuild 1
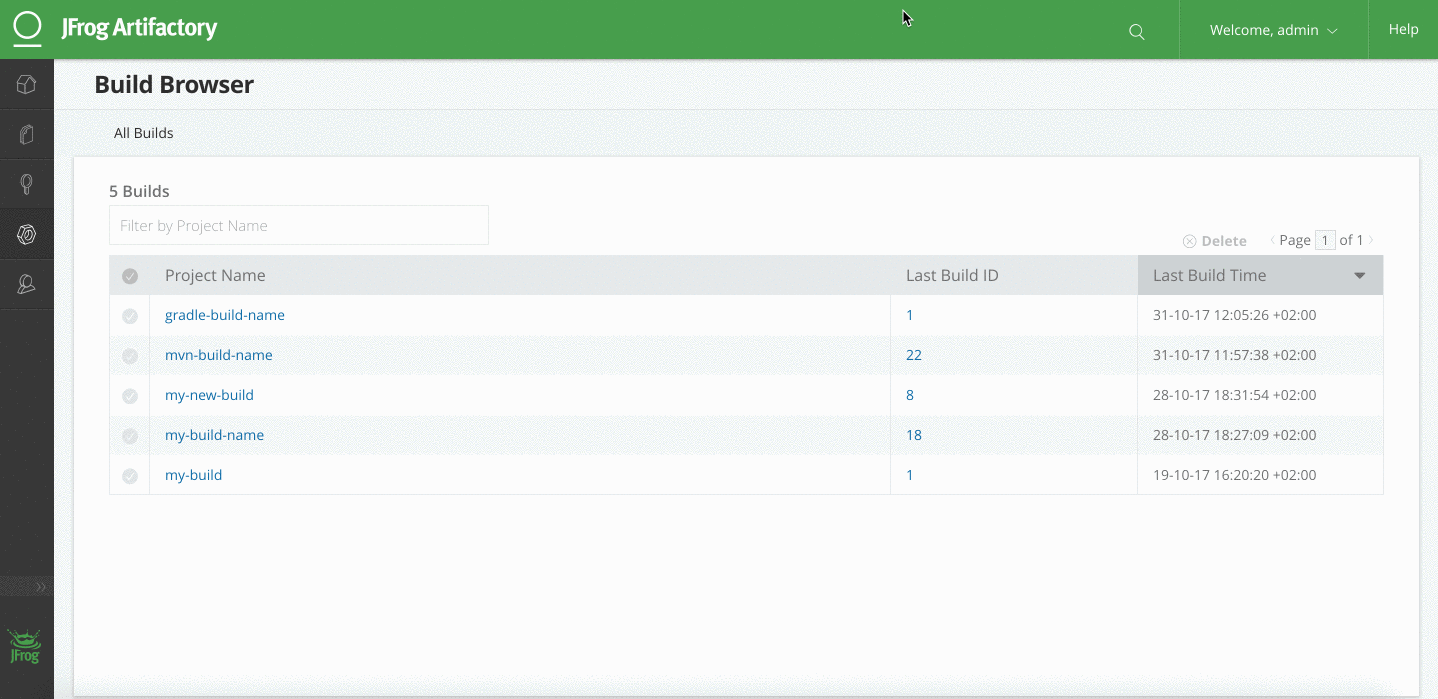
Once the build information has been published, you can browse it in Artifactory as shown below:
That’s it, you’re done!
Keep a lookout for our future posts where we will describe how to use JFrog CLI with Travis CI, how to run NPM builds and how to sort and limit your build output.
Get started with JFrog CLI >
Experience
JFrog Today
Discover how the JFrog Platform unites DevOps, DevSecOps and MLOps for secure, rapid software delivery.


