

Migrate from Nexus to Artifactory and Manage Your Binaries Better

By
4 min read

Update: July 13, 2021. The nexus2art migrator has been deprecated. Please refer to the JFrog documentation for the new migrating from Sonatype Nexus Repository to Artifactory guide.
Many businesses today are using a Binary Repository Manager to manage their binaries and artifacts as it is critical to the delivery of reliable, quality software, faster, and at a lower cost to better compete in the marketplace. However, as their business grows and matures, requirements change and they find the need for a more robust solution.

If you’re one of those businesses and are using Sonatype Nexus, you may have outgrown it. When comparing JFrog Artifactory vs. Nexus you may have found that Nexus is not quite “universal”, it’s availability is not as high as you would like it to be and its storage is not as optimized as it should be. You want something better. You want to migrate from Nexus to Artifactory because you know that Artifactory supports all major package formats, offers massive scalability, and it’s HA configuration provides up to 5-nines availability. You also know that Artifactory’s unique checksum-based storage optimizes performance like no other repository manager can.
But you’re holding back because you’re concerned it’s too difficult. Performing the migration manually can be a very tedious and time-consuming process, and you don’t know where to begin. Well, to make your life easier, we have developed a migration tool!
Introducing NexusToArtifactory
DEPRECATED: Our NexusToArtifactory Migration tool provides a simple wizard-like interface allowing you to easily configure and migrate from your existing Nexus 2 or Nexus 3 instance to Artifactory.
Here’s what can be migrated:
- Local (hosted) repositories – artifacts and configuration
- Remote (proxy) and virtual (group) repository configuration
- Users, groups (roles), and permissions (privileges)
- LDAP configurations
Let’s see how easy it is to use this tool. Here’s the tool’s main menu.

The first thing you need to do is connect the tool to your Artifactory and Nexus instances.
Type “i” to get into the Initial Setup screen.

Type “n” to specify your Nexus Data Directory.
If you’re running Nexus 3, you will then be prompted for the Nexus instance’s URL, Username and Password.
Next, type “a”, “u”, and “p” to enter your Artifactory URL, Username and Password respectively. Your screen will end up looking something like this:
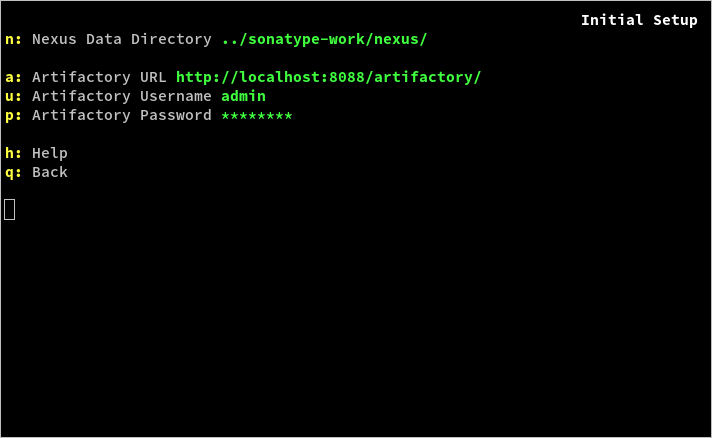
You can now type “q” to get back to the main screen and configure the entities that should be migrated.
Once your connection is setup, you can type “r” in the main menu to configure your repositories for migration. By default all repositories are selected for migration (as indicated by the green plus character), so you just need to type the number of the repositories you don’t want to migrate to deselect them. The example below shows that 6 out of the 7 repositories displayed should be migrated.

Once again, type “q” to get back to the main menu. In a similar way, you can configure more entities for migration such as users, groups, permissions and other configuration parameters. Once you have selected all the entities for migration, type “x” on the main menu to run it.
As the migration proceeds, the nexus2artifactory migrator tool will indicate its progress.

It’s as simple as that.
You can find all the details on how to use the tool in our public nexus2artifactory project on GitHub.
Learn more about JFrog vs Sonatype.
Download your free trial and see how easy it is to migrate from Nexus to Artifactory
Experience
JFrog Today
Discover how the JFrog Platform unites DevOps, DevSecOps and MLOps for secure, rapid software delivery.


