Containerize Node Microservices Using Atlassian Bitbucket Pipeline and JFrog CLI

Atlassian provides tools to help development teams more effectively collaborate and deliver software fast. Atlassian introduced Bitbucket Pipelines in 2016 to automate continuous integration in a seamless way with the git repository. As Bitbucket Pipelines has matured we’ve seen more of our customers taking advantage of its ability to easily integrate CI/CD into the Bitbucket git repository, and use its extensive set of integrations to extend their workflows.
The Atlassian way for working with source code and workflow is highly complementary to the JFrog Artifactory as a repository manager. Atlassian has been a great partner to JFrog over the years, with several integration points including, most critically, the ability to use JFrog Artifactory as the repository for Git Large File Storage (LFS) together with Bitbucket LFS.
In this blog post, we show how to use Bitbucket Pipeline and JFrog products to containerize and distribute node applications in a highly scalable way.
7 reasons to include JFrog products in your Bitbucket pipeline
JFrog products in your Bitbucket pipeline allows you to:
- Collect and publish your npm build information to Artifactory.
- Trace your builds easily once you have published the build information to Artifactory.
- Gain visibility of the used dependencies.
- Generate information about the build environment.
- Scan your builds for potential vulnerabilities and license violations with JFrog Xray.
- Promote your build to production.
- Distribute your build artifacts with JFrog Bintray.
This is how it’s done.
How are the JFrog products integrated into the Bitbucket pipeline?
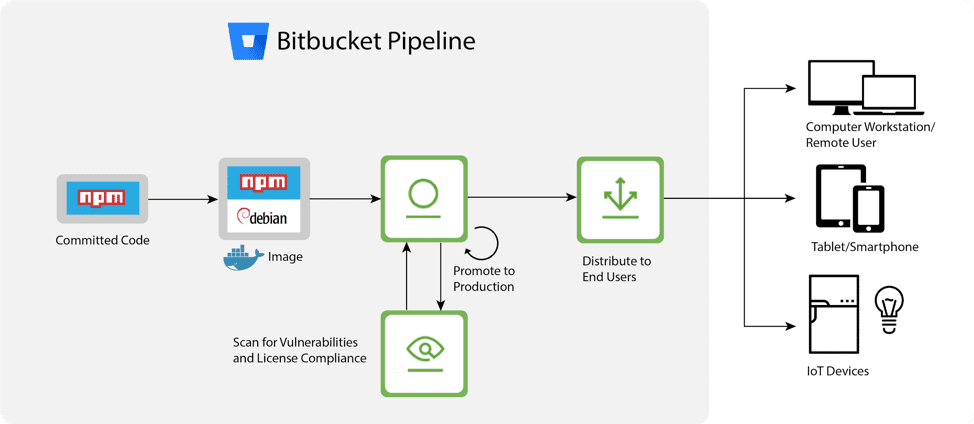
The diagram displays how JFrog products are integrated into the Bitbucket pipeline to create the containerized node applications:
- The Bitbucket pipeline automates the build and test flow while using JFrog Artifactory as your repository manager.
- JFrog Xray then scans the packages for vulnerabilities.
- JFrog Bintray proceeds to distribute the images closest to the target location.
Use JFrog CLI to Easily Integrate into the Bitbucket pipeline
First, we will use JFrog CLI to integrate Bitbucket Pipeline with JFrog Artifactory, JFrog Xray, and JFrog Bintray and then we’ll proceed to automate the entire process.
Prerequisites
Before we get started, make sure you complete the following:
- Install JFrog CLI, using the following command:
$ curl -fL https://getcli.jfrog.io | sh - Configure your environment (optional, but recommended):
- Download and install your npm client.
- Download and install your Docker client.
- Download Artifactory version 5.5.2 and above.
- Download Xray.
- Create a repository in Bintray.
Step 1: Clone your project
You can clone your npm project. In our example, we have cloned the pipeline-docker-artifactory project with the following Git command.
$git clone https://bitbucket.org/JfrogDev/pipeline-docker-artifactory
Step 2: Configure Artifactory with JFrog CLI
All you have to do is run the following command.
$jfrog rt config
Proceed to modify your Artifactory server name, URL, Artifactory username and password as follows.
$jfrog rt config --url $ARTIFACTORY_URL --user $ARTIFACTORY_USER --apikey
$ARTIFACTORY_PASSWORD --interactive false
Step 3: Install npm packages
Run the following npm install command that refers to the npm virtual repository as a source for the dependencies.
This command installs the project and refers to the npm repository as the source.
$jfrog rt npmi npm-virtual --build-name=pipeline-docker-artifactory
--build-number=1
It’s time to generate some information. We recommend adding the Git VCS details using the following build-add-git command.
$jfrog rt bag pipeline-docker-artifactory 1
You can also collect the environment variables using the following build-collect-env command.
$jfrog rt bce pipeline-docker-artifactory 1
Step 4: Publish the npm packages
If you already have npm scripts, we recommend renaming your existing prepublish and post publish scripts in the package.json file. When the npm-publish command runs, the JFrog CLI runs the pack command in the background and not the standard publish command. If your npm package includes the prepublish or postpublish scripts, rename them to prepack and postpack, respectively.
The npm publish command packs and deploys the npm package to your npm repository in Artifactory. You can also add optional flags. For example: upload the package to another server using the –server-id flag.
To publish the package, run the following command.
$jfrog rt npmp npm-virtual --build-name=pipeline-docker-artifactory
--build-number=1
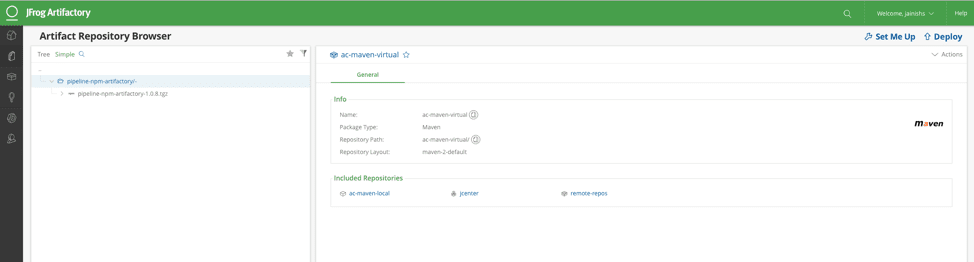
The npm package will now be displayed in Artifactory.
Step 5: Build the Docker image
Configure the Docker registry in Artifactory with a reverse proxy. Alternatively, you can configure your Artifactory using the new proxyless option for non-production setups.
To make sure that the Docker client and the Artifactory Docker registry are configured correctly, run the following commands in order to pull the hello-world Docker image and then push it to Artifactory.
$docker login <artifactoryDockerRegistry>
$docker pull hello-world
$docker tag hello-world:latest <artifactoryDockerRegistry>/hello-world:latest
$docker push <artifactoryDockerRegistry>/hello-world:latest
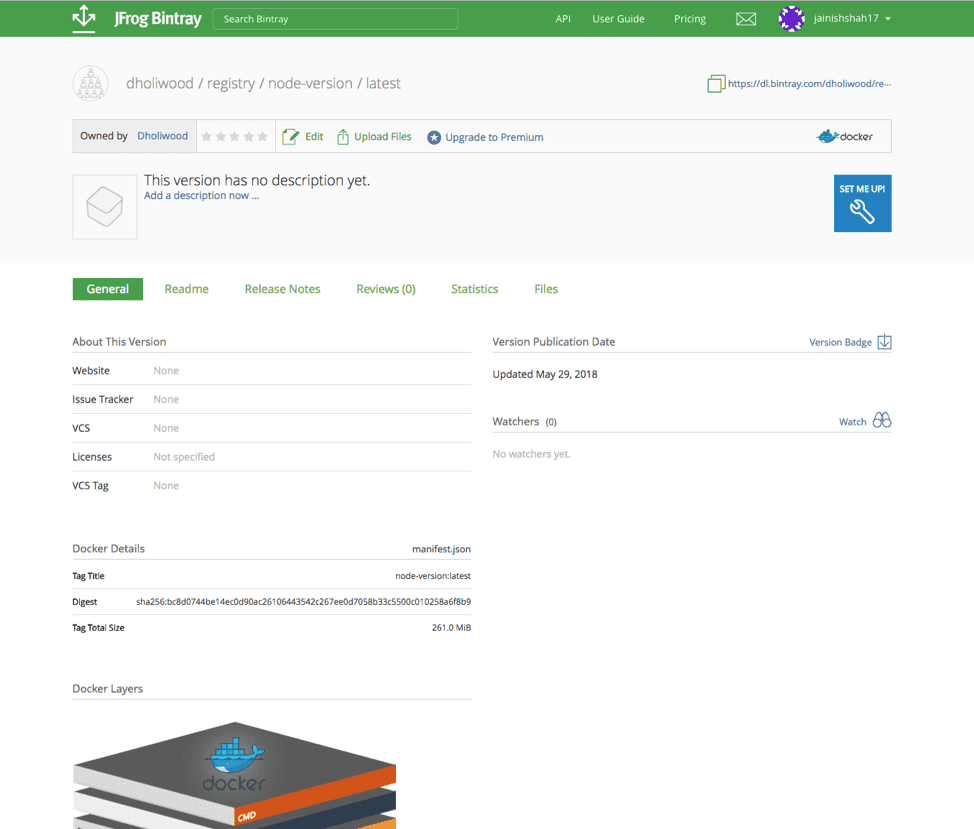
After a successful deployment to Artifactory, you’re now ready to use JFrog CLI to push your image layers into Artifactory.
Package your node microservice in docker image.
$docker build -t <artifactoryDockerRegistry>/node-version:latest
Test the newly created docker image.
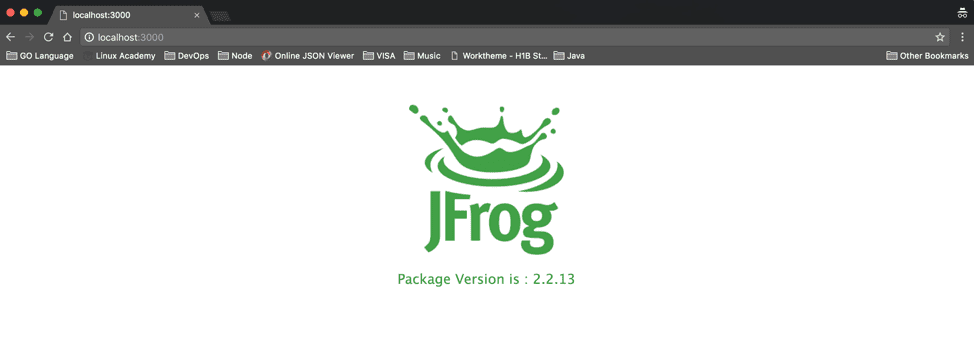
$docker run -d -p 3000:3000 <artifactoryDockerRegistry>/node-version:latest
Type https://localhost:3000/ in the browser. You will see the page as shown below.
Note: When building a Docker image, the docker push command deploys the image layers to the Artifactory server and collects the build info.
To push the image and the build info to Artifactory, run the Docker Push Image CLI command.
$jfrog rt dp my-docker-registry.io/node-version docker-repo
--build-name=pipeline-docker-artifactory --build-number=1
Now we’re ready to pass the build information to Artifactory.
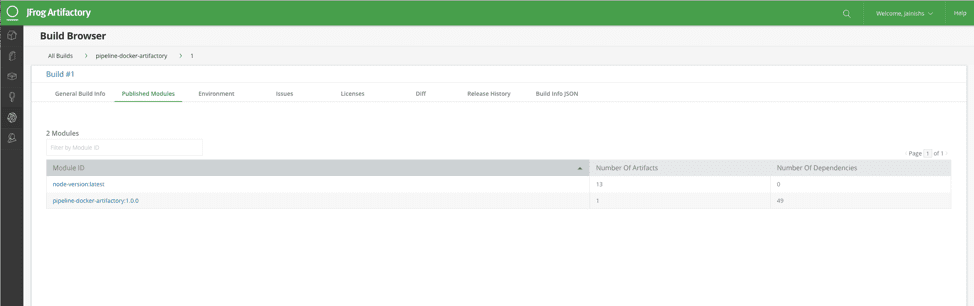
Run the following build publish command.
$jfrog rt bp pipeline-docker-artifactory 1
After running the build publish command, you can review the build information, and publish the modules and environment variables in Artifactory.
Step 6: Scan Your Build
JFrog Xray works with Artifactory to perform universal analysis of binary software components at any stage of the application lifecycle. By scanning binary components and their metadata, recursively going through dependencies at any level, Xray provides unprecedented visibility into issues lurking in components anywhere in your organization.
To scan your build using Xray, configure a new watch for the build as follows.
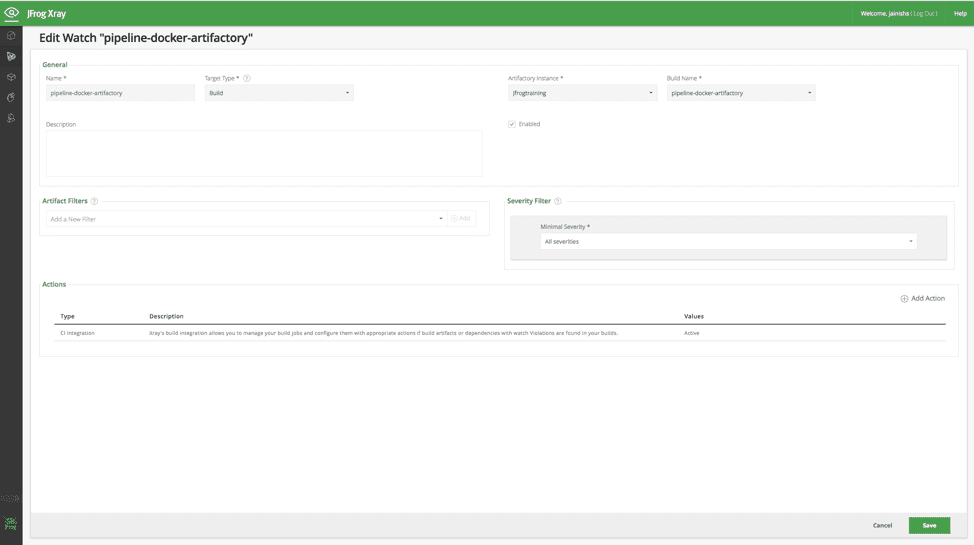
It’s recommended to add an action to the watch. Multiple actions can be selected by clicking Add Action.
JFrog CLI is integrated with JFrog Xray through JFrog Artifactory allowing you to have build artifacts and dependencies scanned for vulnerabilities and other issues. This integration requires JFrog Artifactory v4.16 and above and JFrog Xray v1.6 and above.
To scan a build, use the following command.
$jfrog rt bs pipeline-docker-artifactory 1
Step 7: Promote the build
Build promotion is usually used after testing or building a scan, optionally moving or copying the build artifacts and its dependencies to a target repository.
Use the build promote command to promote the build in Artifactory after scanning the build. You can add a number of optional flags to the command. For example, the –comment and –status flags.
To promote the build, run the following command.
$jfrog rt bpr pipeline-docker-artifactory 1 docker-repo --status="Staged"
--copy=true
See the promoted build in Artifactory.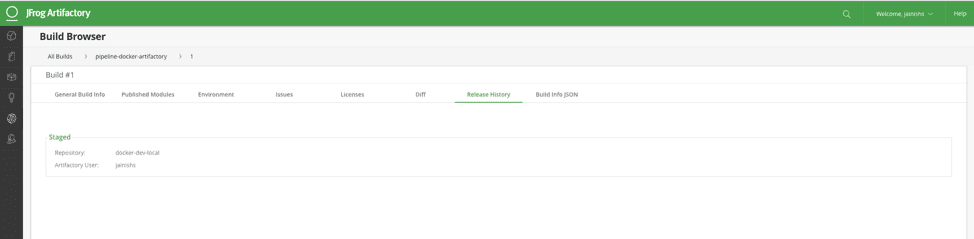
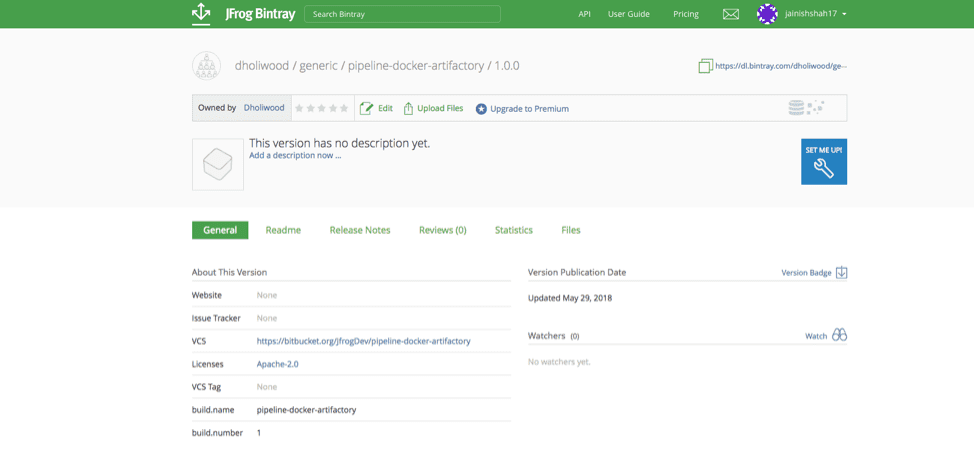
Step 8: Distribute the build
Build distribution is usually used to deploy builds from Artifactory to Bintray, and creates an entry in the corresponding Artifactory distribution repository specified.
Use the build distribution command to distribute the build artifacts from Artifactory to Bintray after promoting the build. You can add a number of optional flags to the command. For example, the –publish and –override flags.
To promote the build, run the following command.
The command refers to the npm distribution repository as a target for build distribution.
$jfrog rt bd pipeline-docker-artifactory 1 distribution-repo
The is the distributed build in Bintray.
Congratulations!
You have successfully deployed your node microservice Docker image manually to Bintray.
Now let’s automate the process using the Bitbucket pipeline.
Automating the build using the Bitbucket pipeline
- Copy the bitbucket-pipelines.yml file to the root of your npm project code in Bitbucket and enable the Bitbucket pipeline.
Do you use Java?
Here is an example that shows you how to containerize your Java microservice using the Bitbucket pipeline and JFrog CLI.
https://bitbucket.org/JfrogDev/pipeline-java-artifactory/src/master/
Get started for free by subscribing to JFrog Artifactory Cloud in the AWS Marketplace , start a Cloud trial through JFrog, or start a trial of JFrog Artifactory


