

5 Steps to Hosting Your Application on Amazon Cloud Container Service

This article describes 5 steps to hosting an application on the cloud with Amazon Elastic Container Services (ECS) and Elastic Container Registries (ECR) using a multi-cloud strategy.
Developers are moving towards hosting applications on the Cloud and using various cloud services provided by market leaders such as: Google (GCP), Amazon (AWS) and Microsoft (Azure).
Nowadays, it is essential for our applications to be ready for multiple challenges such as: scaling according to need, supporting faster cloud deployments (DevOps way of working) along with security parameters and supporting cloud automation from various aspects. Also, when it comes to enterprise applications, high availability and robustness are a must!
In this era of Cloud Computing, Amazon’s cloud-native services such as ECS and ECR, help build, host and maintain our applications on the cloud easily by providing the following services that cater to our needs:
- ECS for Cloud DevOps with:
- EC2 for Cloud Server
- EBS for Cloud Storage
- ELB for Load balancing
- ASG for autoscaling of the application
- CloudFormation Stack – to maintain all the AWS components
- ECR for Container Registry which is a cloud-native solution for maintaining all our container images
ECS accelerates cloud automation by eliminating the need for us to operate on our own cluster management systems like Kubernetes and configuration management systems. There are two different approaches to hosting your cluster and running tasks in ECS:
- Hosting the cluster on a serverless infrastructure, that is managed by Amazon ECS, by launching it using the AWS Fargate launch type.
- Hosting the tasks on a cluster of Amazon Elastic Compute Cloud (Amazon EC2) instances, that is managed by using the EC2 launch type.
Did you know?
Artifactory Cloud can serve as your Kubernetes Docker Registry.
It can provision your k8s cluster with the charts and images needed to orchestrate your application. Learn more on how you can easily configure Artifactory as your Kubernetes registry for EKS.
AWS Fargate is a cloud-native infrastructure provided by AWS to run containers without having to manage servers. In this case, AWS will take care of provisioning, configuring and scaling of Infrastructure to run the cluster. However, using of EC2 service over Fargate for launching ECS will give more control on the infrastructure for the users over the whole setup.
 Workflow diagram of ECS along with ECR
Here’s a how-to guide on hosting applications on the cloud using the components described above.
Step 1: Create the image and push it to ECR
Amazon’s container registry makes it easy for developers to store, manage, and deploy container images, making cloud DevOps a comfortable approach. For getting started with it we need to create a repository on AWS ECR. Then we can use a Docker client that authenticates ECR using AWS URI so that we can use the docker push and docker pull commands to push and pull images to and from the repositories.
Once the Setup is ready, then we can create our own custom Docker images in our local machine and push them to the ECR repository which can then be retrieved by any Docker client which has access to the AWS ECR repository.
We can make use of any external Docker registries, such as the JFrog Docker registry, instead of ECR for storing the Docker images which can then be pulled to the ECS cluster directly.
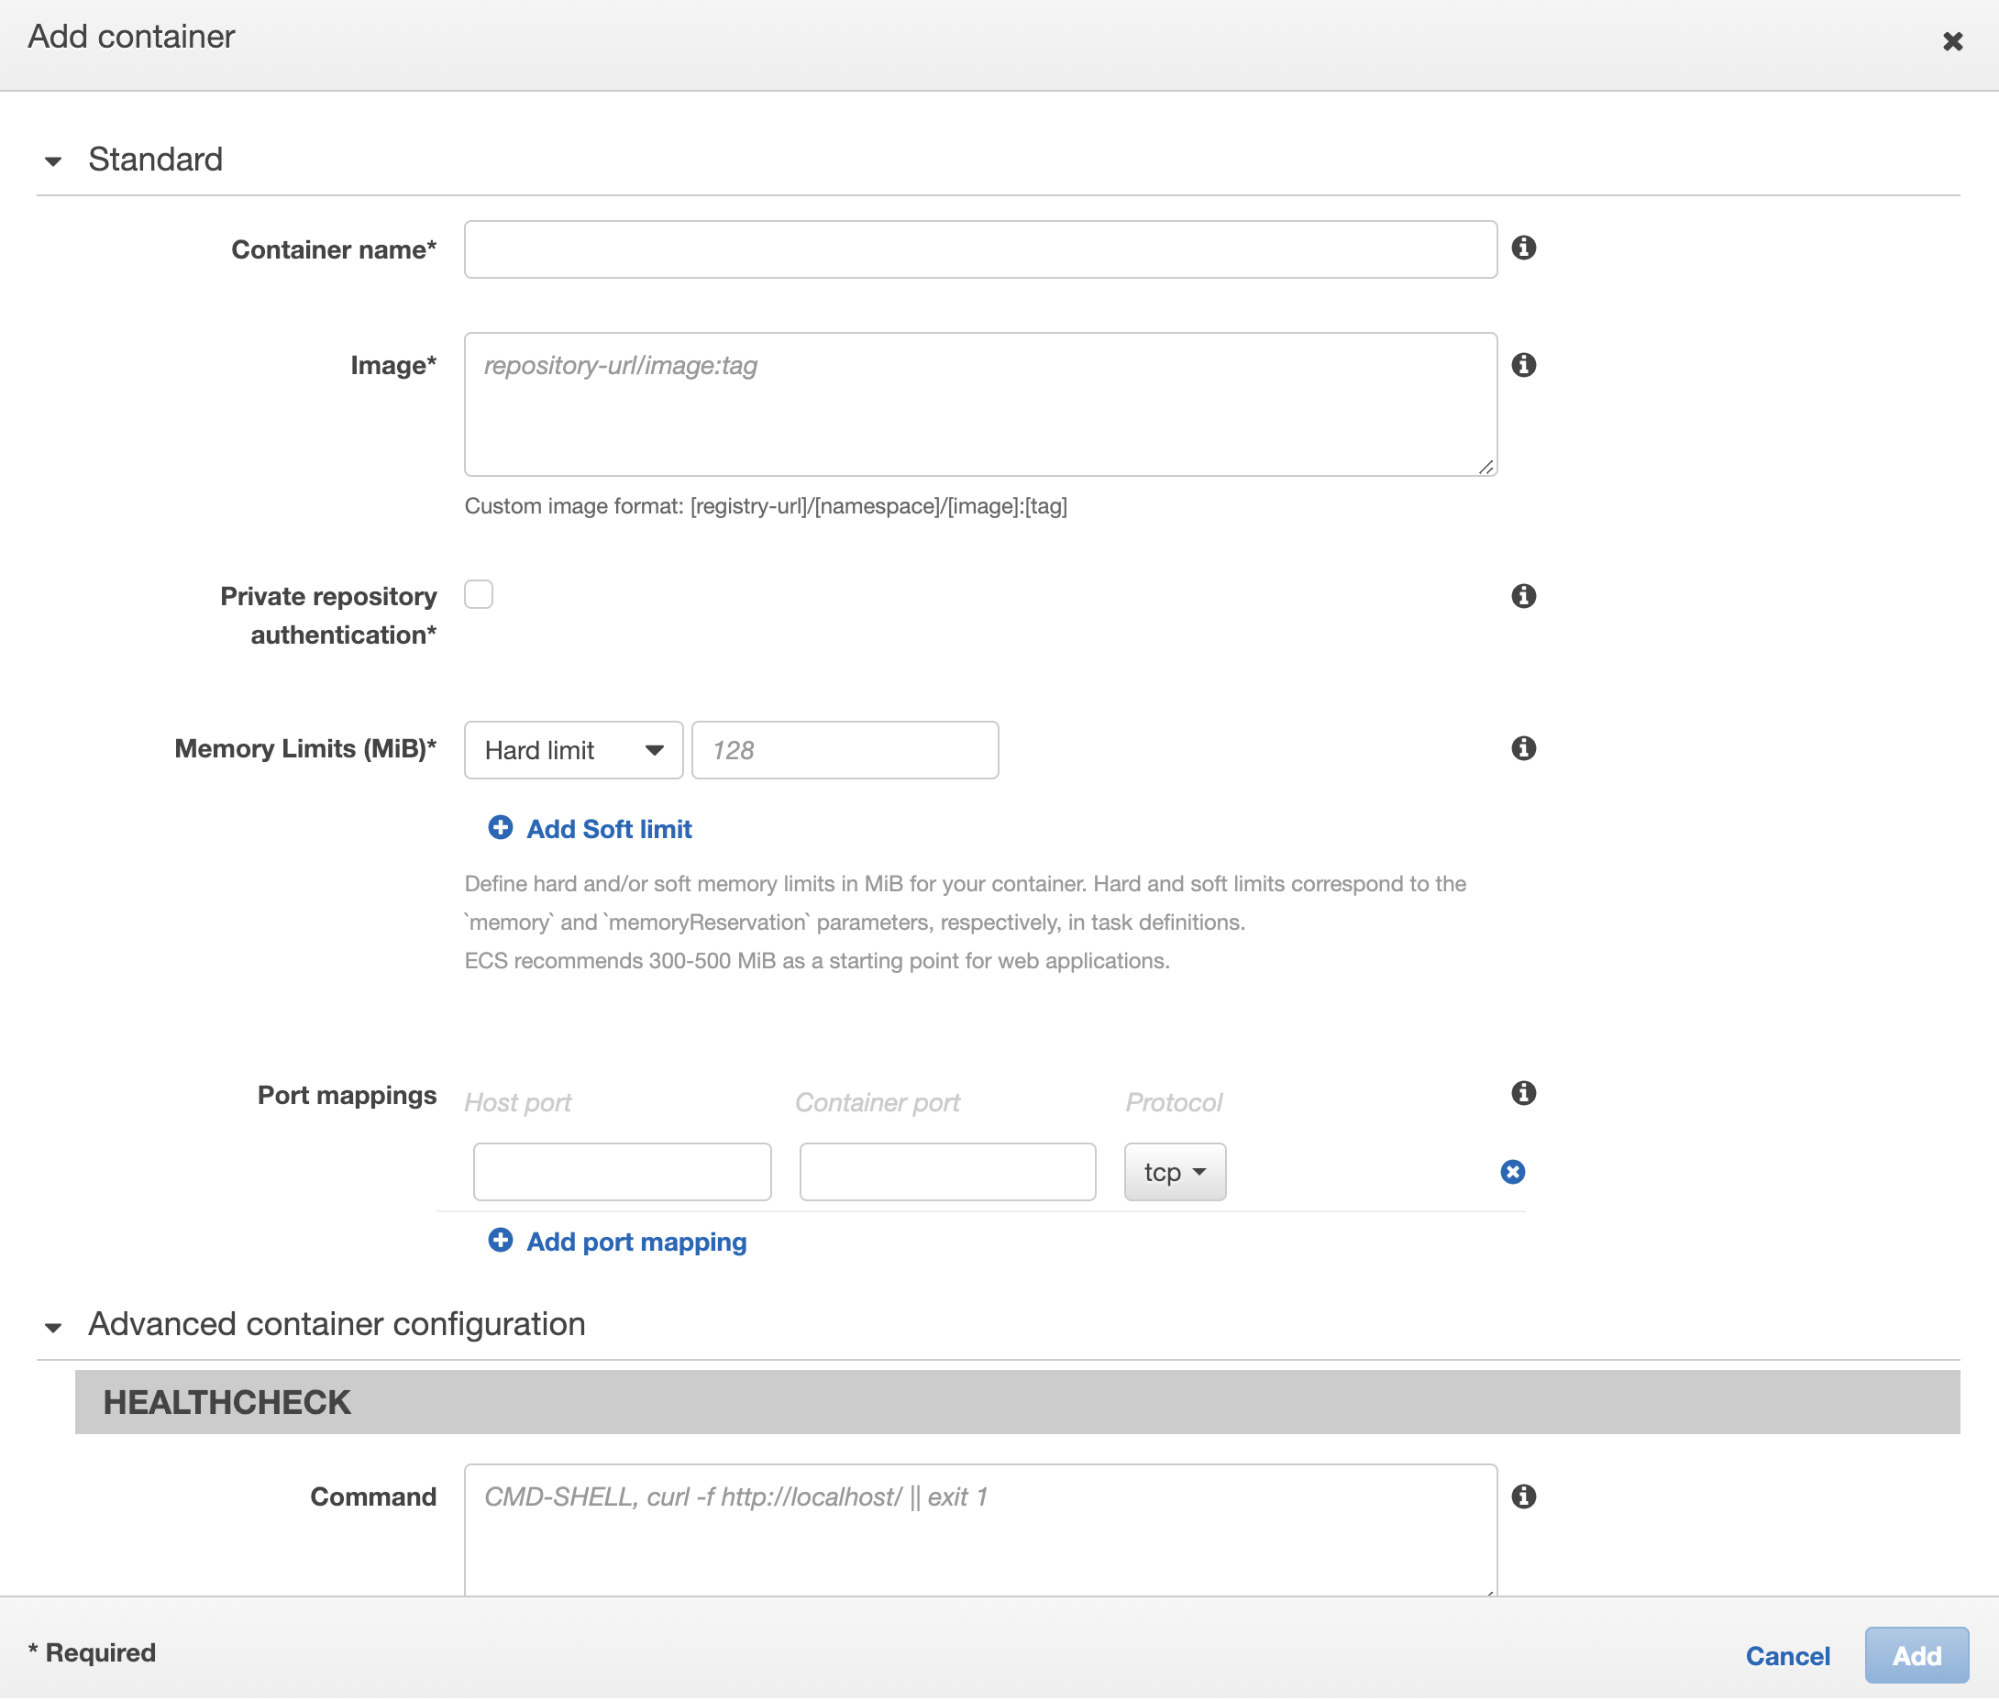
Step 2: Create a Task Definition with the required containers
The task definition stage defines how containers will be launched.

We will define all the required parameters for cloud computing by customizing the container to run on the ECS cluster here by providing the custom configurations for the Docker containers by setting parameters like ports to be exposed, Docker image, CPU shares, memory requirement, environment variables etc.
We can add the required containers with custom configurations by selecting the Add container option on Container Definitions section of the Task definition.
We can also configure container networking settings and logging configurations using CloudWatch.
Step 3: Create the ECS cluster
The ECS cluster is a combination of tasks, services, and infrastructure. Tasks using the Fargate launch type are deployed onto infrastructure managed by AWS and Tasks using the EC2 instances(Linux/Windows) are the ECS Container Instances (EC2) on which the application is spun. The Amazon ECS container instance is a normal EC2 instance with Docker and ECS agent pre-installed and uses ECS-optimized AMI.

Optionally, we can also add our regular EC2 instances to our cluster by installing and configuring docker and ECS agent on it.
Step 4: Run the defined task in the cluster
In this stage, we will be linking the tasks to the ECS cluster from the Task tab within the cluster created. We can specify the task definition to be used along with its version and the number of replicas for this task (usually used for running submodules of a Project). Also, we can define the task placement strategies and constraints for running the defined tasks in the cluster.

Additionally, we can also create scheduled jobs which can run these tasks periodically.

Step 5: Configure the Service to serve with ELB and ASG
In this stage, we can configure services for the tasks running on a particular cluster to run and maintain a specified number of a task definition simultaneously in the ECS cluster. If any of our tasks fails or stops for any reason, the ECS service scheduler launches another instance using cloud deployment with the same task definition to replace it and maintains the desired count of tasks in the service.

The service scheduler works on 2 strategies :
- REPLICA – This strategy places and maintains the number of tasks required within a cluster.
- DAEMON – This strategy ensures that the task is present or running in all the active container instances.
In addition to maintaining the desired count of tasks in our service we can configure the following also;
- Load balancer: We can configure load balancer which internally uses Amazon ELB.
- Service discovery: We can configure service discovery using Amazon Route 53 to create a namespace for our service and allow it to be discoverable via DNS.
- Auto Scaling: Configuring auto-scaling automatically adjusts our service’s desired count up and down within a specified range. We can modify our Service Auto Scaling configuration at any time to meet the needs of our application.
In conclusion, we can use the AWS Cloud services to host the whole of our application as a cluster of containers with all advanced features which allows networking of these containers, load balancing between them, auto-scaling them according to need and with required logging.
As an alternative for ECR, using JFrog Artifactory Cloud hosted on AWS provides more control, insight and management of your binary artifacts, including Docker images.
Along with these tools and features, we can also use Amazon’s other products such as S3 for cloud storage, RDS as a cloud DB, etc to make our applications more cloud-native.
All we need to do now is get on Cloud with ease!
Experience
JFrog Today
Discover how the JFrog Platform unites DevOps, DevSecOps and MLOps for secure, rapid software delivery.


