Doing DevOps Your Way On SaaS Solutions: Writing Your First JFrog Worker Service to Extend JFrog SaaS
October 2024 Update: JFrog Workers is now available for all Enterprise+ and Enterprise X customers!
For more information, review our Help Center documentation.
To recap from our first blog post, JFrog Workers is a service in the JFrog Platform that provides a serverless execution environment, similar to AWS Lambda services. The Workers Service is similar to the user plugins available in JFrog self-hosted, and can be used to perform tasks that extend the capabilities of the JFrog Platform according to your requirements.
How does it work?
The Workers Service enables you to create and run plugins that extend JFrog Platform functionality according to our needs, for example, defining a specific artifact upload path to a repository or adding a property to an artifact .
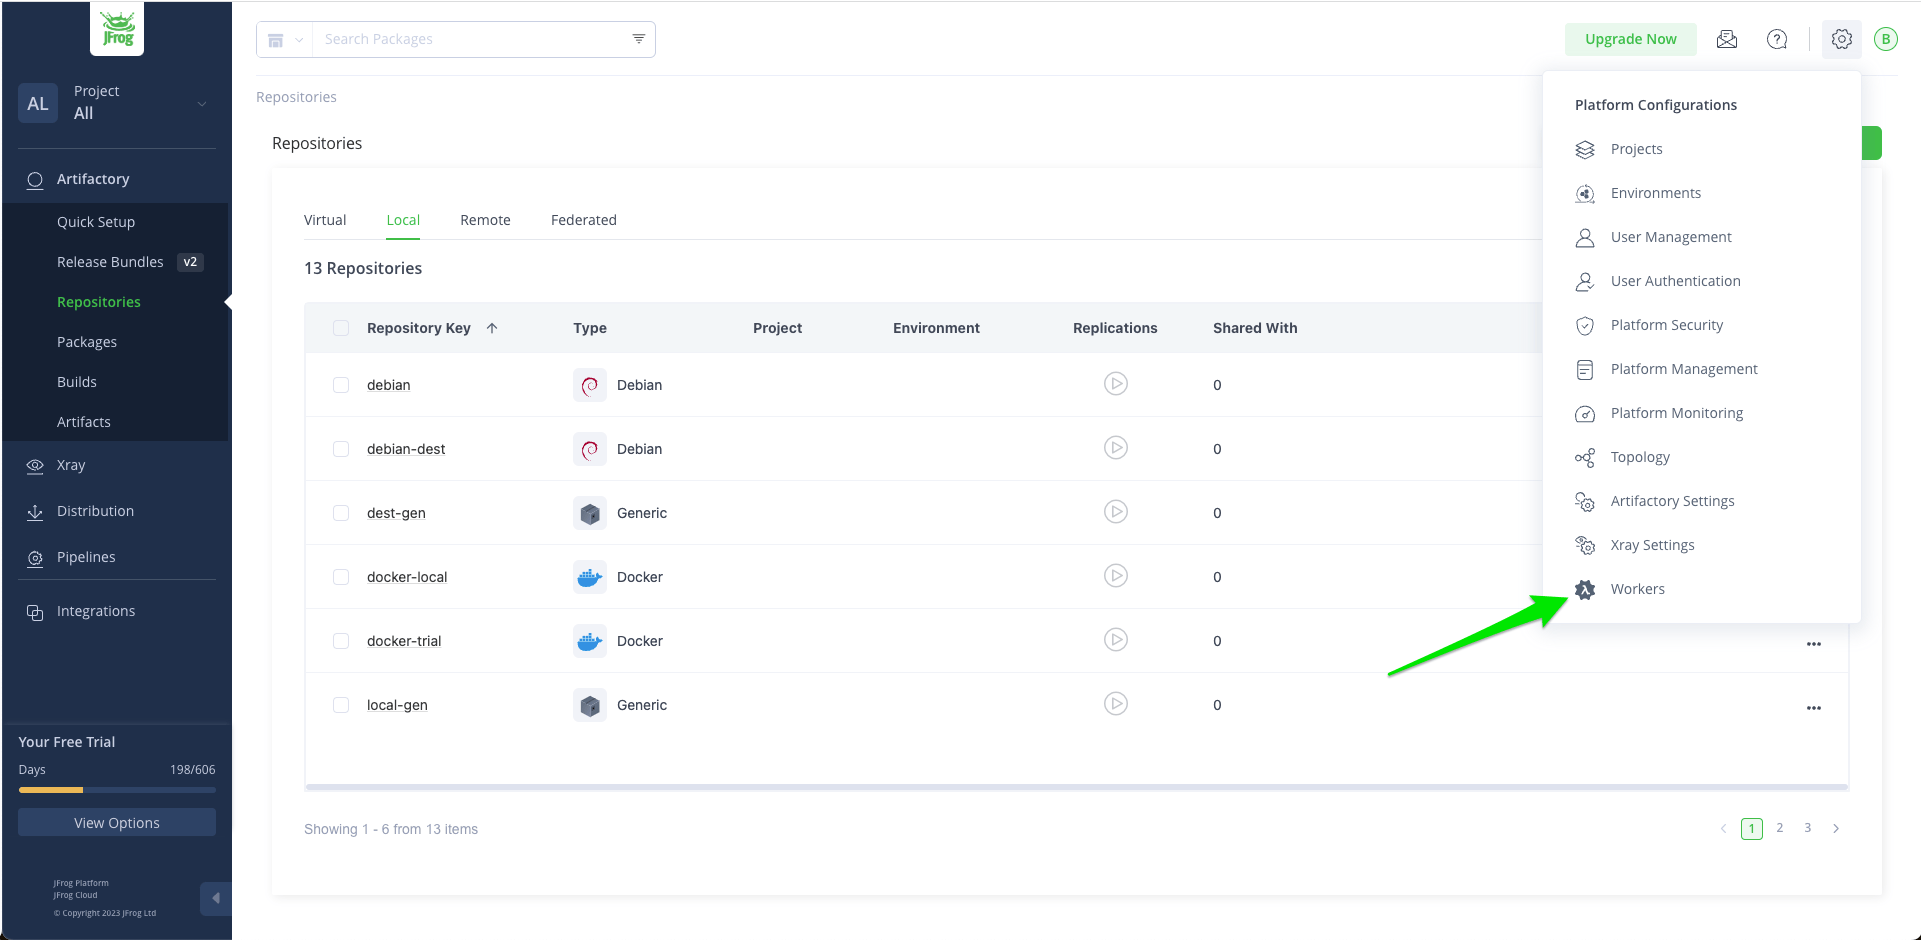
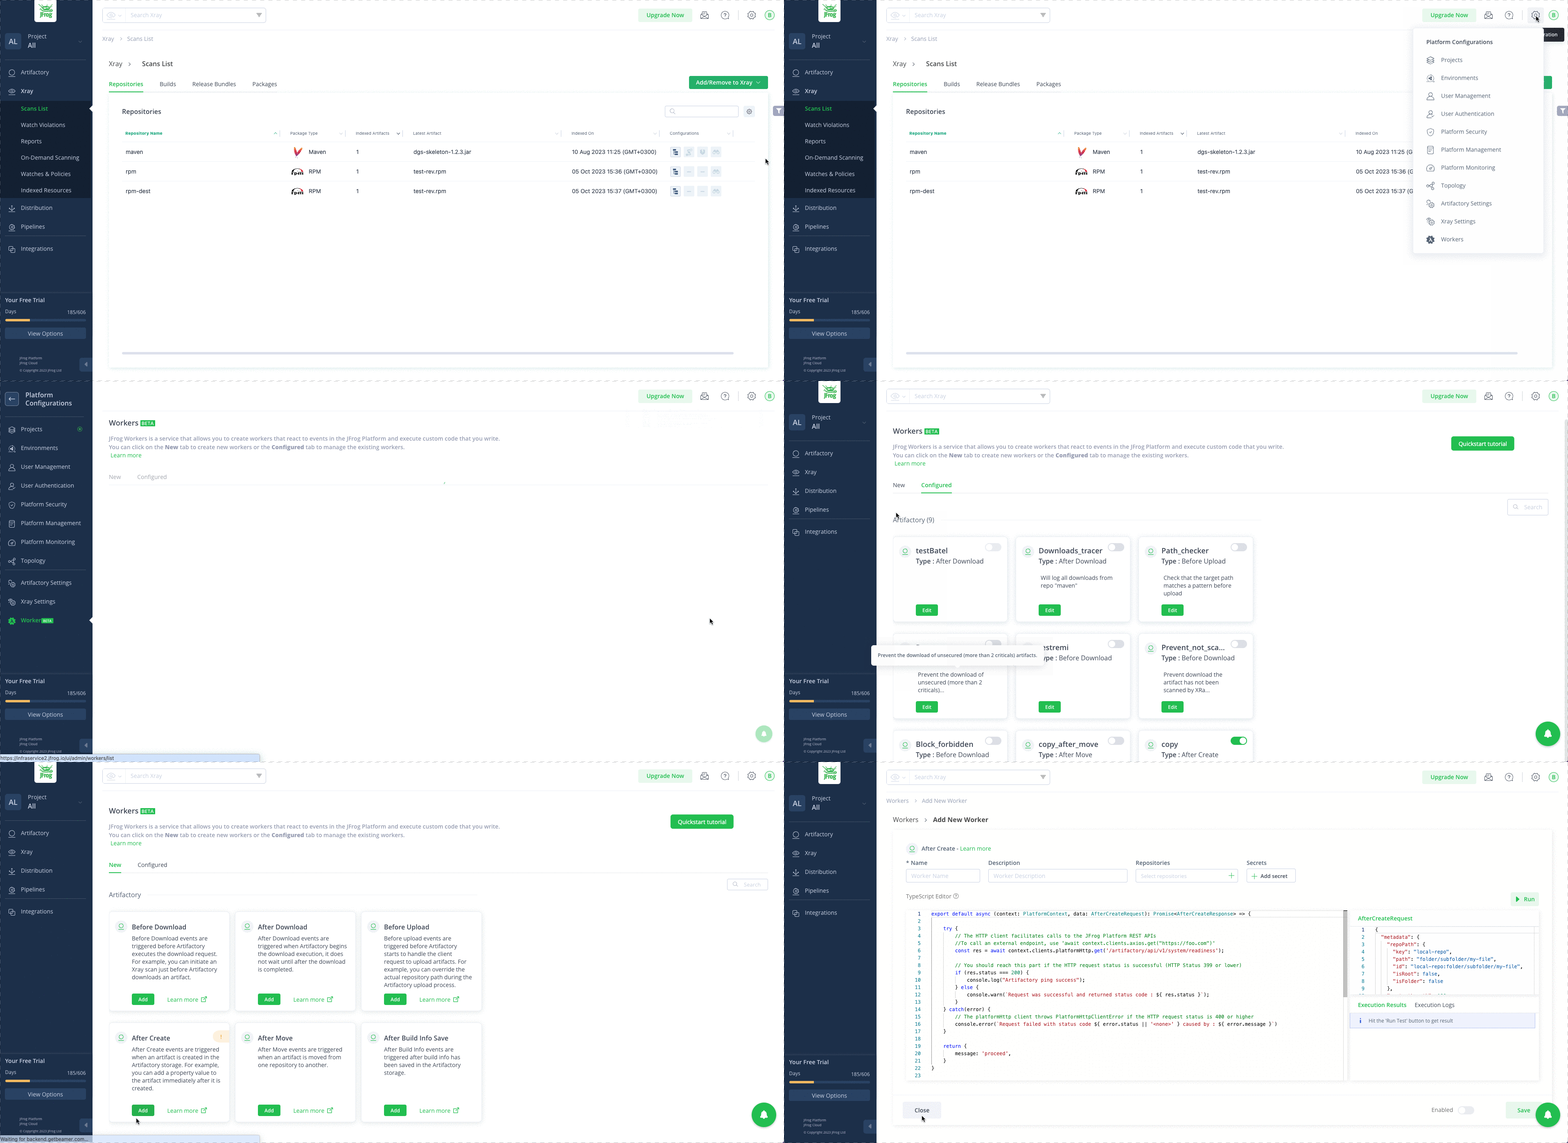
To create a Workers Service, click on the Workers tab under the Administration icon:
Creating a Workers Service
Here’s how we can use automation with the JFrog Workers Service.
A Simple Example Use Case
A simple use case is adding properties to artifacts. This can later be used with JFrog REST API’s, JFrog CLI, and JFrog AQL. In this example, using a single command we can retrive all artifacts that contain a specific property. Also, we can create other advanced queries, using JFrog CLI, such as deleting all artifacts uploaded on a specific date that contain a specific property.
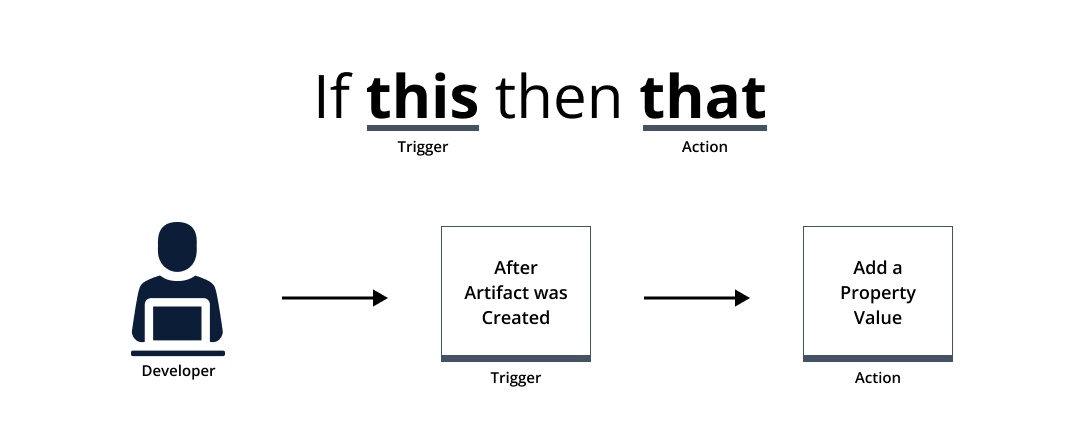
Here’s the logic: After an artifact was created → Add a property value.
Trigger and Action in JFrog Workers Service
Step1: We’ll add the name of the project as a property. To do this, click on the workers view and add the “After Create” worker.
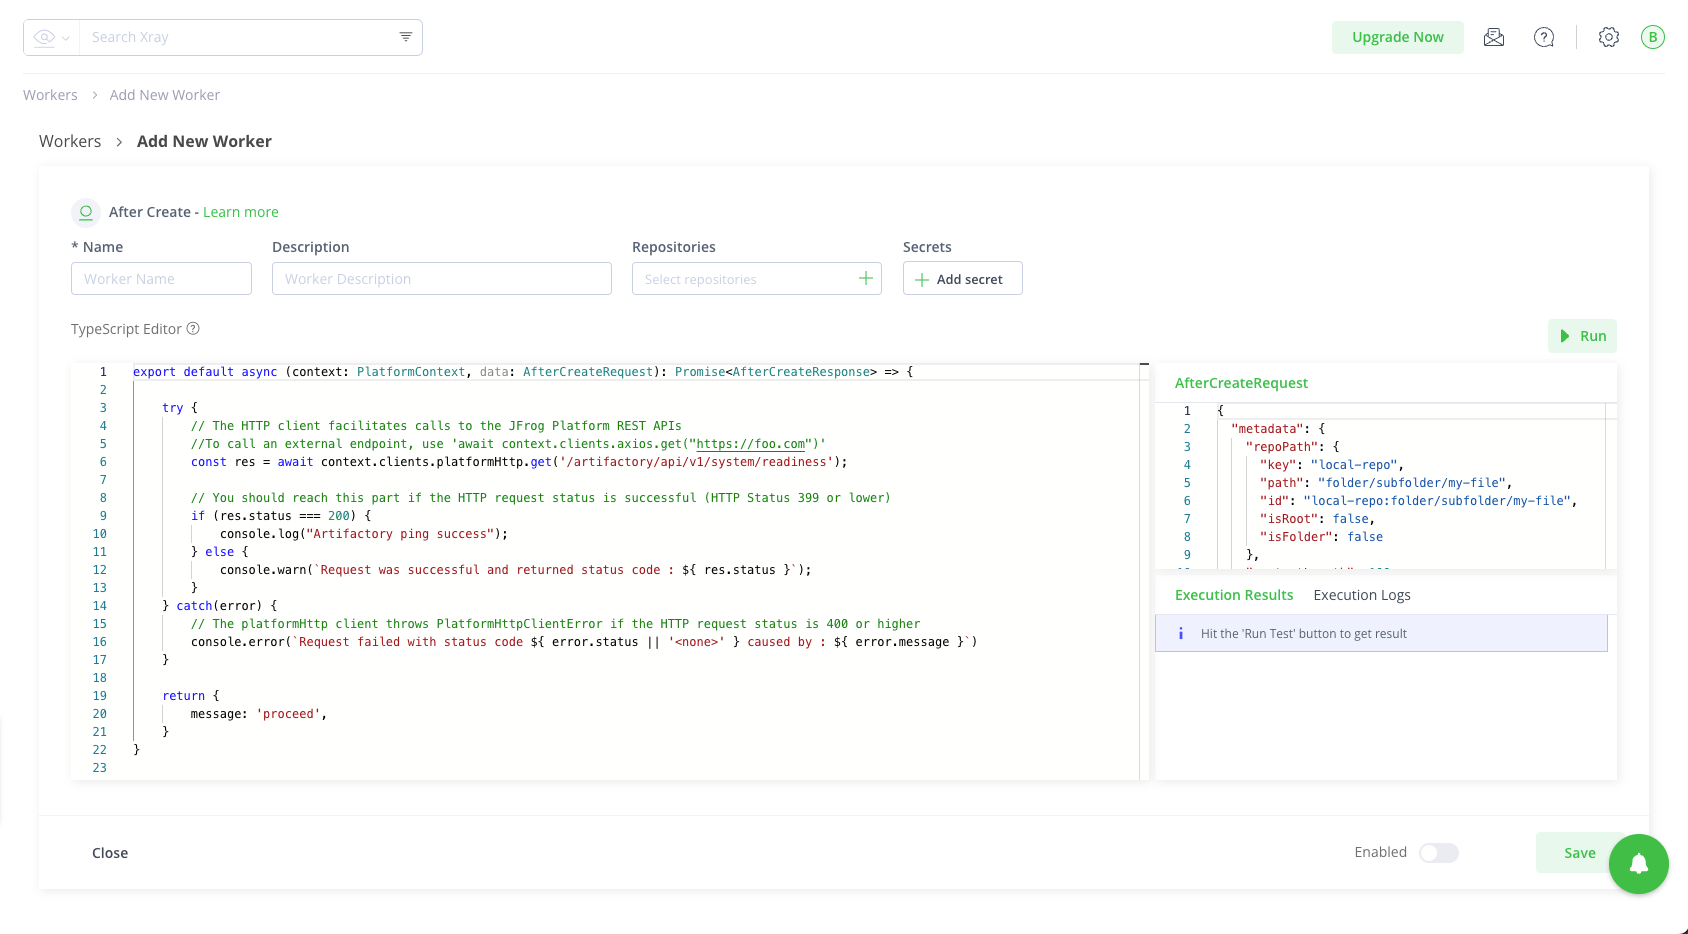
This will create a default worker:
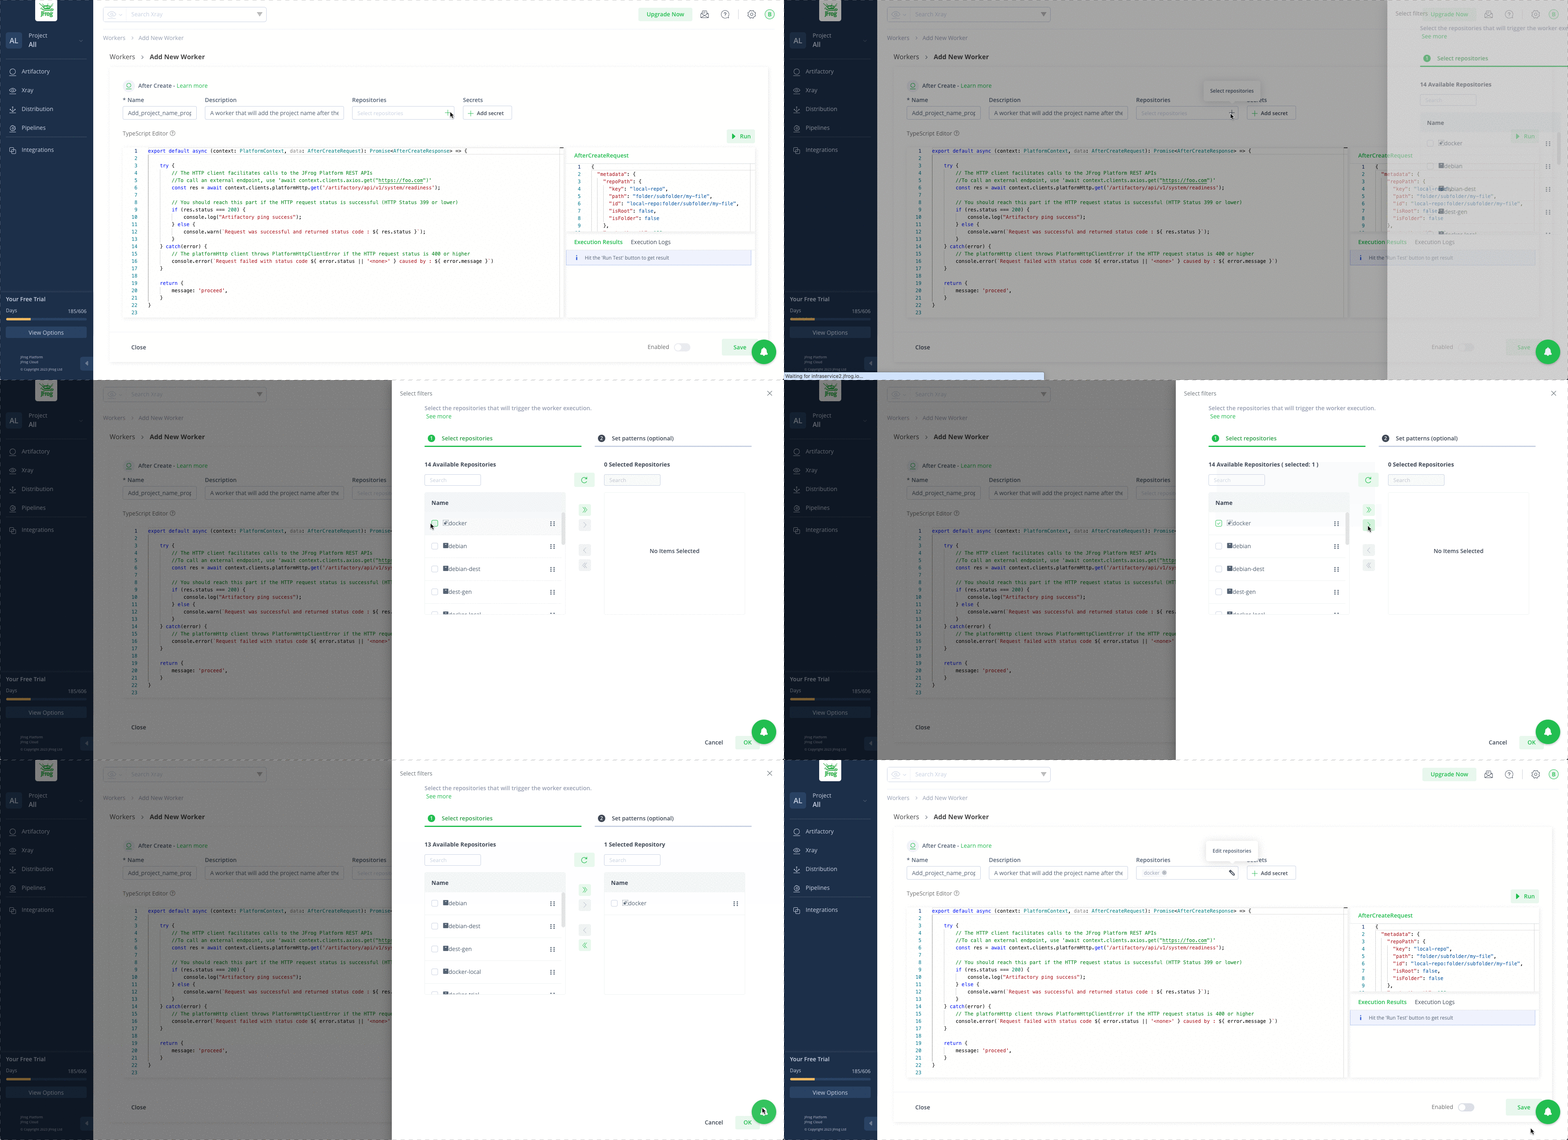
Step 2: Name our worker, provide a short description, and select the repositories to include.
Step 3: Now let’s edit the code with the property test passed.
export default async (context: PlatformContext, data: AfterCreateRequest): Promise => {
   let message = 'OK';
   try {
       await context.clients.platformHttp.put(`/artifactory/api/storage/${data.metadata.repoPath.key}/${data.metadata.repoPath.path}?properties=test=passed`);
  } catch(error) {
      message = `Could not set the property: ${error.message}`;
       console.error(`Request failed with status code ${ error.status || '' } caused by : ${ error.message }`)
   }


   return {
       message,
   }
}
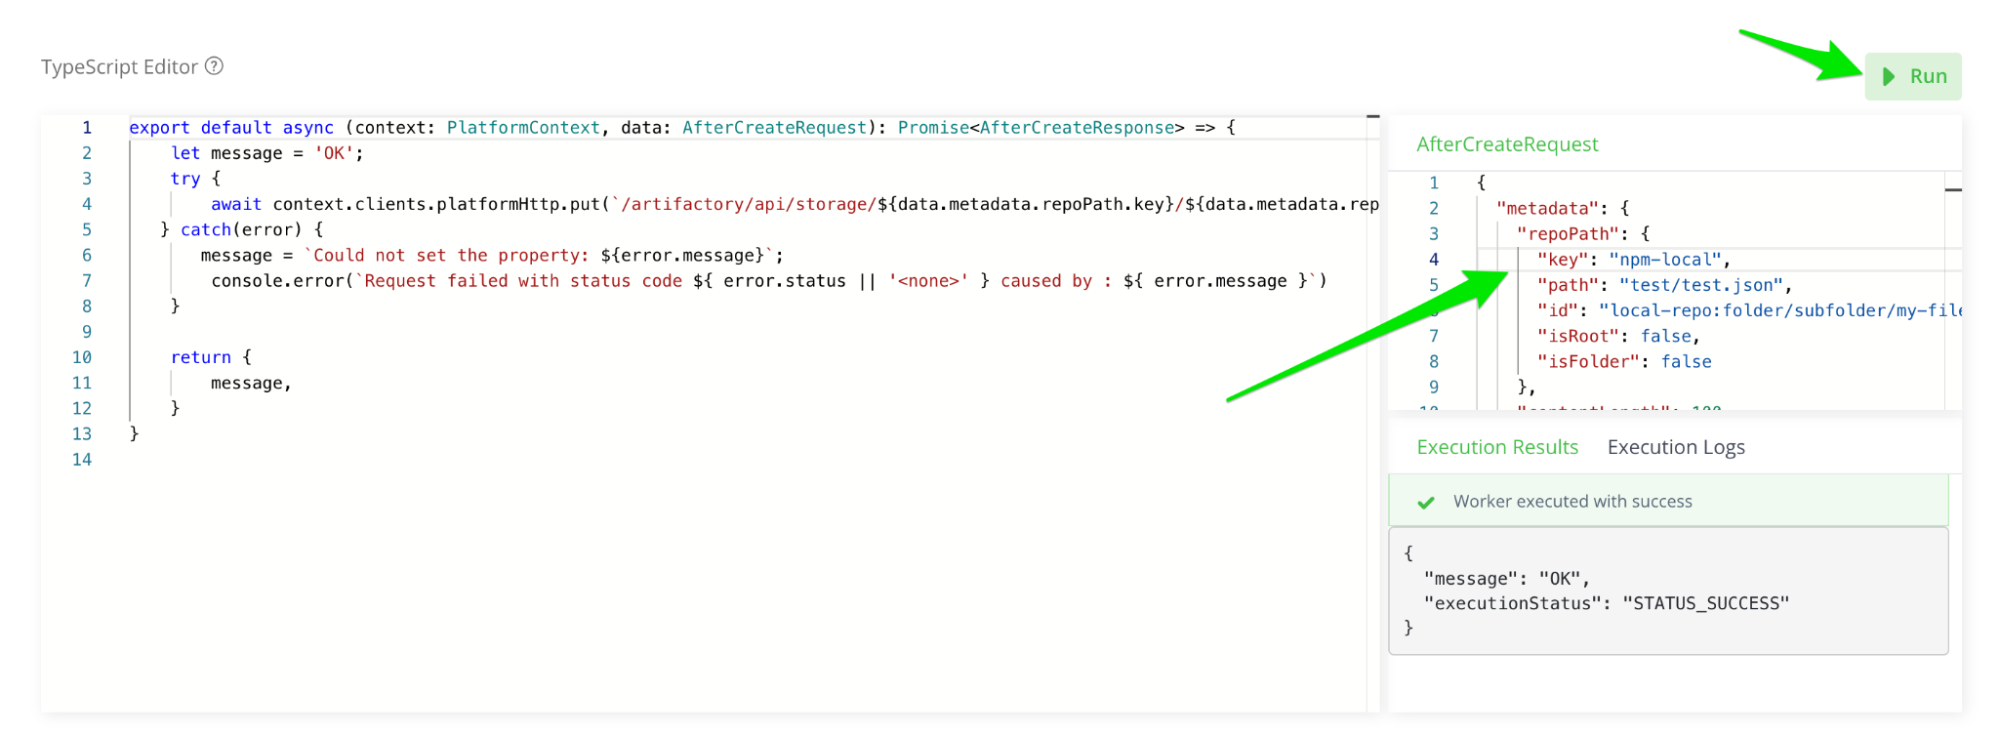
Step 4: To check our worker and run some tests, add the Key and repository path, and click on run to test it.
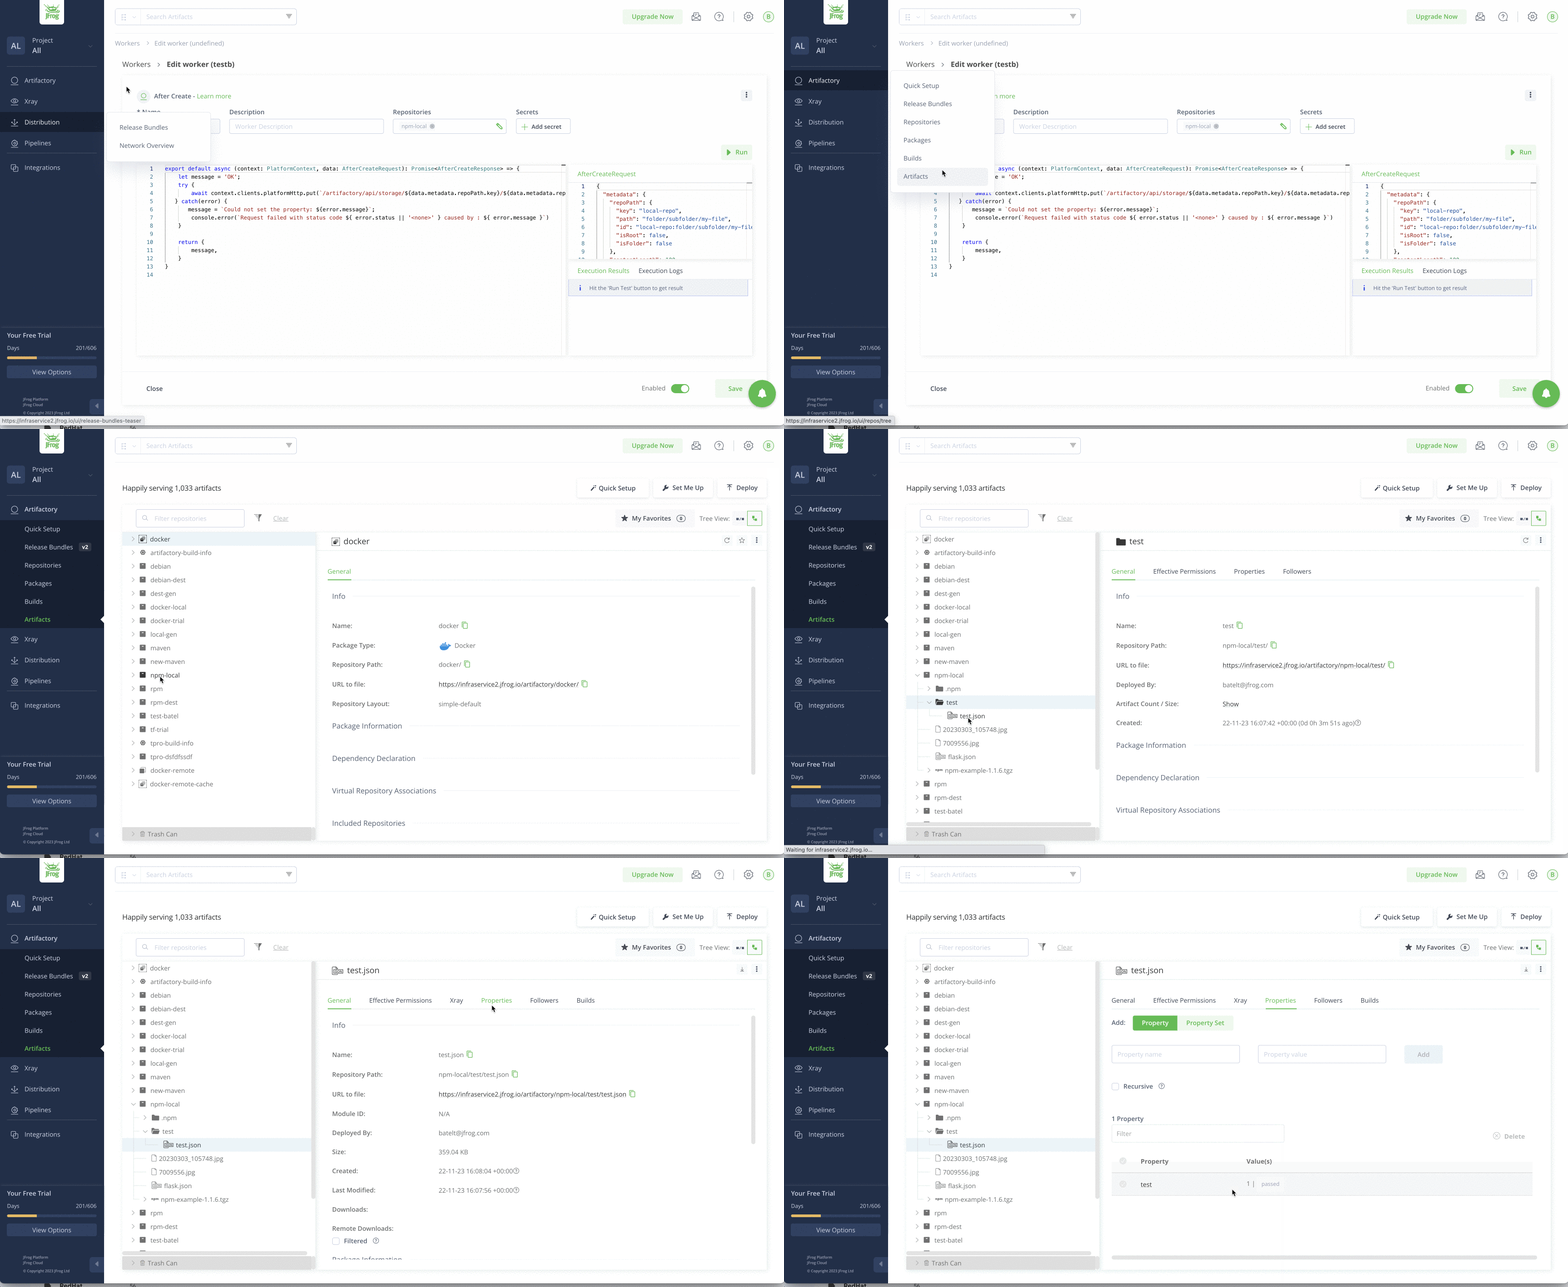
Step 5: Now let’s check our artifacts and see if we added the properties as expected. In this example, the updated repository is “npm-local”. We can see that the property test was added and has the value passed.
That’s it! We’re done.
What’s Next
Additional JFrog Workers support will be included in the JFrog CLI, which will enable us to easily incorporate Workers as part of our pipeline.
For more on workers, visit our technical documentation, request a demo, or start a trial to see it in action.


