

npm Packages with JFrog CLI

By
6 min read
Updated October 2024
JFrog CLI is a compact and smart client that provides a simple interface and greatly simplifies working with JFrog Artifactory. The simplified commands enable you to create readable automation scripts that are easy to maintain, efficient and reliable.
From version 1.13.1, JFrog CLI has extended its support to include npm packages, in addition to its Maven and Gradle build support. This blog post describes the available npm commands that work with the npm client to manage your npm builds. Using the JFrog CLI, you can:
- Collect and Publish your npm build information to Artifactory
- Trace your builds easily once you have published the build information to Artifactory
- Gain visibility of the used dependencies
- Generate information about the build environment
- Scan your builds for potential vulnerabilities by connecting JFrog Xray
- Promote your build
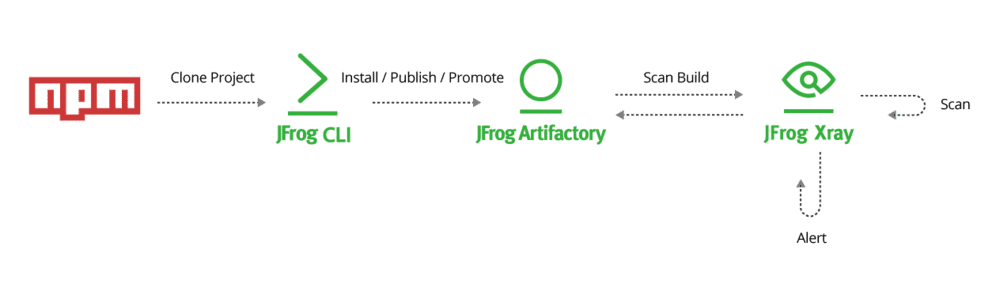
The following steps will take you through the complete process of getting your npm build up and running:
- Clone a project.
- Set the CLI connection to your Artifactory server(s).
- Install the package dependencies.
- Publish the package in Artifactory.
- Scan the build.
- Promote the build.
Prerequisites
Before we get started, make sure you complete the following.
- Install JFrog CLI, using the following command:$ curl -fL https://getcli.jfrog.io | sh
- Setup your environment (optional, but recommended):
- Download and install your npm client
- Download Artifactory version 5.5.2 and above.
- Download Xray.
1. Clone Your Project
You can clone any npm project. In our example, we have cloned the twbs Bootstrap project with the following Git command:
$ Git clone https://github.com/twbs/bootstrap.git
2. Configure Artifactory with JFrog CLI
All you have to do is run the following command:
$ jfrog config add
Proceed to modify your Artifactory server name, URL, Artifactory username and password as follows:
Hurray, the connection is established!
3. Setting npm repositories
Run the following setting npm repositories that will configure our npm repositories for our build:
$ jfrog rt npmc
The commands will help us to configure the npm repositories like the following:
4. Install npm Packages
Run the following npm install command that refers to the npm virtual repository as a source for the dependencies:
$ jf npm install --build-name=bootstrap --build-number=1.0.0
This command installs the project and refers to the npm repository as the source.
Knowledge is Power!
It’s time to generate some information. We recommend adding the Git VCS details using the following build-add-git command:
$ jfrog rt bag bootstrap 1.0.0
Also, you can collect the environment variables using the following build-collect-env command:
$ jfrog rt bce bootstrap 1.0.0

5. Publish npm Packages
Important Note: Required changes to existing npm scripts
If you already have npm scripts, we recommend renaming your existing prepublish and post publish scripts in the package.json file. When the npm-publish command runs, the JFrog CLI runs the pack command in the background and not the standard publish command. If your npm package includes the prepublish or postpublish scripts, rename them to prepack and postpack, respectively.
The npm publish command packs and deploys the npm package to your npm repository in Artifactory. You can also add optional flags. For example: upload the package to another server using the –server-id flag.
To publish the package, run the following command:
$ jf npm publish --build-name=bootstrap --build-number=1.0.0
Now we’re ready to pass the build information to Artifactory.
Run the following build publish command:
$ jfrog rt bp bootstrap 1.0.0

The npm package will now be displayed in Artifactory.
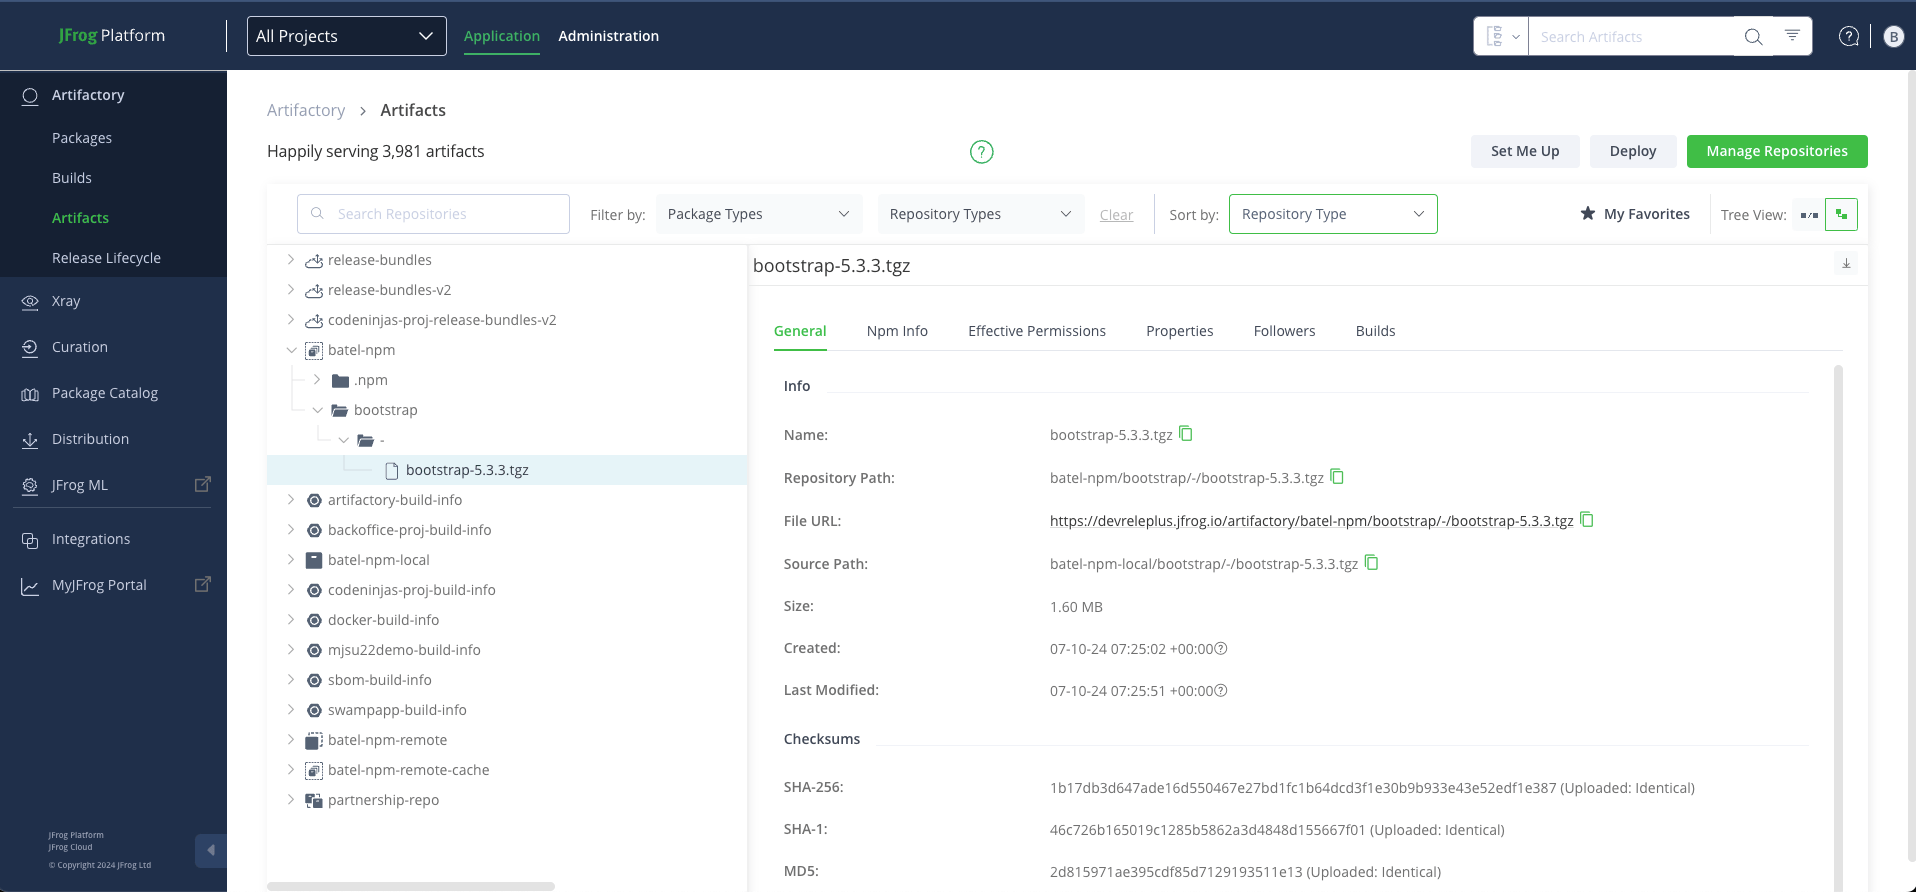
After running the build publish command, you can review the build information, and publish the modules and environment variables in Artifactory.
6. Scan Your Build
JFrog Xray works with Artifactory to perform universal analysis of binary software components at any stage of the application lifecycle. By scanning binary components and their metadata, recursively going through dependencies at any level, Xray provides unprecedented visibility into issues lurking in components anywhere in your organization.
To scan your build using Xray, you need to configure a new watch for the build as follows:
It’s recommended to add an action to the watch. Multiple actions can be selected by clicking Add Action.
JFrog CLI is integrated with JFrog Xray through JFrog Artifactory allowing you to have build artifacts and dependencies scanned for vulnerabilities and other issues. This integration requires JFrog Artifactory v4.16 and above and JFrog Xray v1.6 and above.
To scan a build, use the following command:
$ jfrog rt bs bootstrap 1.0.0
7. Promote the Build
Build promotion is usually used after testing or build scan, optionally moving or copying the build artifacts and its dependencies to a target repository.
Use the build promote command to promote the build in Artifactory after scanning the build. You can add a number of optional flags to the command. For example, the –comment and –status flags.
To promote the build, run the following command:
$ jf rt bpr bootstrap 1.0.0 npm-virtual

The promoted build in Artifactory:
That’s it, you’re done!
Keep a lookout for our future posts on using JFrog CLI with Travis CI, as well as sorting and limiting your build output.
Click here to get Started with JFrog CLI.
Experience
JFrog Today
Discover how the JFrog Platform unites DevOps, DevSecOps and MLOps for secure, rapid software delivery.


