

Managing Users and Groups with SCIM in the JFrog Platform

By
6 min read

When your organization becomes bigger, managing the users and groups lifecycle becomes a significant challenge. Your company grows rapidly, hiring new employees, and giving them access to more and more applications that your organization uses. This means that there are many employee-related actions that need to be taken when an employee changes their team, role, leaves temporarily or permanently (otherwise you may end up with operational, security or compliance issues).
As such, there are many situations in which you may need to revoke that employee’s access to certain applications for security and compliance reasons. This process becomes time-consuming and error-prone when your organization uses many external services, and has a lot of users. In Artifactory, you’ll find it useful to create or delete users and groups, disable users, and revoke Access Tokens and API keys when the user is disabled.
Your DevOps teams will be happy to learn that identity access security for cloud-based applications and service just got a lot easier with the addition of the SCIM v2.0 protocol and schema to the JFrog Platform.
Read more about Scaling Software Supply Chains Securely >
System for Cross domain Identity Management (SCIM), is an open standard protocol, which allows you to provision and manage your users and groups across systems. The JFrog implementation of SCIM protocol provides the core of SCIM v2.0 specification. SCIM implementation relies on REST endpoints conforming with the SCIM schema, and allows you to create, delete, disable users and groups, associate between groups and users, and many other actions that can be performed through your Identity Provider (IdP). Your IT department can manage your JFrog users and groups using Identity Provider such as Okta or Azure Active Directory. This will reduce the painful and time-consuming process of managing users across multiple applications.

SCIM protocol improves your company security and compliance position, since all user management is concentrated in one place, access to applications will be disabled/enabled easily with a click of a button, and your IT department will save a lot of time and effort.
Because JFrog is an integral part of the DevOps world, we implemented the SCIM v2.0 protocol into our Platform, so that our customers can enjoy the ease of managing their users and groups using their preferred IdP.
This blog post will show how simple it is to configure your IdP (Okta in this case), create a user, and disable their activity. In 3 easy steps!
Step 1: Generate Access Admin Token
First, you will want to generate an Access Admin Token, which you will use to authenticate the communication with your JFrog Platform application. When logged in as Administrator, go to Identity and Access > Access Tokens > Generate Admin Token.

Copy the Access Admin Token that you created because you will need it to configure SCIM with Okta.
Step 2: Configure SCIM with Okta
In Okta, go to Applications > click Create New App. A popup modal will appear, you probably want to choose SAML 2.0 for the sign on method, as it integrates naturally with SCIM.
Choose a name for your app, and click Next.

Note: Follow these instructions to optionally configure SAML SSO with Okta.
Go to General tab, and choose SCIM in the Provisioning options, and click Save.

A new Provisioning tab will appear; open it and click Edit.
Fill in the fields as shown below:

- SCIM connector base URL: https://<ARTIFACTORY_URL>/access/api/v1/scim/v2
- Unique identifier field for users: userName
- Supported provisioning actions: Enable your preferred actions, in this example we enabled all of them, as we support in our platform all of these actions.
- Authentication Mode: HTTP Header
- Authorization: Paste the Access Admin Token you generated earlier.
Click Test Connector Configuration. A series of a successful action popups will appear:

Click Save, and go to the To App tab on the left menu, check all the checkboxes except “Sync Password”, since we are using SAML as our sign on method:

Click Save.
Hooray! You’ve configured SCIM with your JFrog Artifactory. Now all you have left is to use it.
Step 3: Start using SCIM with JFrog Artifactory
Create a user. Go to Directory > People > Add Person. Fill the fields and Save.

Now click the user you’ve just created, click Assign Applications, click Assign on your JFrog platform application.
Click Save and Done.

Now your new user will appear in your JFrog Platform in the Users page:

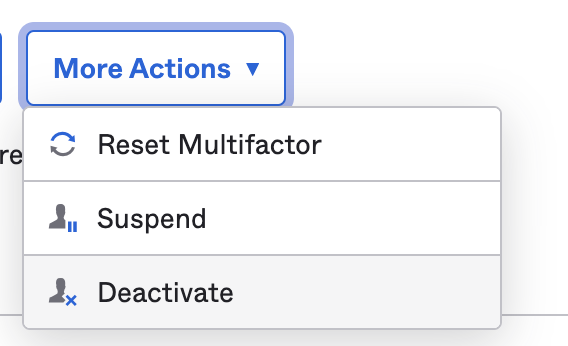
Let’s assume we want to disable the user, click More Actions > Deactivate.
Your change will be automatically provisioned to your JFrog Platform application:

Whenever you make changes to your users on Okta, these changes will be reflected in your JFrog Platform, such as deactivate users, assign users to groups, etc. In the same way you can create groups, and push them easily into your JFrog DevOps platform.
SCIM makes your life a lot easier and intuitive when it comes to managing your users and groups, which is JFrog’s main motivation for implementing SCIM ing the JFrog Platform. You’ll enjoy quick and automated actions, as described above, that will help avoid security and compliance issues; you can add admin privileges to a group, and assign a bunch of users to that group, simply performed in one place. As the number of users in your organization grows and everyone starts using multiple applications, these actions will become more and more common.
Start working with SCIM in the JFrog Platform >
Experience
JFrog Today
Discover how the JFrog Platform unites DevOps, DevSecOps and MLOps for secure, rapid software delivery.


