Herd Trust Into Your Rancher Labs Multi-Cloud Strategy with Artifactory

DevOps engineers have grown so reliant on the power and scalability of Kubernetes (K8s) clusters that one server platform can seldom accommodate them all. More and more enterprises now run their containerized applications in clusters across multiple platforms at once, in public clouds and on-prem servers.
That can fuel a chaotic stampede in an enterprise-class system – who has control, and which builds do you trust?
Rancher Labs offers a solution for managing multiple K8s clusters, and an enhanced Kubernetes distribution with additional features for central control of those clusters. Rancher provides a unified experience for running production clusters across multiple providers.
But a multi-cloud DevOps strategy also amplifies the possible damage from a harmful container, exposing not just one environment but several. Spreading your clusters across a wide landscape of platforms can make it harder to corral your risks.
Kubernetes registry enables trust
While containerized applications help provide great stability through features like immutability and declarative configuration, they don’t guarantee that the software they contain is trusted. Without full control of and visibility into the source and dependencies that go into your containers, elements you don’t want or need can sneak into your builds.
JFrog Artifactory can provide the hybrid Kubernetes registry you need that gives you full visibility into your containers. Click To Tweet Artifactory enables trust by giving you insight into your code-to-cluster process while providing visibility into each layer of each application. Moreover, a hybrid K8s registry will help you run applications effectively and safely across all clusters in all of the infrastructure environments you use.
Installing Artifactory with Rancher
Rancher makes it easy for you to install a high-availability instance of Artifactory through its catalog of applications directly into a Kubernetes cluster that you create for Artifactory. In this way, Artifactory instances can run in any of the infrastructure types you use, either on a public cloud or an on-prem server.
To start, install the Rancher Kubernetes Engine (RKE) onto a server and set up an admin account.
Step 1: Add a Cluster
From Rancher’s UI, add a new K8s cluster in the platform where your Artifactory instance will run.
- You can use a node template for nodes hosted by an infrastructure provider such as Google Cloud Platform (GCP), Amazon Web Services (AWS) or Azure, or set up a custom node for a local on-prem server.
- For a cluster on a hosted service like GKE, you may need to have a service account created by your support team that provides the privileges that you need.
- When you create the cluster, select a machine type powerful enough to support Artifactory (recommended minimum is 2 vCPUs, 7.5 Gb RAM)
- When you have completed your settings, provision the cluster. This may take several minutes to complete.
Step 2: Create a Project and Namespace
You can install Artifactory into the Default Rancher project that is automatically created when adding a cluster. However, it’s a good practice to create a Rancher project and namespace for Artifactory to run in,
For example, a project my-project and a namespace my-project-artifactory:

Step 3: Create a Certificate
The NGINX server used by Artifactory requires a certificate to run.
From the main menu, select Resources > Certificates. In the resulting page, supply the Private Key and Certificate, and assign the Name as artifactory-ha-tls.
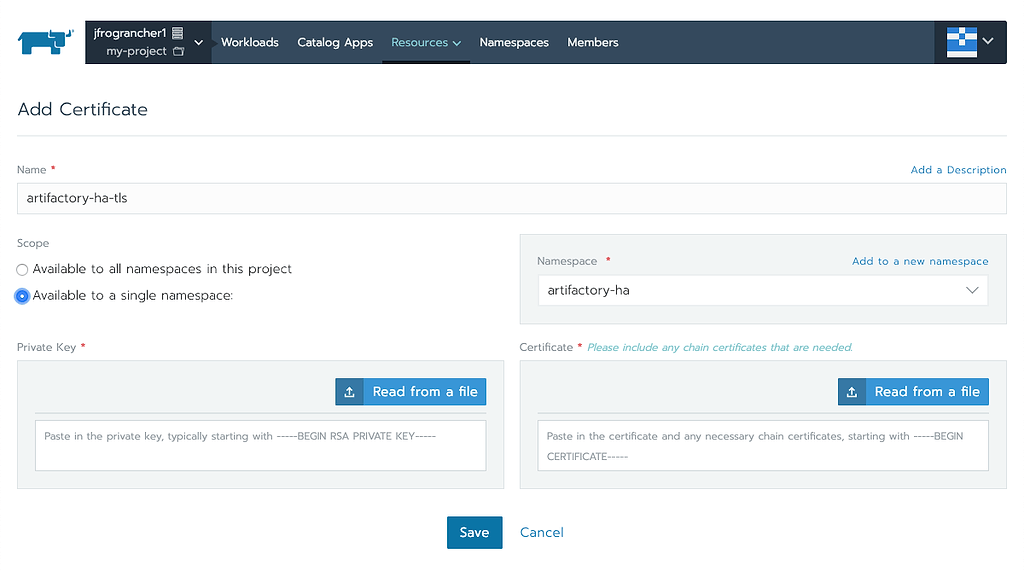
When complete, click Save.
Step 4: Add a ConfigMap
Artifactory will require a ConfigMap for general configuration information needed by its load balancer.
The following example ConfigMap should be used for a standard setup:
## add HA entries when ha is configure. upstream artifactory { server artifactory-ha-artifactory-ha-primary:8081; server artifactory-ha:8081; } ## add ssl entries when https has been set in config ssl_certificate /var/opt/jfrog/nginx/ssl/tls.crt; ssl_certificate_key /var/opt/jfrog/nginx/ssl/tls.key; ssl_session_cache shared:SSL:1m; ssl_prefer_server_ciphers on; ## server configuration server { listen 443 ssl; listen 80 ; server_name ~(?<repo>.+)\.jfrog.team jfrog.team; if ($http_x_forwarded_proto = '') { set $http_x_forwarded_proto $scheme; } ## Application specific logs ## access_log /var/log/nginx/jfrog.team-access.log timing; ## error_log /var/log/nginx/jfrog.team-error.log; rewrite ^/$ /artifactory/webapp/ redirect; rewrite ^/artifactory/?(/webapp)?$ /artifactory/webapp/ redirect; rewrite ^/(v1|v2)/(.*) /artifactory/api/docker/$repo/$1/$2; chunked_transfer_encoding on; client_max_body_size 0; location /artifactory/ { proxy_read_timeout 2400s; proxy_pass_header Server; proxy_cookie_path ~*^/.* /; if ( $request_uri ~ ^/artifactory/(.*)$ ) { proxy_pass https://artifactory/artifactory/$1; } proxy_pass https://artifactory/artifactory/; proxy_next_upstream http_503 non_idempotent; proxy_set_header X-Artifactory-Override-Base-Url $http_x_forwarded_proto://$host:$server_port/artifactory; proxy_set_header X-Forwarded-Port $server_port; proxy_set_header X-Forwarded-Proto $http_x_forwarded_proto; proxy_set_header Host $http_host; proxy_set_header X-Forwarded-For $proxy_add_x_forwarded_for; } } |
From the main menu, select Resources > Config Maps, then click Add Config Map.
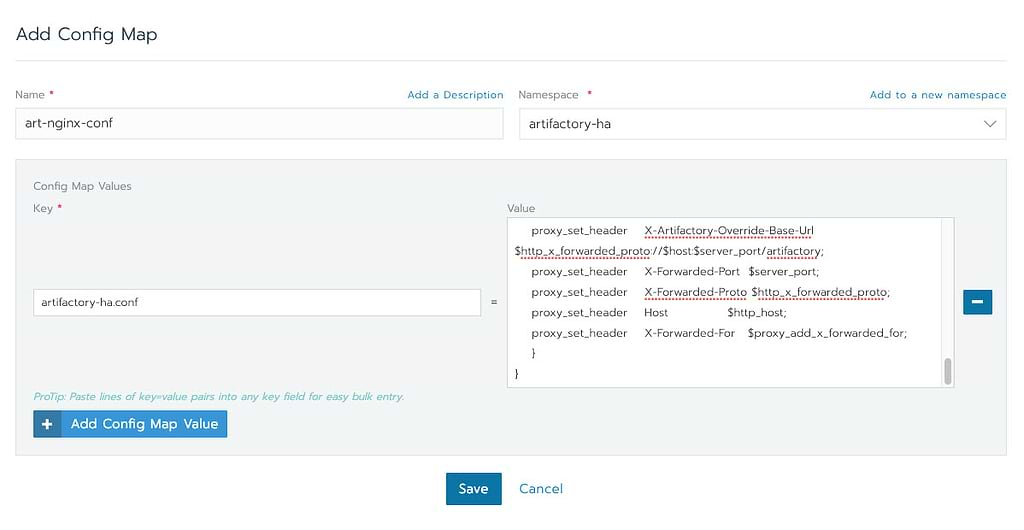
- In the Name field, enter art-nginx-conf
- In the Namespace field, enter the name of the created namespace.
- In the Key field, enter artifactory-ha.conf
- Copy the example ConfigMap and paste it into the Value field.
- Click Save
The ConfigMap will be used when Artifactory is installed.
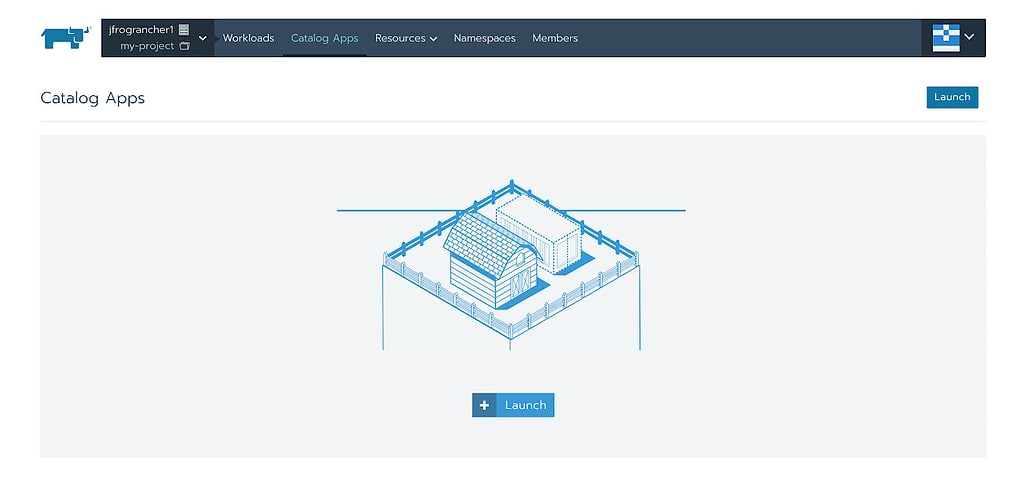
Step 5: Install Artifactory
Once you have a cluster, project, and namespace that Artifactory can run in, you can install it easily through Rancher’s catalog of applications.
-
-
- In the Rancher UI, click on Catalog Apps, then click the Launch button.
- In the catalog, find the JFrog artifactory-ha template marked “Partner”
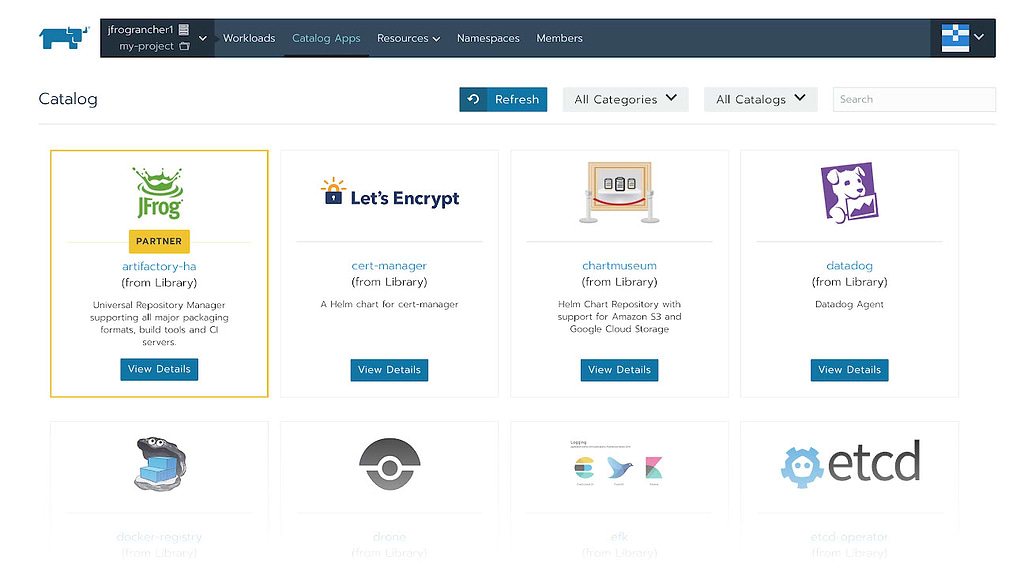
- Click View Details
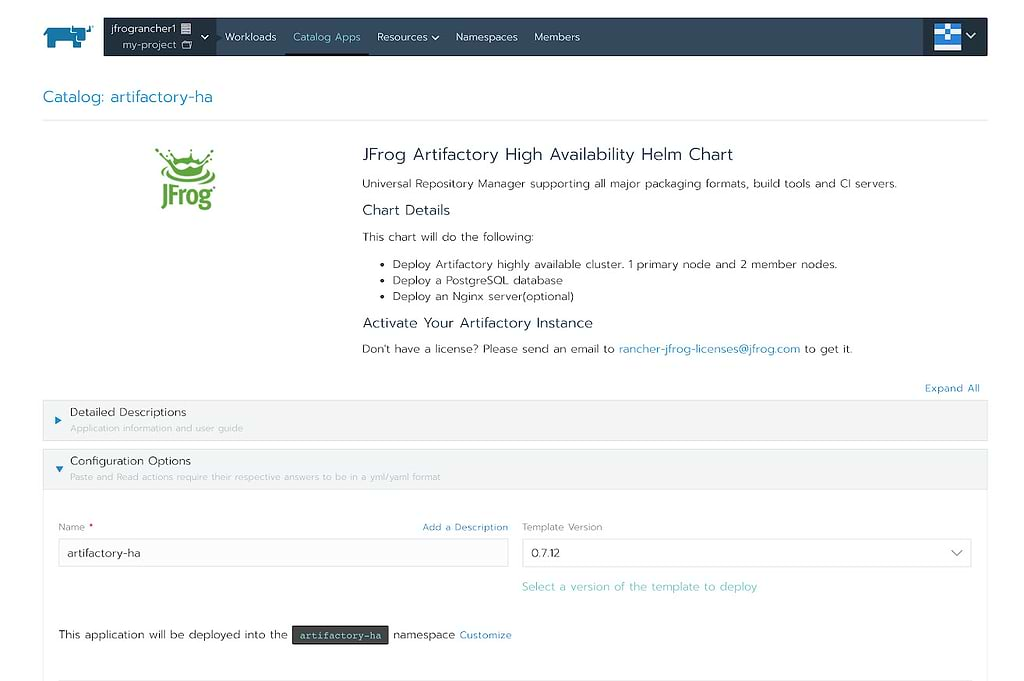
Scroll down to set the Configuration Options. Set the name, enable persistent storage, and set the persistent volume size to a value large enough to accommodate your expected needs.<br/Set the Container Images to use the Default Image, and the Services and Load Balancing settings to use the NGINX server, assign the artifactory-ha-tls secret and the art-nginx-conf ConfigMap that were created in the prior steps.

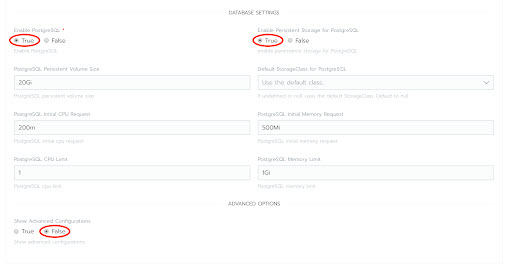
Set the Database Settings to enable and configure PostgreSQL.
Click Launch to perform the installation.
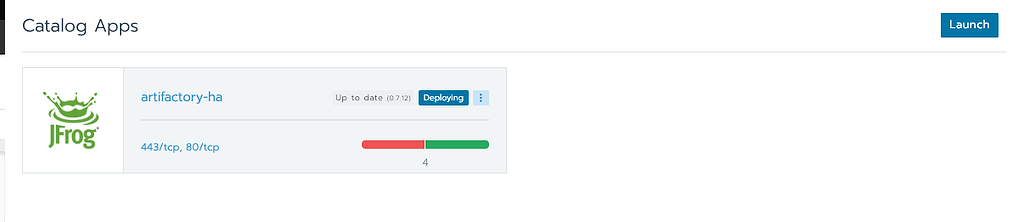
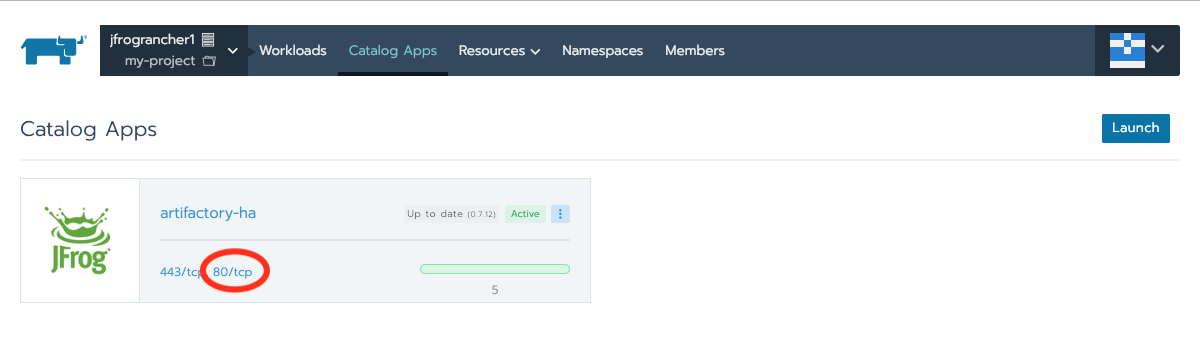
- The installation will likely take several minutes to complete. When finished, it will present the JFrog artifactory-ha app as Active.The URL for the Artifactory HA installation is presented as a hotlink (for example, 443/tcp, 80/tcp). Click on the link to access the Artifactory HA application.
- In the Rancher UI, click on Catalog Apps, then click the Launch button.
Give it a try
Rancher and Artifactory both bring many pieces that would be challenging to manage independently into a single system, bringing control and visibility to the process. Together, they help enforce uniform policies, promotion flow, and more under a set of universal managers, quelling the risk of disorder.
Rancher’s integration of Artifactory through its catalog makes it especially easy to deploy and manage a hybrid Kubernetes Registry across all of the clusters you need across your organization.
If you’re already a Rancher user, you can install Artifactory immediately through the catalog of applications.
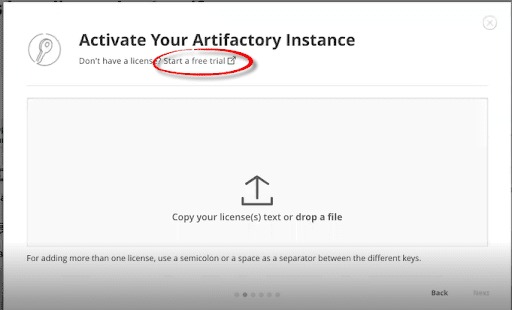
If you are new to Artifactory, you can request a set of three Artifactory Enterprise licenses for a free trial by emailing rancher-jfrog-licenses@jfrog.com
-


