

GitLab CI and Artifactory: On Your Mark, Get Set, Build!

Note: This blog post was updated on Sept 20, 2022.
Integrating GitLab CI pipelines with the JFrog Platform makes your software release fast and secure a reality. This blog post describes how to integrate GitLab CI with Artifactory and Xray, in order to make sure any artifact deployed, is properly managed and protected from any unwanted OSS security and license compliance risks.
Read the updated post on Gitlab Ci/CD >>
Manage and scan published artifacts
GitLab CI helps automate your delivery process by triggering a CI pipeline whenever any change is introduced into your code. However tracking this delivery process and ensuring it is well documented and managed is a different story. To overcome this, Artifactory seamlessly enables you to track your artifacts deployment and collect all relevant variables to be able to properly manage your deployments. Via JFrog CLI, GitLab CI fetches, caches, and publishes your dependencies, created packages, and build information to Artifactory. Finally, Xray, JFrog’s application security SCA tool, ensures that any artifact deployed is scanned for security vulnerabilities, preventing any unsecure binary from being deployed to your production environments.

Artifactory’s Build Integration automatically links each generated package to its relevant build, dependencies, information, and collects a new set of metadata that you might not have benefited from until now. Once Artifactory is integrated with GitLab CI, you can store and view metadata information such as:
- Published modules
- Build information
- System variables
- Environment variables
- Package dependencies (SBOM)
- Used Dependencies
- License Summary
- Links to your issue-tracker
- Diffs between builds
The data stored in the Artifactory database allows you to retrieve it also using the Artifactory Query Language.
Integrate Artifactory into your GitLab pipeline
The following step-by-step example demonstrates how to integrate Artifactory and Xray into your GitLab pipeline. In this example we’ll use JFrog CLI to perform a gradle build, but any package builder can be used with JFrog CLI in the same way. You can find the GitLab example pipeline in the GitHub examples project.
- Create a new GitLab project.
- Clone your code project to GitLab VCS, for example: Spring PetClinic.
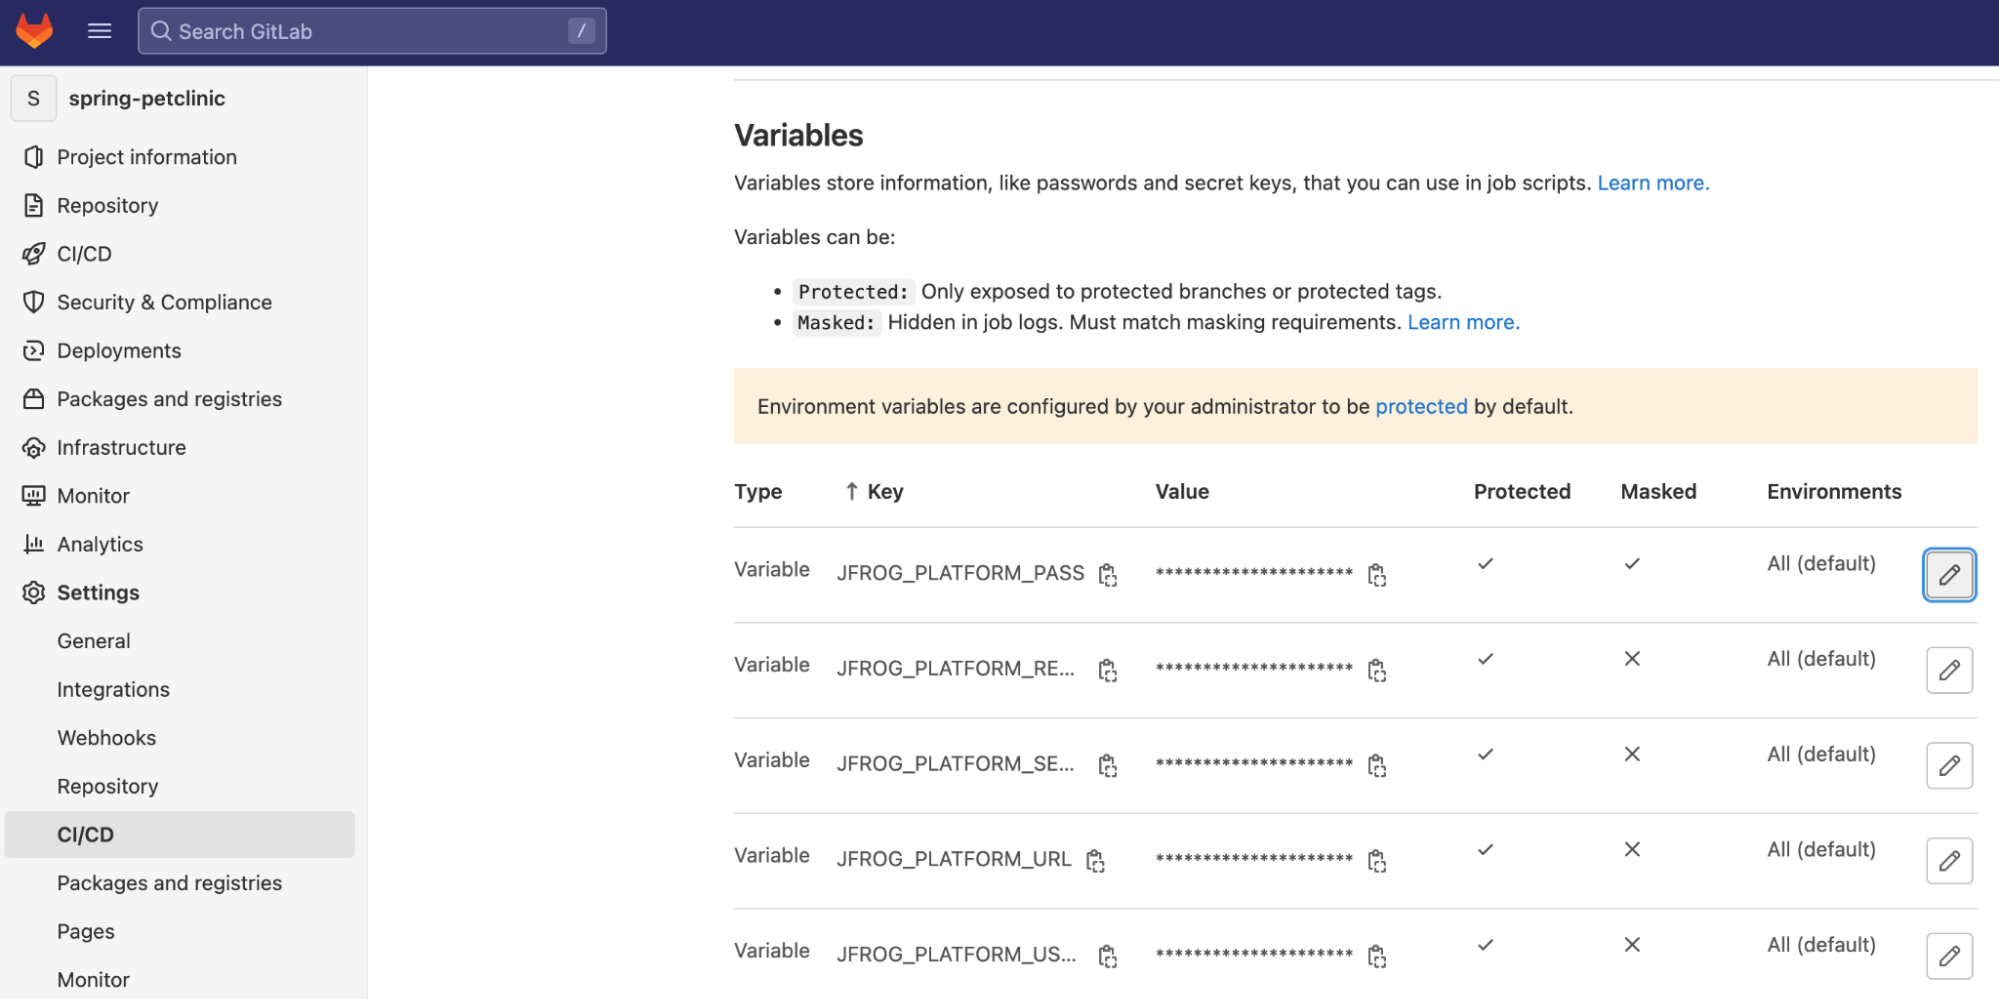
- Configure the following variables in GitLab, under Settings > CI/CD > Variables:
JFROG_PLATFORM_SERVER_ID: a unique server ID used to reference the server configuration from within the pipeline codeJFROG_PLATFORM_URL: the JFrog Platform server URL usedJFROG_PLATFORM_USER: the user name used to access JFrog PlatformJFROG_PLATFORM_PASS: a password or token used to validate the user
(Note: it is recommended to use a masked variable for confidential variables such as secrets.)JFROG_PLATFORM_REPO: a virtual repository used to upload and download artifacts from JFrog Platform

- Create a new pipeline in GitLab and copy the following pipeline yaml code:
image: gradle:latest

before_script:
 # Download JFrog CLI
 -  curl -fL https://install-cli.jfrog.io | sh
 # configure artifactory server
 - jf config add $JFROG_PLATFORM_SERVER_ID--url=$JFROG_PLATFORM_URL --user=$JFROG_PLATFORM_USER --password=$JFROG_PLATFORM_PASS
 - jf config show

 # configure gradle, set upload and download repos
 - jf gradlec --repo-resolve $JFROG_PLATFORM_REPO --repo-deploy $JFROG_PLATFORM_REPO

gitlab-ci-gradle-build: #This job name will be used as the build info repository name in artifactory
 stage: build
 script:
   # upload the built artifact to artifactory
   - jf gradle clean artifactoryPublish --build-name=$CI_JOB_NAME --build-number=$CI_JOB_ID
   # Collect environment variables for the build
   - jf rt bce $CI_JOB_NAME $CI_JOB_ID
   # Collect VCS details from git and add them to the build
   - jf rt bag $CI_JOB_NAME $CI_JOB_ID
   # Publish build info
   - jf rt bp $CI_JOB_NAME $CI_JOB_ID
   # Scan with xray
   - jf bs $CI_JOB_NAME $CI_JOB_ID
Run the pipeline
By default, GitLab pipelines are triggered whenever a change is committed to the project repo. However, you can manually trigger the pipeline by going to: CI/CD > Pipelines and clicking “Run pipeline”. To view the pipeline execution logs navigate to: CI/CD > Jobs and click the relevant job execution.

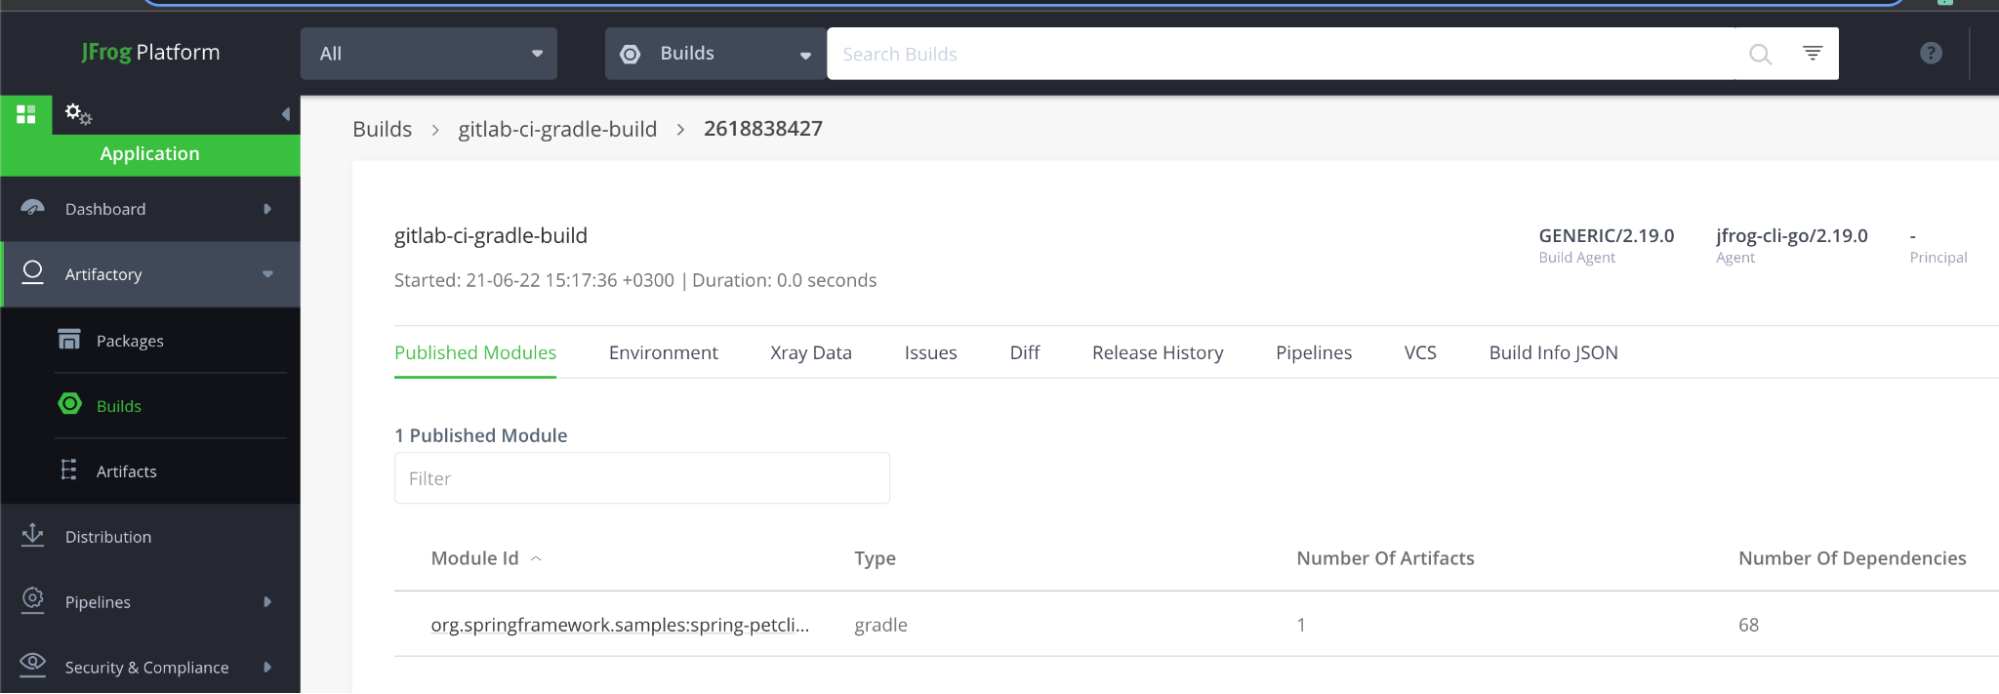
After the job execution is successfully complete, navigate to the JFrog Platform and view the deployed artifact, including all of the collected build information:
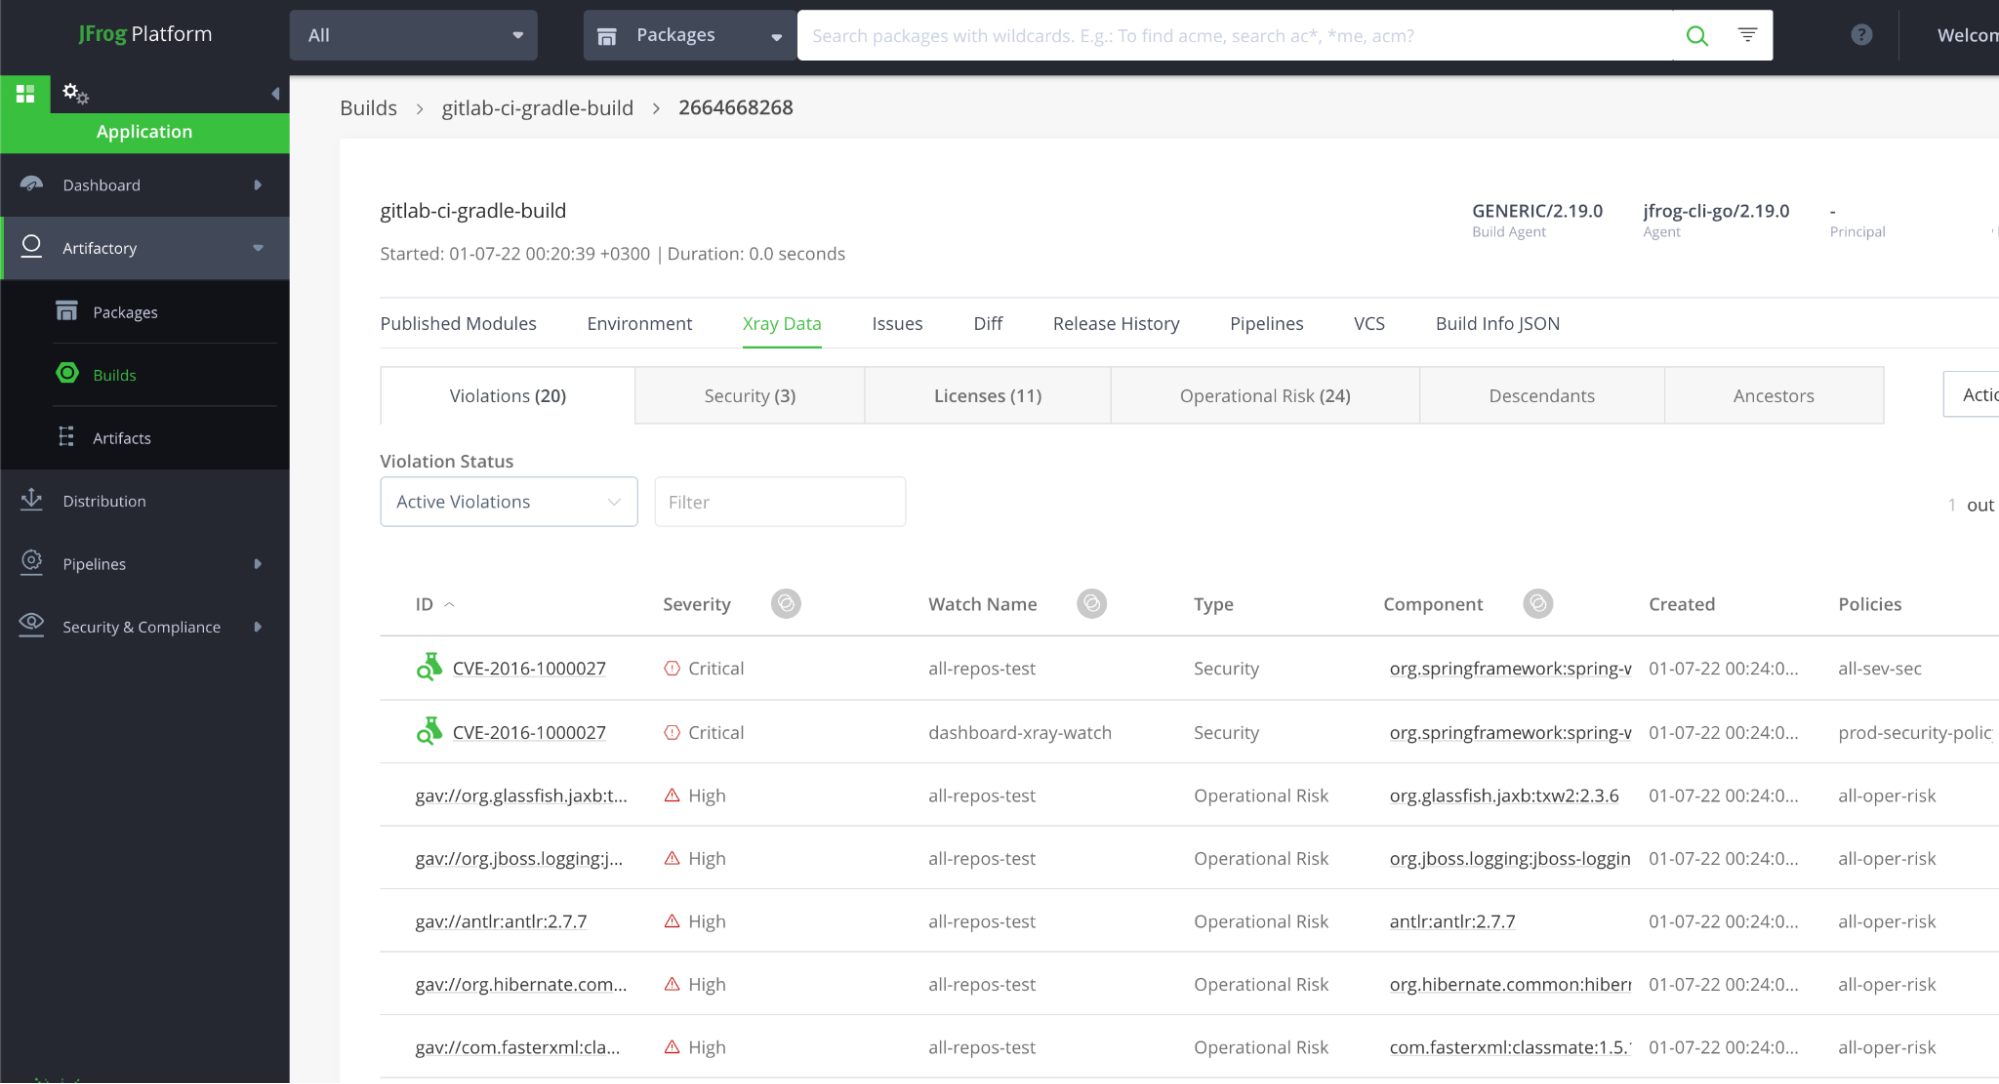
To view the Xray scan results, navigate to the “Xray Data” tab in the Builds page in the Platform:
That’s it! You’re done.
Experience
JFrog Today
Discover how the JFrog Platform unites DevOps, DevSecOps and MLOps for secure, rapid software delivery.


