

Creating your first Pub project with JFrog Artifactory

By
7 min read

Developers today need to build software from many platforms in order to reach their users. All while maintaining quality and achieving the best user experience possible. This can be a challenging task when you need to meet the growing needs of software development. This is where the Dart and Flutter come into the picture.
A bit about Dart and Flutter
Before diving into the technical details, let’s start with some background.
Dart and Flutter continue to gain popularity with developers since they are easy to learn open source developer friendly languages. The Flutter SDK enables you to easily ship applications for Android, iOS and web from a single codebase. While supporting all of these platforms, it provides developers with a fast development experience. Dart is a programming language designed for web and mobile app client development. It was created and developed by Google, and can also be used to build server and desktop applications.
To better understand the benefits of Dart and Flutter, here is a simple demo application that you can easily run on Android Studio. Let’s take a look at what it includes.
Part 1: My first Flutter application
Getting started with the Dart language is easy. The following example demonstrates the unique Dart language syntax that makes Dart one of the high-demand languages for developers.
The below code snippet allows us to display an application title with the primarySwatch color green.
One of the benefits of using Dart is that you can easily make changes, save the project and immediately see the updates. For example with the title and colors in the below snippet.

Example code: creating a simple widget under the main.dart file
Widget build(BuildContext context) {

   return MaterialApp(
     title: 'JFrog Card',
     theme: ThemeData(
       primarySwatch: Colors.green,
     ),
     home: const MyHomePage(title: 'Welcome to JFrog Security application'),
   );
 }
}
Another benefit is the ability to help those both new and experienced in the language. Developers in the Dart community can share packages using the official Dart and Flutter public package repository, which includes libraries for databases, routing and functions.
The following example displays a heading, subheading, text and logo for our application. It also includes a card design for security updates.
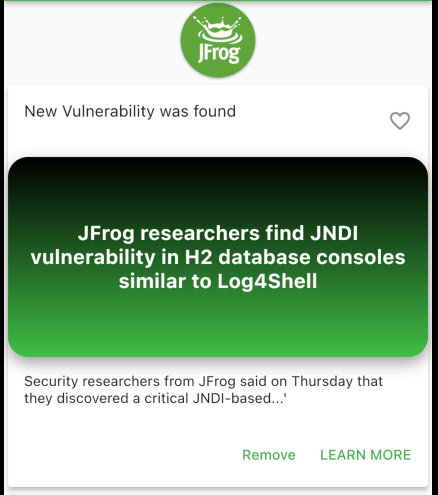
Example code: creating a JFrog security vulnerability card using a widget.
class JfrogCard extends StatelessWidget {
 const JfrogCard({
   Key? key,
   required this.heading,
   this.subheading = "",
   this.mainCardText = "Default Text",
   required this.supportingText,
 }) : super(key: key);

 final String heading;
 final String subheading;
 final String supportingText;
 final String mainCardText;

 @override
 Widget build(BuildContext context) {
   return Card(
       elevation: 4.0,
       child: Column(
         children: [
           ListTile(
             title: Text(heading),
             subtitle: Text(subheading),
             trailing: Icon(Icons.favorite_outline),
           ),
           Container(
               height: 200.0,
               child: Center(
                 child: Padding(
                   padding: EdgeInsets.all(8.0),
                   child: Center(
                     child: Text(
                       mainCardText,
                       style: TextStyle(
                           fontWeight: FontWeight.bold,
                           fontSize: 20.0,
                           color: Colors.white),
                       textAlign: TextAlign.center,
                     ),
                   ),
                 ),
               ),
               decoration: const BoxDecoration(
                 borderRadius: BorderRadius.all(Radius.circular(20.0)),
                 gradient: LinearGradient(
                     colors: [Color(0xFF40be46), Color(0xFF000000)],
                     begin: Alignment.bottomCenter,
                     end: Alignment.topCenter),
                 boxShadow: [
                   BoxShadow(
                     color: Colors.grey,
                     blurRadius: 12,
                     offset: Offset(0, 6),
                   ),
                 ],
               )),
           Container(
             padding: EdgeInsets.all(16.0),
             alignment: Alignment.centerLeft,
             child: Text(supportingText),
           ),
           ButtonBar(
             children: [
               TextButton(
                 child: const Text('Remove'),
                 onPressed: () {
                   log('I Was pressed remove');
                 },
               ),
               TextButton(
                 child: const Text('LEARN MORE'),
                 onPressed: () {
                   log('I Was pressed to learn');
                 },
               )
             ],
           )
         ],
       ));
 }
}
Now, let’s see how you can share this card design with your team using JFrog Artifactory as your binary repository manager.
Part 2: JFrog Artifactory as your Pub repository manager
To make this card design available for anyone to use, we can upload it as a package to a JFrog Artifactory server. To do this, we need to start by creating new pub repositories in the JFrog Platform.
Don’t have an account yet, start for free here >
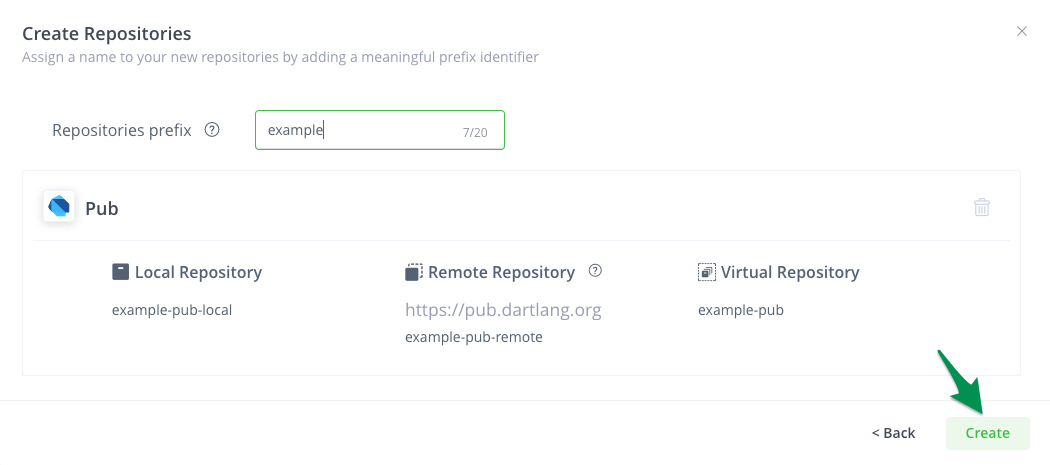
- Step 1: From the JFrog Platform, click on “Quick Setup” to create your repositories:

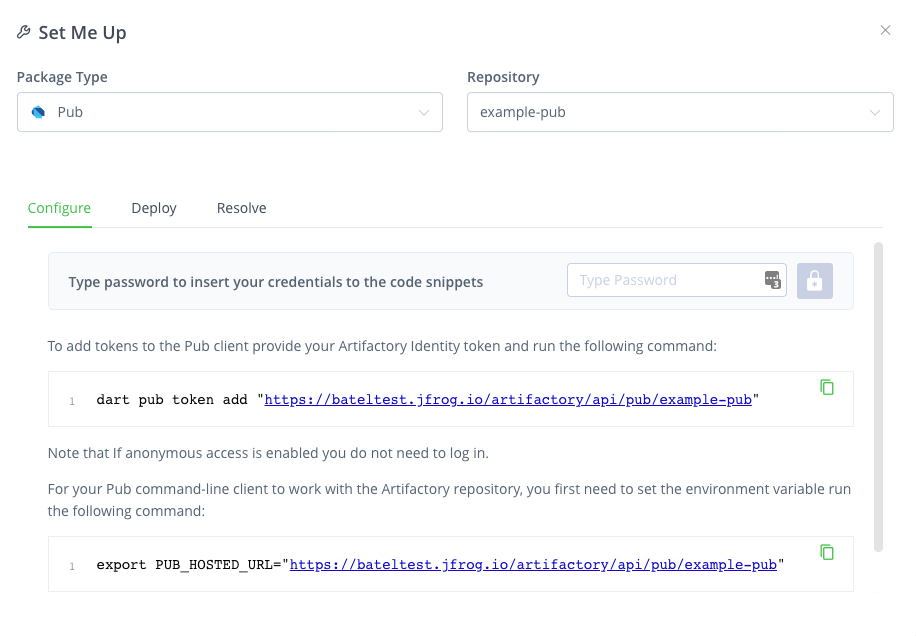
- Step 2: Click on the ”Set Me Up” to configure the Dart client:

By default, the Remote Pub repository will point to the official Pub.dev package repository for Dart and Flutter. This reliable public repository has a growing ecosystem of more than 24,000 packages! Shared within the open source community.
Learn more about local, remote and virtual Pub repositories > - Step 3: Create a “Card” package (using the code from the application example above), and upload it to your new local repository so that it can easily be reused by other applications.
Clone the widget, including all of the configurations (see the part 2 directory of the application example)Widget build(BuildContext context) { return Card( elevation: 4.0, child: Column( children: [ ListTile( title: Text(heading), subtitle: Text(subheading), trailing: Icon(Icons.favorite_outline), ), Container( height: 200.0, child: Center( child: Padding( padding: EdgeInsets.all(8.0), child: Center( child: Text( mainCardText, style: TextStyle( fontWeight: FontWeight.bold, fontSize: 20.0, color: Colors.white), textAlign: TextAlign.center, ), ), ), ), decoration: const BoxDecoration( borderRadius: BorderRadius.all(Radius.circular(20.0)), gradient: LinearGradient( colors: [Color(0xFF40be46), Color(0xFF000000)], begin: Alignment.bottomCenter, end: Alignment.topCenter), boxShadow: [ BoxShadow( color: Colors.grey, blurRadius: 12, offset: Offset(0, 6), ), ], )), Container( padding: EdgeInsets.all(16.0), alignment: Alignment.centerLeft, child: Text(supportingText), ), ButtonBar( children: [ TextButton( child: const Text('Remove'), onPressed: () { log('I Was pressed remove'); }, ), TextButton( child: const Text('LEARN MORE'), onPressed: () { log('I Was pressed to learn'); }, ) ], ) ], )); }Note: You can create versions for the Card package in the pubspec that’s generated automatically when we create a new Flutter project. For example, to create a different card version with different styles, change the style in the main configuration file and save it as an additional version in the pubspec.

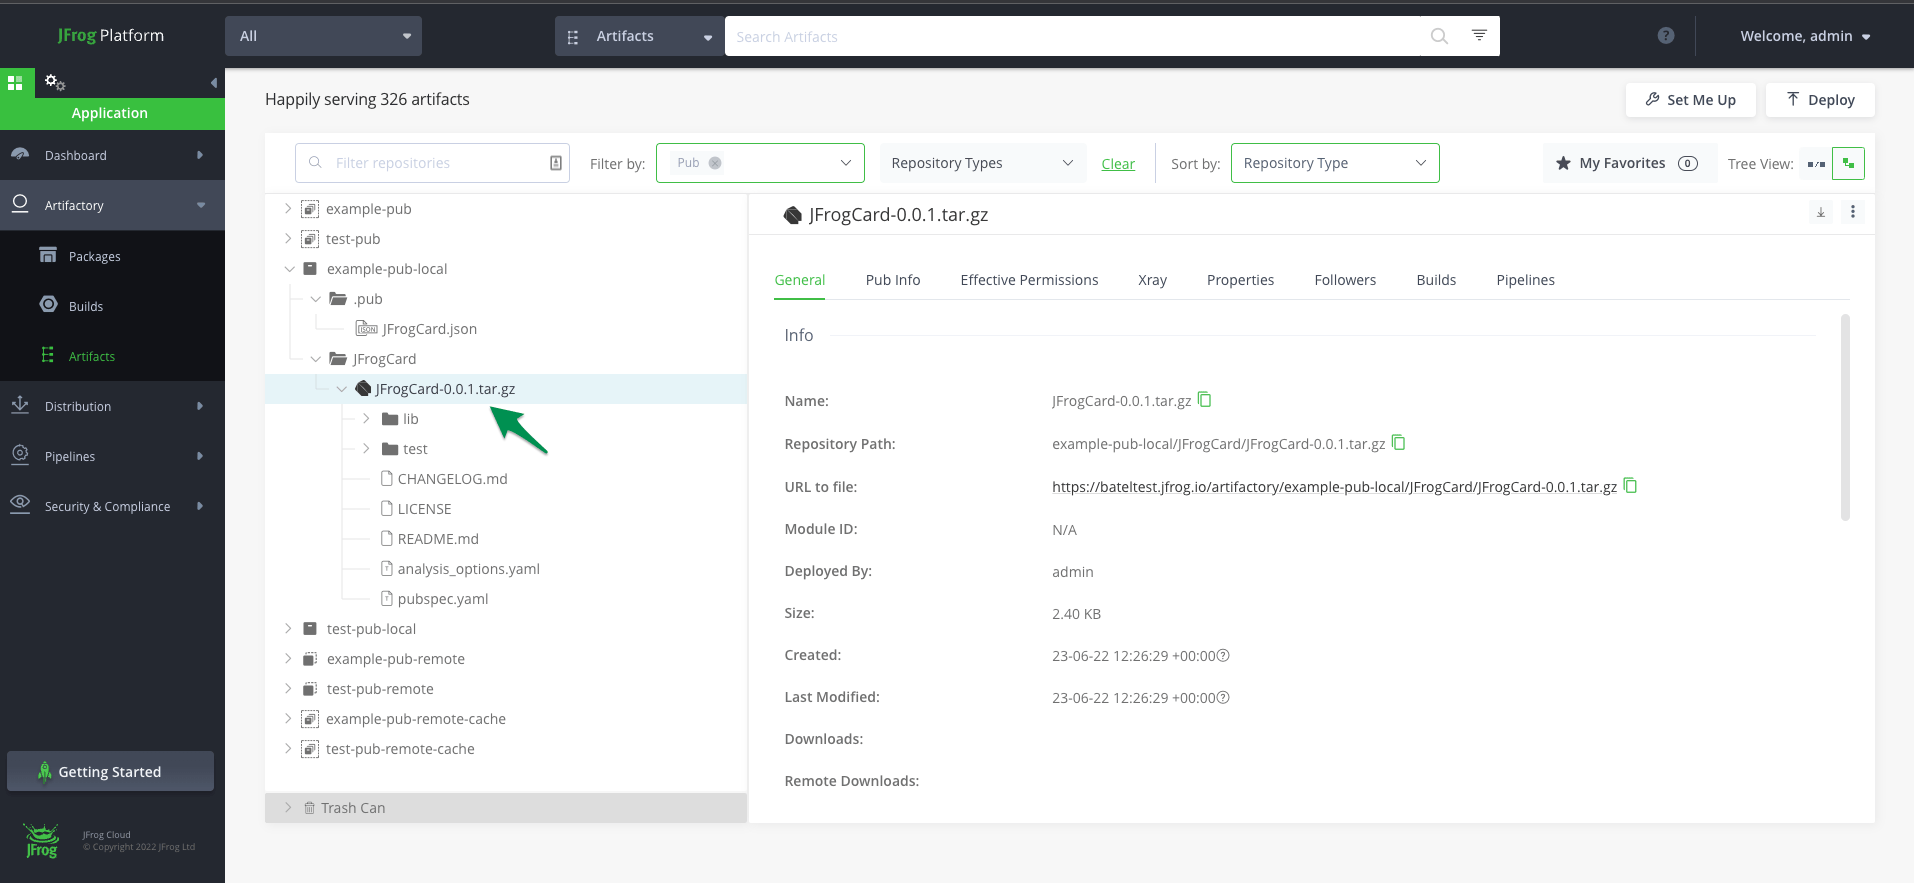
- Step 4: Upload the Card package to the Pub-example-localI repository that we created above. Use the “Set Me Up” configuration to do this.
 Note: To use authentication create an identity token under the user admin.
 - Step 5: Use the deploy command to upload the package into your private repository in Artifactory.
$ dart pub publish

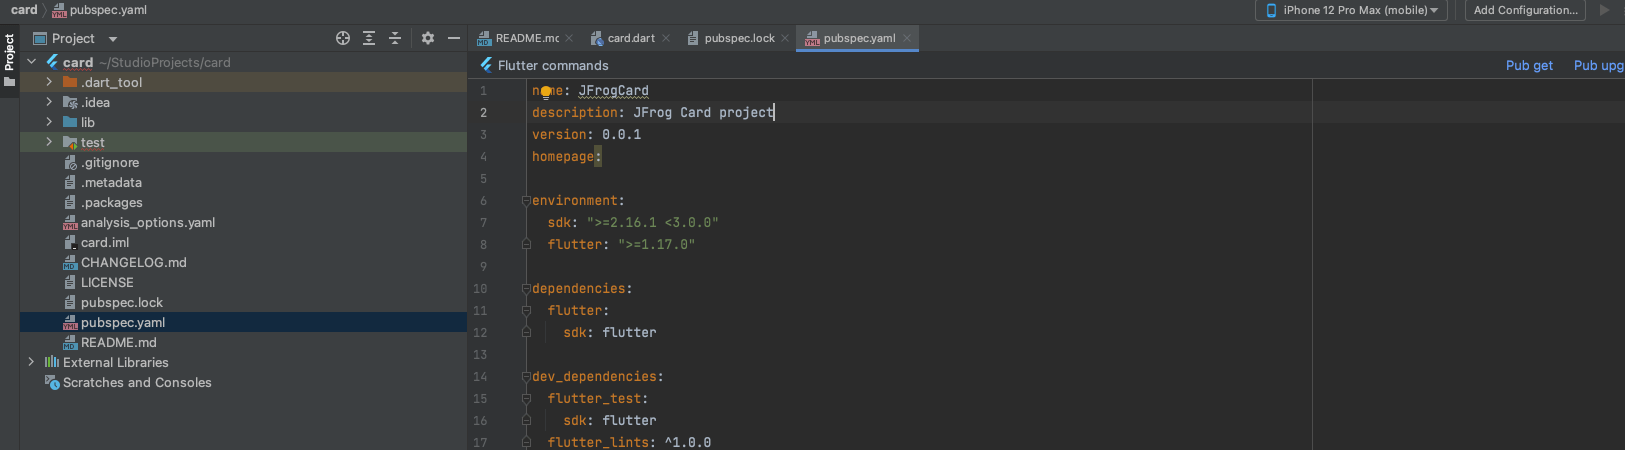
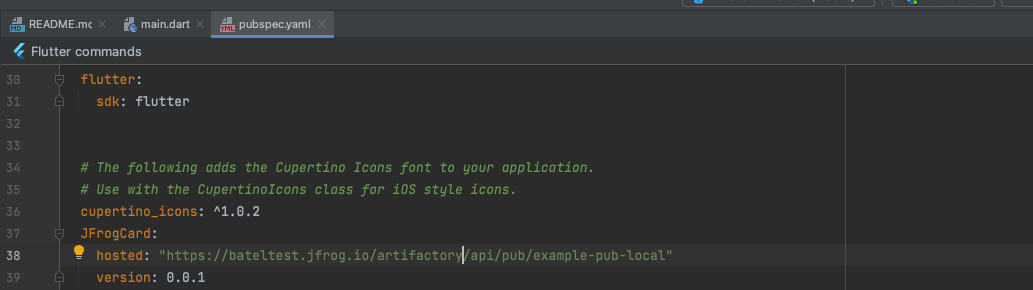
- Step 6: Use the new package we uploaded as a dependency. Edit your pubspec with the following:
JFrogCard:
 hosted: "/artifactory/api/pub/"
 version: 0.0.1
For example:

- Step 7: Import the JFrogCard to your main.dart:

- Step 8: Get the dependencies from the Pub repository in Artifactory and run the project.

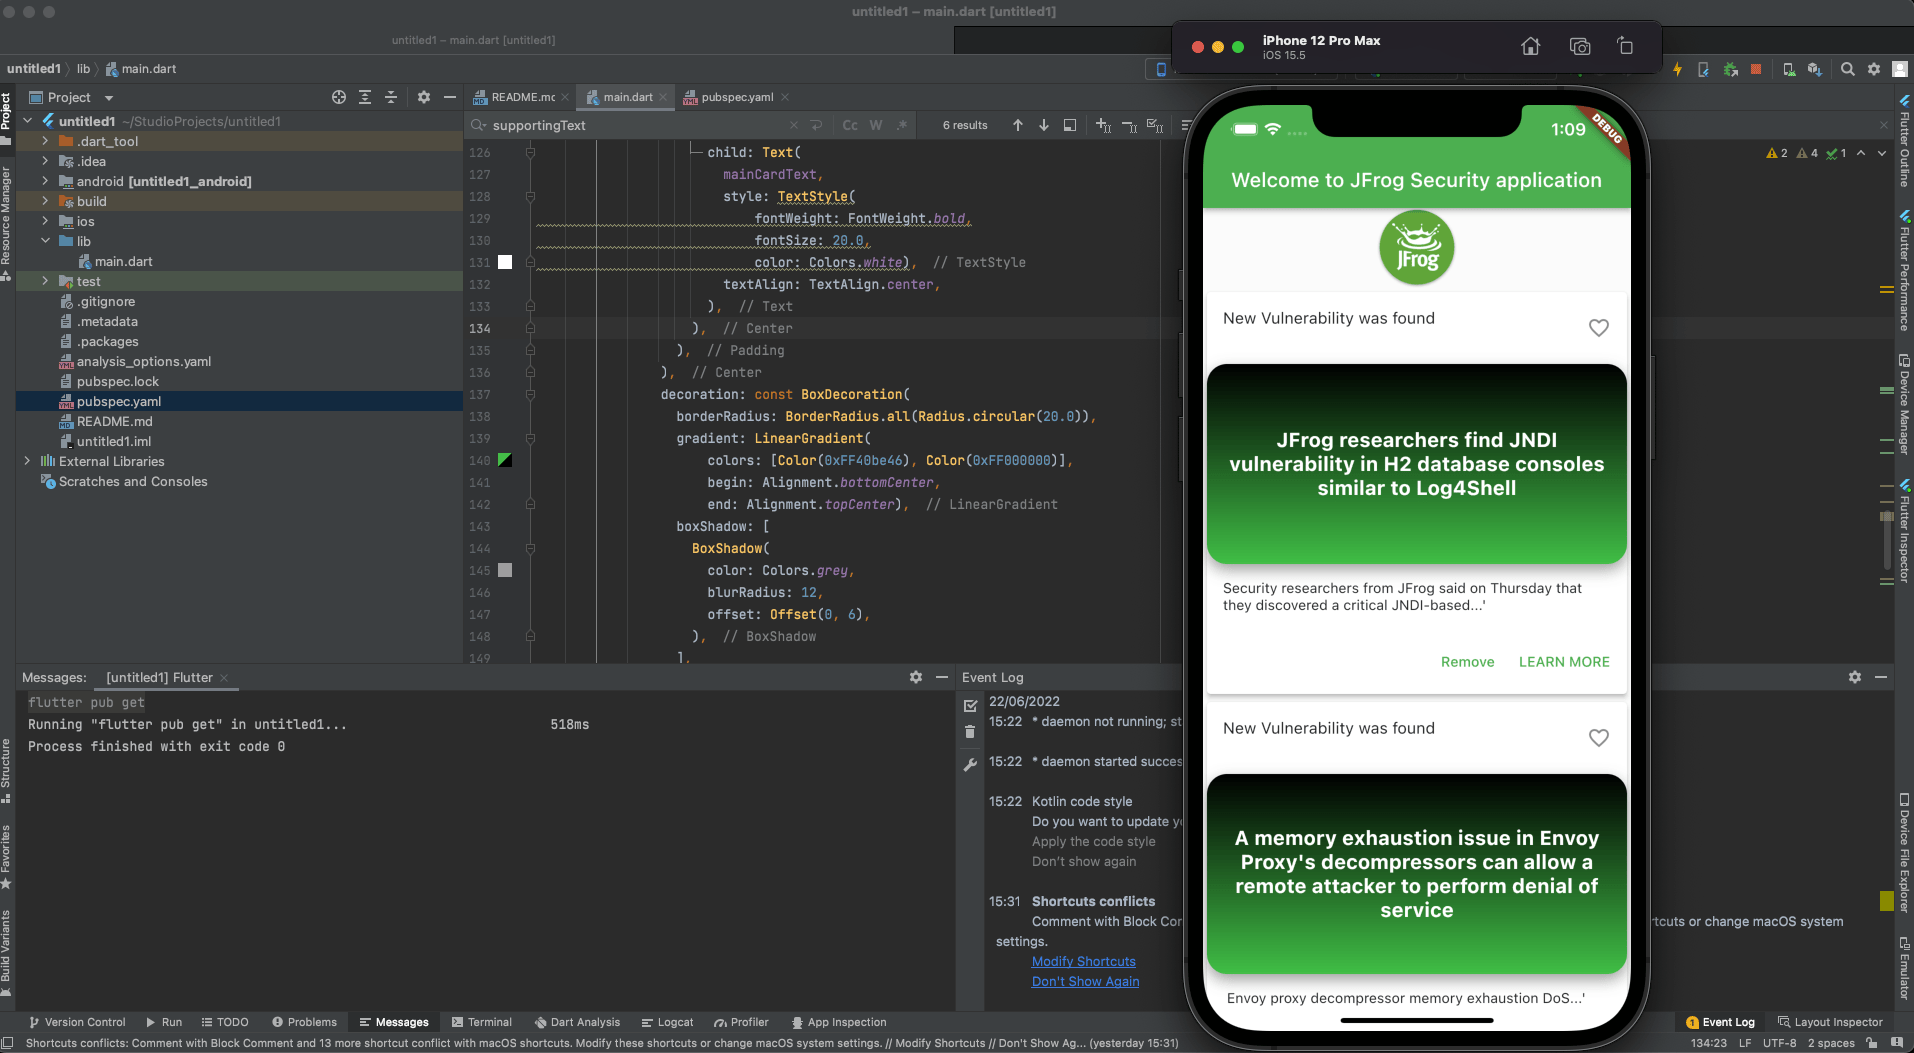
That’s it! You’re all set with your first Flutter application!
Get started with a free JFrog cloud account >
Experience
JFrog Today
Discover how the JFrog Platform unites DevOps, DevSecOps and MLOps for secure, rapid software delivery.


