JFrog Connect REST API – Changing Device Details
In a deployment where there are many endpoints/edges, it may most often be ideal to enroll devices before deployment, and at their first boot, run a small script script to introduce themselves to the JFrog Connect dashboard along with its information such as device name, group (if any), software version, physical location etc. to distinguish one from other devices. This form of setup requires minimum user/developer intervention and provides quick and easy integration of the device with the platform.
In this guide, let’s take a look at JFrog Connect’s device details API call, which is an HTTP POST request, which the payload should be in the form of JSON array.
For simplicity, the script is written in Python and the prerequisite modules are json and requests. These are by default installed with every Python installation, and are cross-platform compatible.
Step 1 – Obtain the User Token and the Device ID [optional]
The user token can be found in the Settings section in the JFrog Connect dashboard, by clicking on Show Account Token. This token is unique to your account and cannot be changed.
The Device ID is unique to a device and each device receives one upon first enrollment/registration, and can be found at /etc/upswift/service/settings.json file. This file also contains the User/Account Token.
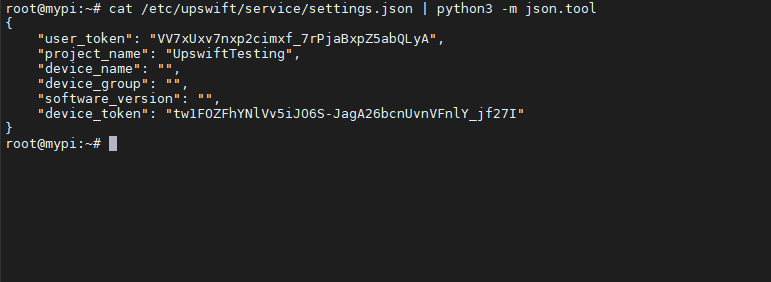
However, for the sake of fully automating the process, we will be fetching the Device ID and User Token from the settings.json file from the Python script itself.
Step 2 – Python script template for changing the device details
Following the official documentation for the API, the following Python script template can then be used to update the device details in the dashboard.
Create a new file using nano <filename>.py and type in the script, and update the details accordingly. Then, press Ctrl+O and press Enter to confirm save.
Step 3 – Execute the script and verify the functionality
Type in the command python <filename>.py (which was used to name the script in Step 3), and press Enter. (in the following example, the file has been saved as upswift_device_details_update.py)

Upon successful completion of the script, the above output should be displayed. If any error occurred, the script will print out the error message for further debugging.
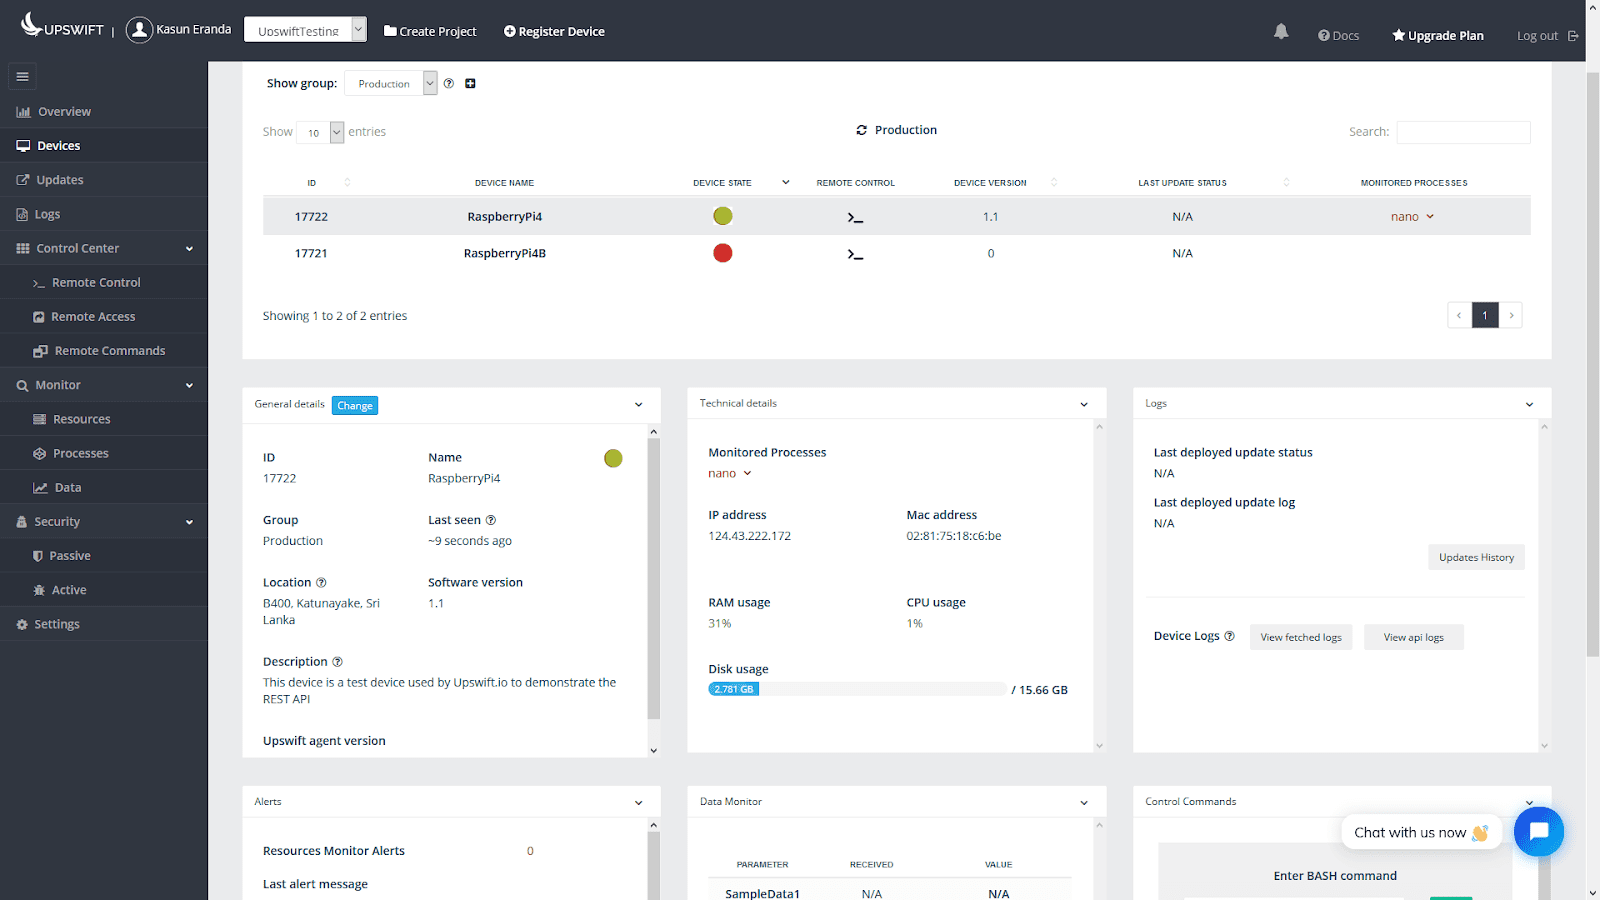
Step 4 – Verify the changes
The updated information can be checked and verified by visiting the Devices section of the dashboard and clicking on the Device name, and reviewing the General details section
For more information on the JFrog Connect Change Device Details API, please feel free to refer to the official documentation.