

From Git to Kubernetes: Cloud-Native DevOps
Watch our webinar to learn best-practices when using the JFrog Platform to store and manage your Docker images and Kubernetes deployments from beginning to end, while also setting up a continuous build, test and deploy pipeline.
We’ll cover best practices for managing and creating Docker registries and Helm repositories, testing and promotion of Docker containers, and taking your containers all the way to production using the JFrog Platform and Kubernetes together.
We’ll show:
– How to trigger container image creation
– How to store all the container images
– How to test the containers upon build
– How to deploy container images when all tests have passed
Who should attend:
Developers and DevOps engineers who are currently using Artifactory and Kubernetes and want to know how to leverage the integration to the greatest extent.
Pre-requisites
Working knowledge of JFrog Artifactory & Kubernetes
Read the whitepaper here and learn the best practices for taking your containers all the way to production!

Register here to see this resource

Transcript
Hello. Good morning, good afternoon, good evening to those joining us around the world. My name is Sean, your friendly product marketer here at JFrog. We’re super excited for this webinar today, which as you can see in front of you is From Git to Kubernetes. But before we jump in with our awesome host, just a few housekeeping items. This webinar is being recorded and we will share that with you typically within one to two business days after you watch it. So no worries, you’re going to get it. The second thing is, this is a very full webinar, so we’re going to try to answer any questions that come up. You can drop those into the chat, but we probably won’t have time to get to them at the end. So if we don’t answer your question, someone from our team will definitely follow up with you to make sure that you get an answer.
So please do drop those questions in. If we don’t get to them, we’ll make sure that we get your answers to you after the webinar wraps up. So without that, because this is jam packed, I’m going to go ahead and hand it over to our presenter today, the one and only Bill Manning. He’s the man, the myth, the legend. He’s going to take us through it all. So Bill, go ahead and take it away.
Thanks Sean, I really appreciate it. So, how you doing, I’m Bill Manning. I am actually one of the Solution Architects and also Solution Engineering Manager here for the Americas. We got, like I said, we have a very jam packed schedule today on what we’re going to discuss. But just so you know, the basic agenda is as follows. We’re going to talk about the JFrog platform for a bit. We’re going to talk about how you plan your journey from going from Git to Kubernetes, because we do realize that a lot of companies out there are starting this journey to going into the idea of orchestration and whatnot. And so this is the best practice. And one of the things that we’re going to be discussing in here and showing a lot of practical examples is things like what automation tools can you use, how you can use our API, our CLI and other things that we offer for CI integrations. How to design and build your repositories to match your SDLC as part of this, so you can have dev and QA and staging and production.
By the way, one of the things we’ll touch upon in this is also things like FOS libraries that make up 85 to 90% of your software. We have tons of actually webinars based on this already. If you want just go to our YouTube channel, go to our JFrog page for resources, JFrog.com and you can see a lot of the other things that we offer. But we’re also going to be talking about something very important and it’s very near and dear to my heart when we talk about this, which is software builds and build info. I see a lot of customers these days that when they build, they’re just publishing their builds right into Artifactory without a lot of context. But the thing is, one of the powerful pieces of what we do at JFrog and Artifactory is not only maintaining and managing the binaries out of third party libraries, really what you’re utilizing to make your software, we support over 32 package types.
But on top of that too, understanding that when you produce a build, how is it built? What did it contain? And we’ll talk about that. We’ll talk about docker containers and some best practices around there. I’ll show you a really neat trick where you can use our download spec that we have to actually download specific versions of Artifactory based on things like properties and metadata. We’ll talk about Helm and I’ll show you how you can use that same metadata that’s inside of Artifactory to go ahead and dynamically create Helm Charts to your deployments.
We’ll talk about things like release bundles, which is a way to package up those Helm Charts, save the docker images that are going to be called in those Helm Charts and actually bring those together with things maybe with Terraform or whatever, package them up into a thing called a release bundle. And then lastly, how to distribute them out into your environment. And I’ll even show you a quick end one if I have time on how you can actually even make additional steps where you can even deploy these. It’s all about automating. It’s all about going from your source code down to an orchestrated scalable environment.
Now understanding that, you need to understand our platform ’cause we’ll be utilizing a huge chunk of that today. So first of all, we have Artifactory, which is the next cornerstone of our technology. It’s the universal binary repository manager. What that means is that we maintain and manage the third party transit dependencies that make up 85 to 90% of your software and also the software builds you produce. One of the things we’ll talk about today is also your software development life cycle ’cause one of the key features that we have inside of Artifactory is your ability to design the repositories where you store the bills that you create no matter what type they are and promote the builds through that cycle from dev to QA to staging and production.
I have whole talks actually based on this idea, but we’ll touch upon it today. And when you go into the deeper dive in this, just know too, you can change the ACLs between each stage of the SDLC itself. So where developers might have a little more free rein and do whatever they want to do, you’re probably going to want to restrict things for QA so they can only read the data, but you’re going to want them also to publish the information they have back into Artifactory as the system of record because Artifactory should be your central source for all the software you produced. How it was made, when it was made, when it was used, what was used to create it with system settings. There’s a lot of information here.
Now, of course, those 85 to 90% of those binary is those libraries that you’re actually ingesting and utilizing, the thing is that right now there’s a lot of attacks on the software supply chain, and the reason why I bring that up is cause one of the main features that we bring in here is curation and also creation. And the thing is that we have the ability using our x-ray product to number one, pre-vet by those third party libraries, both implicit or direct and also indirect, the ones you actually request and the ones that come along for the ride. On top of that, we also have the ability to scanning things like docker images and also things like infrastructure as code with our advanced security.
Like I said, we have tons of information on our X-ray product. Just so you’re also aware what makes us different from the rest of the other technologies that are looking at these potential threats and vulnerabilities is ours is continuous because the way Artifactory and x-ray are together, and one of the things it does is the metadata I was talking about earlier, that we’re going to utilize to do some of our bills, is also the same metadata that our x-ray product uses to evaluate those libraries and make sure that you’re not having anything potentially threatening or malicious in the stuff that you create. Because just to give you an idea. In 2021, there was a 650% increase in supply chain attacks alone and it’s only gone up from there.
To the right of that, we have the consumption portion of what we do, meaning the things that are consumed. So this is actually a way for you to use our distribution model if you want to use distribution. And distribution is a hub and spoke model and the edges are, we have edge notes called Artifactory edges, which are spokes of this distribution. They’re lightweight, immutable versions of Artifactory, and this is where the release bundle portion I was talking about before comes in because what you could do is you could package these up, distribute them into multiple edge nodes. Now these edge nodes could be in your own DC, it could be in a single cloud provider that you may work with. It could be in multiple cloud providers. There’s a lot of things that we also talk about in other discussions about multi-site hybrid and other types of things. But just so you know, we have you covered and we even have managed versions of our product so you can even distribute it to your customers.
Below that, we have Connect, it’s our IoT platform. It’s actually used as a device manager, device updater, remote diagnostics and also remote monitoring.
And then lastly, below this we have pipelines. And pipelines is our CI, CD, and CR orchestration tool. And the other things we’re going to talk about today or no, I mean actually probably not today, but remember we also have tool sets for things like ID plugins for your developers to make sure that what they’re using is safe and secure. We have our JFrog CLI tool, which we will talk about today, which also handles things like builds and also handles things like security and promotion.
But knowing that, our intent platform gives you the ability to go from code to cloud, from developer to device, whatever you call it, whatever your SDLC dictates, we have the end-to-end solution. So from your developer all the way down to whatever the things that you do as an organization.
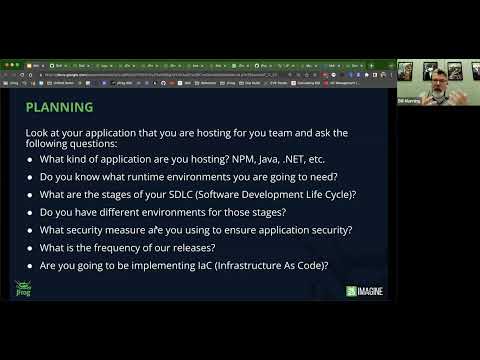
Now, the first thing I mentioned is planning. So what you’re going to be doing is that there’s a mentality thing here and the reason why I’m starting off here, and a majority of it is actually around education on how to utilize this is the fact that you need to look at certain things like what application are you hosting when it comes to things like Kubernetes. Remember, it’s scalable. It’s designed to be resilient, it’s designed to have it so that you can rapidly update it and improve it.
So first thing about the application you’re hosting, it’s an MPM, it’s a Java. We support over 32 package types. You need to understand what kind of runtime you’re going to need from this. Also, sit down with your team and actually talk about your software development life cycle. You’ll hear me say SDLC a lot in here because when you design this, if you follow things like 12 factor application method or multi-tier, one of the key factors here is the idea of the atomic unit. So the ability for you to go in and move it from one stage to the next to the next. Also, too, make sure you have application level security throughout it. Like I said, we have tons of talks about our x-ray product and how you can integrate security into pre-evaluation of libraries. You can actually make it part of your build process. You can even make it part of your deployment process.
So you can have security consistently across the board. On top of that, discuss things like what’s your frequency, things like your naming convention, your numbering convention or whatnot. And then also have talks around things. Are you going to be using something like Terraform for say, infrastructure as code? Because you’re going to want to think about that too. Now what are we going to build? So I mean what we’re going to build is we’re actually not going to build it today. I’ve already done this in the past, I’ve actually built it, but I’m going to be going through the examples of this seven stage example that I really love to show. Now in this we’re going to be showing the five steps because the other two steps happen to do with actually distributing the software out and then also to implementing it. And I’ll show you how you can use our metadata, our tool sets and everything to do this.
But our Kubernetes step is pretty straightforward, this application we’re doing. We’re going to have a Gradle application and an MPM application. So we’re going to have an MPM front end and a Gradle backend. Next step we’re going to do is we’re going to build a base level container image. This image is an image that we might use to host, maybe a corporate sponsor, maybe we have a corporate version of a container that all applications could live in. It might have all your tool sets like monitoring and things like that in there, maybe approve run times and whatnot. And the thing is that we’re going to build a base container that’s going to hold our Maven, our Gradle app, and also our MPM front end. And then we’re going to take step three. We’re actually going to use Artifactory metadata based on the bills that we produced in step one to create an image that is using step twos based level container images.
But the best part is when we discuss this, and I show you the benefit, we’ll be using our download spec and I’ll talk about that in a bit. But the reason why is this will give you accountability on so you can see what applications are living at your application level. This is magic. I love this part.
Step four, we’re going to be actually dynamically creating a Helm Chart. And we’re going to use is we’re actually going to use metadata queries that we’re going to do to Artifactory, get specific versions of both the node and the Gradle app, also the docker framework and the docker image to make sure that we’re using the right one. And then based on those versions, we’re going to create a Helm Chart and publish that Helm Chart into Artifactory. So when we deploy it, we have the exact version of the container that we are going to launch in our orchestrated environment.
And lastly, we’re actually going to go ahead and we’re going to combine these together. And actually at the end we’re going to deploy them. But the big thing we’re going to do is we’re going to wrap it in a release bundle and we’re going to take that release bundle, we’re gonna distribute it to the edge nodes and then we’re also going to launch it and substantiate it. So step five is a combination of actually three steps, but these three steps will help you expedite the things that you do over time. So let’s talk about the tool sets that are available. These are things that you should keep in your repertoire. And when you are going through and looking at how you’re going to build, distribute, or do anything with Artifactory, know you have these things.
First thing is our Artifactory API. Our Artifactory API, but we have an X-ray API. We have a distribution API. But for this actual talk right now, we’re going to talk about the Artifactory API. It’s a full-blown standard API that returns JSON calls, is completely integrated into our system. Everything from, by the way, user creation, repository creation and whatnot. But in this case, we’re going to be talking about the build side, right? We’re talking about the CI side of actually constructing your software and some of the things that you can utilize it for. And I have a couple of examples of this. Now just so you’re aware for this one, I’m using Jenkins because Jenkins is still the most popular version of the platform out there. It’s also the easiest to show and talk about. But in the stuff that I’m going to show you, I’m actually going to be using a bunch of API calls.
And also I’m going to be looking at things like build automation from our API, how you can deploy artifacts, the flexibility. You can do everything from even things like, by the way, custom artifact cleanups. You can also add in controls and governance. And the thing is that you can automate any of the things that you’re trying to do through our API. Actually, if you use our UI for our entire platform, one of the nice things is that everything behind the scenes is our API. We’re just putting a nice front end on top of it directly. So all calls are pretty straightforward, but everything from repo creation, storage projects, you name it, our API encapsulates everything within our platform. And these are majority of the ones around Artifactory. And some of the things we’ll talk about today, a lot of it actually we’ll talk about today, is things like builds and searches. Because searches using our query, arguably one of the ways in which you can go in and actually query Artifactory to find specific versions. And I’ll explain to you why that matters.
We have our JFrog CLI. I Love our JFrog CLI. It is so important. It is so strong, it does so many things. And the best part is it adheres to some of our best practices and standards as in the fact that it uses all our APIs, all our APIs are there. And by the way, one of the coolest features you can do too if you just type in JFrog CLI custom, you could even extend, we’ve actually wrote a way for you write plugins for our JFrog CLI. So this gives you the ability to even create your own set of functions if you want.
But one of the big advantages is it has parallel uploads and downloads. It’s been optimized for checksum. Now, if you’re familiar with Artifactory, we use a checksum based approach for storage. This actually allows you to have that same algorithmic capabilities at the CLI, cutting down on the number of times you can upload and download. And also making it so that it only transfers things like the deltas before. And then here you can use wild cards or regular expressions. And like I said, you could even make your own set of plugins for it. And this entire webinar that I did actually on plugins on how you can create things that you might do on a regular basis, but the generalized commands, you can do everything from build integration to managing users groups. You name it, the CLI is extremely robust.
It has so much functionality. It even has some native functionality for things like Maven and Gradle for MPM and Python and Rust and Go and others. We have a lot of webinars on this, too. I recommend looking at it. Like I said, these are just high level [inaudible 00:15:26]. Just making sure you’re aware of all the things that you have the ability to do because when you use the CLI, it allows you to have greater control over everything you’re doing and you could use it in a scripted format. And I’m actually going to show you today how I actually, I’m going to giving a talk at the end of the June, and if it’s way past that, you’ll understand.
But the idea here is that I actually use, I’ve talks on this in the past too, where I’ve used the JFrog CLI to actually go ahead and prototype my CI process. And instead of actually rewriting it, all I’m doing is copying those commands. And I’ll show you an example of that today where I’m actually using those commands, I parameterized them and then I can actually turn it into a build process. But I experimented at first and I was able to test it using my CLI.
One of the big things that everybody should be aware of is AQL, our Artifactory Query Language. I don’t think it gets enough love as it deserves, and we’re going to be using it a lot today. But the idea of it is it’s a powerful language. It’s very much like an SQL language, right? It’s very much like SQL. It gives you the ability to go in and search for properties and anything you want, you can query Artifactory ’cause remember, everything in Artifactory is based on a meta content level and it returns to standard JSON syntax. You can go in and put in things like different types and properties and things, and we’ll talk about that. But our Artifactory query language really allows you to go ahead and use the data and return data where you can use it very succinctly.
And I’m going to show you some of that today with some of the things that we’re doing. Also, too, one of the things that we will be doing is working with file specs. Why is this important? Well, I’m going to show you one of the demos I’d love to show my customers is I show my docker image and I ask them, I’m running a note for [inaudible 00:17:13] of the job, a backend. Please tell me what version I’m running. I’m going to show you today how you can capture that information. And I’ll show you the output from this so that you understand that when you are seeing it, how you can see what applications are living in the docker image or what dependencies are living in the docker image.
But the file spec allows you to go in and do ifs and and’s and or’s and conditionals and searches on properties, on actual components, whatever. But it can be recursive. So you can either have it a flat level inside of a repository or you can have it go through a tree, whatever. There’s tons of information on this too, but for the expediency of time, we need to go ahead and do it this way.
CI integrations, we have CI integrations into all major CI environments. If we don’t, you could use our API or our CLI also. I think this is super important. So if you don’t see it here, please go and type in this Artifactory and the CI server names. And I am sure that we either have the integration or there are plenty of people. We have almost 7,500 customers now.
And I’ll tell you right now, we have found tons of examples of companies utilizing stuff that we never thought we would support ’cause we don’t support them directly ourselves, but we actually have our customer support for us. So let’s go right in. Now, let’s talk about builds, right? This is super critical. So understanding build is actually the key concept between everything that we’re doing here today, right? Because the thing is you’re building software that needs to be hosted and needs to scale. Let’s just break it down to its brass simple tax in this case. So understanding that is what we have here, right? We’re going to do, I’m going to talk about Gradle for a minute. I’m going to talk about MPM.
But the thing is you need to understand is keep repositories in mind to start with this. And this is a quick overview, okay? Third party transit dependencies, you use remote repositories. It’s lazy cache. This gives you the ability to go in and even do things like if you want to do replay of bills later on, this is where you go. Or if you have a thousand developers and developer zero brings down a library, these 999 other developers will use the same thing. What you’re doing is, is any of these third party transit dependencies, these libraries direct and indirect, because remember, if you do something direct, you have a bunch of indirect ones that are going to come also, but this is a place for you to cache and store those third party transit dependencies. It’s the remote repository. And for our intents and purposes today, this is what we’re going to be doing.
Remember that constitutes 85 to 90% of the software you produce is other people’s software. You know, don’t know, right? These third party libraries. Now saying that when you produce a build, you’re going to be producing a build and publishing it into our local repositories. This is where your stuff goes. This is also the local repositories is to where you’re going to go ahead and design your SDLC, your software development life cycle. And what you’re going to have is a series of local repositories and you’re going to have a series of remote repositories and you’re not going to want to go ahead and actually have all these repositories that are there.
So what you’re going to do is you’re going to have a virtual repository also, and I’m going to show you that in a minute, but virtual repositories is an aggregate. It can be a combination of local and remote. It can be local, remote and virtual. It can be all virtual. It doesn’t matter. It’s a single point of entry, a single URL for you to access both third party transit dependencies and also to the local repositories where you’re going to do your SDLC.
So if we’re going to look at this, again, you can see here I’ve got a virtual repository called Docker. I’m going to have Docker dev local, which is my local, where I’m going to shoot all my development builds. And when I’m happy with my development builds, I’m probably going to take them and promote them into a production build. So if you look, I got dev, I got production, and of course in this case, my docker stuff depends on third party transitive containers. In this case, those base level images I’m going to use. So I have a remote repository, so every time I do a Docker poll, Python blah, it’ll first check in dev, then QA production, and then go ahead and check in my remote.
And if it’s not in any of those, it’ll go to Docker hub, it’ll bring it down, it will cash it there. I have tons of, there’s tons of webinars talking about repositories alone. I’m not going to spend a tremendous amount of time on it. Just know that you’re going to want to go ahead and actually emulate your SDLC. Now, I wrote a naming convention document many, many, many moons ago, but we’re also going to be talking. What I wanted to talk about is keep your naming conventions in mind when you are building these, when you’re going through the planning, I like to always team, which is the team that’s doing its thing. The technology supposed be like docker or MPM or whatnot, maturity level. This usually is where you are in the SDLC pipeline. So it could be dev, QA, staging, production, whatever you want, and then location. Now local means it would be local to that Artifactory instance, but Artifactory can be used globally across multiple versions of the same platform. So always keep in mind that you might want to have a location.
There’s lots of talks online about how we do repositories and the repository method, but just to know also too, every artifact that you pull into Artifactory, one of the things I have talked about, you keep hearing me say metadata, is the idea of artifact properties. Now, this is important too because we’re going to be using actually artifact properties today to go ahead and do queries into our system. So just keep that in mind.
On top of that, you can also set properties, by the way, on artifacts, directories or builds. It can be actually done in the UI, the rest API, CLI. We have user plugins and also too, we have this thing called matrix parameters. These are all covered in other webinars, but I’m going to show you today how we can use these properties and also too, how you can set properties.
Now, software builds is where we’re going to start off with, and I want you to understand that most people, when I talk about yeah, I’m publishing my builds, they’re usually taking the end result of whatever their software build process is and they’re pushing it into Artifactory. That’s incorrect. What you should be doing is a thing we actually have is called build information. So when you publish, you’re publishing not just pushing a build of some sort in [inaudible 00:23:22] Artifactory. In this case we’ll be looking at MPM, and then the other case we’ll be looking at Gradle. But what build information software builds is picture this being a giant basically software object.
And inside here we encapsulate everything. What was produced, how was approved, what CI was it done or was it done through a CLI or something like that. What dependencies does it have? What stage of the SDLC is it in? Is it in dev? Is it QA? Is it staging, right? These are all the information that we compile and we aggregate into a thing called a build object or build information inside of Artifactory. And this, I’ll show you in a bit what that looks like and how that all works together. But the thing is it’s going to capture dependencies, all the build artifacts, what environments were using, what variables are used during that environment, all the published information around the build. And also too, you could designate very specific build commands for very specific types. Each one has its own merits, the MPM Publish or Python push or there’s a lot of them out there.
But in this case, we’re going to be talking about MPM and Gradle in this case. But one of the things also I mentioned is our SDLC. So one of the things we’re going to touch on in this first section is also to our build promotion, which means I’m going to promote a build from dev to QA or QA to staging. So it might look something like this, and I’m going to show you how you can do that. Build promotion also to what’s great is, like I said, if you follow 12 factor or multi-tier, having the atomic unit is the most essential bit. So whatever you’re moving should it be the same thing. Whatever you produce in dev should be the same thing in QA should be the same thing as staging and all the way to production. And you can use our API and you can add as much arbitrary information as you want.
So today what we’re going to do is we are going to talk about some of these build promotion steps. I’m going to show you an example actually inside of a docker image because you can actually treat a docker image as such. But this allows you to encapsulate all the information and gather and capture all the information on how you do your bills and your build process. So let’s take a look quick look at an example. Now what I have here is I actually, this is my project and here’s my seven step example. Here’s my Gradle app, here’s my Note app, here’s my base level container image. Here’s my actual app where I’m actually using the base level image and I’m pulling the versions of the Gradle app at the UI. Here’s my Helm Chart. My Helm Chart is actually going to be using the information from the steps above to create it.
Here’s where I’m actually creating the thing called the release bundle. So I’ll be using a lot of AQL here and the API. Here’s where I’m actually going to go ahead and distribute. I’m going to show you just a quick what looks like when you want to distribute. And then lastly, you can even put in information on how to deploy the entire process from an edge node and say, “yeah, I want to launch this using Kubectl.”
But let’s take a look at some of the examples. So in this case, the example that I really, really, really want to show you in this case is the fact that I’ll go to my raw view just for a minute, but here’s an example of a Gradle bill and what makes this important is I’m using Jenkins in this case, and if you look here, you can actually see where I’m substantiating our Artifactory plugin and this plugin, I’m actually is all parameterized, just so you know.
And the tool, what I’m doing is I’m actually building my Gradle. So I’m using my Gradle example here to actually go ahead and build the actual component. I’m also saying that when I want to go ahead and deploy this build, I’m going to deploy it into dev. So you can actually see I’ve Gradle, dev local. You can also see that if I want to resolve it, I’m actually going to use Gradle release. These are all repositories that I define. These are all standards that we usually have. You can go over our JFrog Academy to learn these things. And then what I’m doing is I’m actually capturing all that information into a build file. And what I’m going to do is, as part of this, I’m actually going to go ahead and I’m going to capture how the environmental system information is.
I have this thing that says collect build issues. I’m not going to go through this too much right now, but what this is saying is I actually have in this case a spec where I’m actually grabbing this from a Jira system that we have. So this way I can go ahead and capture any Jira tickets that might be part of this is. There’s a whole talk I actually gave on this. But the thing is, what I’m doing is I’m actually, the big thing here is I’m actually publishing this component into Artifactory, right? So I’m actually taking this Gradle build and I’m publishing it.
Well, what does that look like? Well, let’s do this. Let’s go ahead and look at the builds that I have here. So we can go ahead and search builds. And I’m actually going to say in this case, I am going to say step one or step two. Actually I did in this case, hold on step actually, I actually bring up all my steps so if I can type today, here we go. So if we take a look here, I got step one create Gradle [inaudible 00:28:12]. You can see actually in this case, this one has been released. I’m going to go ahead and show you what we capture.
So by capturing all this build information and stuff that we have here, I’ve got a JAR file. That’s my output that I would do usually for Gradle. But if you look here, you can see I’ve got all my dependencies. Why is this important? Well, the thing is that say you are, you want to know everything about how something was created. Well, that’s what we do here. We have the output, we have actually the ingredients, right? Because that’s what the dependencies are.
On top of that, we also capture things like the environmental and system information. If you look here, we could actually show you every single component that was actually set during this time, the runtime, the execution environment. We also have things like x-ray data. Now, in this case, I don’t believe I have, I’m actually capturing well I am. So you can see here with our x-ray product where I’ve actually found things like violations and things like security risks, and I actually have things like licensing. And my favorite one, I’m mean nobody ever talks about, but I love it, is operational risk. How healthy are those third party transitive dependencies that you’re bringing in, right?
So the idea here is the actual open source project you’re using outdated, or in some cases, is it not being even used at all or is it being completely abandoned? Here’s where I could go ahead and actually display if I had any Jira tickets, it would be display here. Also too, one of the important things is why would you capture build info? Well, you can diff two builds. You can actually go ahead and diff it at the artifact level, the dependency level, also the environmental and system information level. If you use a promotion API, we can actually see here where this is actually promoted into a release repository. So I know where it stands in the SDLC, but if we go back here, one of my favorite things is, I’ll just show you quickly, is why would you want to capture all those build info?
Well, what happens if one of these actual components that you’re utilizing is terrible and you find out that this got terrible CVE’s, it’s going to ruin your company’s reputation and lost revenue. Well, we actually go ahead with this build info and we utilize it to map it to see where it’s been used. So you can actually tell that just that one build we’re using, it says here, log back core. Well, actually this has been used about a hundred times, not just my project, but it could be others, too. If you look here, you can see there’s other projects in here that are using this library, too.
So by capturing the build info, not only do everything about the actual thing we’re building, but on top of that we actually also understand where are all the resources being utilized? Let’s go back a step, right? ‘Cause I was using an Artifactory plugin. Let’s talk about our JFrog CLI tool, right? And in the JFrog CLI, the reason why I want to bring this up is, is that this MPM build I’m doing instead, I actually prototyped this using our JFrog CLI, and I was able to capture all this information.
So if you take a look here for a second, you can see I actually have a stage here where I’m actually going ahead and I’m downloading the JFrog CLI. I have all these examples online. You can see that I’m actually configuring my JFrog CLI to use my Artifactory server. Now, by the way, just so you know, these are parameters that I’m passing in as part of the server. I’m configuring the CLI to be used against the Artifactory instance. I’m actually showing it in this case. And then I’m also just doing a quick ping to make sure the server’s online. Now, in this case, by the way, just so you know, I’m doing some extra commands here where I’m actually taking the build number and I’m turning that into a value inside of my package out of JSON.
Not important, but the next step here is I’m actually using some native commands that we’ve built in such as MPM, so MPM-C, which is MPM config. You can see I’m actually setting this as my registry where I have this one here says where I’m going to resolve, I’m going to use, I’m going to use MPM in this case, which is a virtual repository. I’ll just show you quickly. If I were to show you inside of Artifactory what that looks like, this actually has all my stages of my SDLC. I’ll bring it up right here. You’ll actually see me just do a quick search and let’s see here, I got to find it. It must be maybe one more. Here it is. So here’s my end repository, and if you look down below, you can see I’ve got dev, I’ve got QA, I’ve got production.
These are local repositories, and my resolution is MPM from my third party trans devs, and this is the top down. So by doing MPM install, that’s going to start here, and it’ll slowly work its way down. Saying that this means that when I’m resolved, I’ll use that MPM remote to actually go ahead and pull in those third party. And when I want to do a publish, an MPM publish, because remember, if you’ve ever used us before, all of our commands are native so MPM publish will work. Or in this case, I might use the JFrog CLI, and I’m going to go ahead and do an MPM install. Now the MPM install, I can either use a standard MPM install, or in this case, I’m using the JFrog command line to do it. Why? Once again, it has some stuff that’s built in natively, so I don’t have to authenticate.
I also handle some resolution issues. But some of the things that if you want, I’m going to talk about here is there’s some steps you need to know. So in other words, now that I’ve done MPM install, I’ve gathered all those third party transit dependencies. If you look at this next step here, you can actually see where I have this one says BAG. I’m going to capture all the information around the Gitrepo where the source patrol came from. I BCE, this one here, this is capturing all the environmental information.
Here’s my MPM publish where I’m actually going to publish all the MPM information around how it was built after I did my MPM install. And then I have one here says BP and BOP, what that does is BP actually goes ahead and publishes the build info. So what does that look like?
Well, let’s go back to our builds for a second here. So let’s go look at the builds. I’m going to also go in, I’m going to show, I’m going to say step again, and here’s my step two, right? So my step two, which is the one I’m, I’m actually utilizing that I have in this raw area right here. If I take a look at it, you can see where I, in this MPM build I have, you can see here’s my [inaudible 00:34:09] when I output it, when my MPM install, and then I did an MPM publish, but it also published all the information around every single dependency that I had. So I know exactly when it’s building this, including when I look at the environmental and system information, I can even see what version of MPM is running.
Now, let’s go back because we still need to talk some more because there’s other things too you can do in there such as build, publish, and create and all these things, but we have these examples available, but these are just quick things. You need to capture all that build information. And why is that important? Well, let’s talk about Docker, right? We’re heading over to step two and with Docker, we’re going to look at the creating a Docker framework and then how to actually go ahead and publish that into our Artifactory, right?
And so if we take a look here, Docker Artifactory, as a docker registry is absolutely powerful and extremely resilient. You can have multiple registries, which is the other big benefit. You could actually specify specific repositories that you might want to use for some of these builds. On top of that, the thing is that when I showed this to you today, one of the things I want to make sure that we have here is I’m going to show you first, here’s my Jenkins builds, right? In this case, I’m just going to go bring up the raw again.
And in this case, I’m actually going to go ahead and I could do things such as, here’s a download spec, right? I actually in my case, I actually have uploaded a specific version of Java that I have and also too a specific version of Tomcat that I want to use. And in this case, what I’m doing is I’m putting those in Artifactory and I’m actually using, in this case, the Artifactory plugin just so you know, once again, I showed you in the early one, I have complete webinars just based on this part alone.
But what I’m doing is I’m actually downloading that information and I know which version I’m actually utilizing in this case. So let me just show you what that looks like when we get back to step again, and let’s take a look. Here’s my Docker framework. Here’s a build that I have for my Docker framework. And if you look here, remember I showed you I want to know a specific version of the Tomcat server, and here’s a specific version of the JDK I’m using. By using the download spec, I can specify which objects, which builds, which things I have that I might want to know between versions code in case I do change stuff.
Now, I didn’t change anything here, but if I did [inaudible 00:36:31] between them, so let me know, did I change version of Tomcat? Did I change version of the SDK? But the thing is I’m constructing my standard build. Now, I’m not doing anything crazy here. I’m just modifying the docker file in this case, just so you know. So I know where the registration is. I’m just doing a quick said to say, “Hey, in this case, what I’m going to do is I want to go ahead and I’m going to change, I’m going to find maybe in boot two is my base image. I’m going to go ahead and replace it with the one that’s an Artifactory.” I have a whole webinar just on this subject alone, by the way, and I’m pulling down those images and I want to do is I’m actually going to do a standard docker build, right? It’s just standard docker build. That’s it. There’s nothing else crazy here.
And once I’ve actually done this docker build, I could actually push this into Artifactory and I could publish all that build information. Why would I do that, right? Well, I’ll show you. Like I said, here’s that Docker build again, and I’ll show you every other registry looks like this, right? There’s a bunch of obfuscated information, but if I asked you what version of Java or the version of say the Tomcat I was running, I could actually show you because the way I captured it, once again, we captured all this information.
So we know this is our base level image and the base level image is important, but in my opinion, the next one that I’m about to show you is the most important in this case, okay? Let’s look at the next step. Now, the next step is important. Now, the reason why this is important is because if we go in here, once again, I’m using the JFrog Artifactory plugin. Just be aware, but you’ll see something different. Now, I just showed you the download spec, right? So I have two downloads right here where I say build info. In both of these where I’m going to download, one says greatest war for Gradle war and the other one says MPM download.
Well above here, I have two queries, and once again, here’s my download spec that I was showing you before. Now the difference is that these queries that I have here are below, and these are functions that I built. And these functions are utilizing our API in this case. So here’s an example of get latest war. So in this case, I actually have an AQL query where I’m saying, “Find me an item.” So item find, in this repository, here’s my Gradle repository. I want to look at an exact match. So this case, I’m looking for my Frog, my Frog’s WS is my web service. I want to match it. I want to return the JAR name and I want to include the path to created and the name, and I want to do it by descending, by created, and I want to return the last one.
Now, the thing is, is I can use also things like queries that could search for specific properties or specific metadata that might be in Artifactory key value pairs. You might want to sit up so they show you have a series of tests that you have. Why do I bring this up? Because one of the things is actually you can add testing materials and information. And actually inside of this docker builds that I have here, I actually do have a step, and this is where actually we’re grabbing the API again.
In this case, I actually have a thing called test app. It’s a really cheesy test that I’m doing. Basically what I’m just doing is in this case is I’m actually downloading the image. I’m actually going ahead and I’m running the image. So here’s my image download image run, and then I’m just doing a curl that basically says if I get back 200, okay, says it’s good. But as part of this process, I’m also saying update property, QA, functional test equals pass. Now, update property is another API call. So if you look, I have a curl string here, and my string actually is saying, go to the API, go to this docker app with this build number, here’s property equals, and pass those properties and assign them to the build.
And I could make those query-able. Did it pass my QA test? Yes. If it did, give me the latest version and you can actually have it set up. And there’s a whole talk on AQL in the API called AQL, what is it? It’s a Artifactory AQL made in heaven, or one of those, I can’t remember the name exactly, but we go into deeper dives on this. But the idea is simple. Once again, we’re going ahead and we’re doing testing, you’re doing the testing.
On top of that too, we’re also using our download spec. And what does that get us? Well, I’ll show you, and this is a question I ask companies. So first of all, as part of this too, if you look here, it says released. I should address this too, while we’re sitting here. If you look below, one of the steps I have as part of this build process is I have a promotion step.
And this promotion step, I’m taking it from one repository and moving it to another based on this job name and this build number, I’m calling it released. And what this does is this allows me to even go ahead and promote things like docker images. So if you look here, you can see I highlighted the word released. This is an arbitrary value. I can do this here. Plus also we capture that build information. I could show you, this actually links directly back to the CI server that actually produced it. And actually when you have plugins, if we have the plugin for the CI server, one of the nice features is we actually link it back so you can go bidirectionally in this. And you can see where all the steps I was just talking about while I’m building this, here’s all the data right here.
So I’m actually pulling those dependencies, those third party using the AQL queries I’m building and deploying it. I’m publishing it and I’m going to test it. I can even x-ray scan it as part of this. So if you look here, you can actually see one of the stages that I’m actually utilizing here it says X-ray scan, because this is actually another thing I use from our plugins to scan it based on the version of the build I produced. And if we take a look in here, what does this get you? And this is the question I ask companies all the time. I’m like, “Here’s your standard registry.” And I said, “If I had a build number 52 and as a node for the job on the backend,” one of the things I always say is, it looks like this. And I always ask the same question, “Tell me what version of the node front end and the Java backend I’m running.” And they’ll go, “I don’t know, it’ll take awhile.”
Well, yeah, it will take a while. But if you use our methodologies, like I just showed you and all these examples are online, is the fact that you can see, here’s my node front end, here’s my Java backend. I can actually tell you what versions. This also allows me to go in and diff between images. So if say something goes horribly wrong between 145 and 152, I could tell you what changed. I could even diff, by the way, entire containers, not just application level like artifacts, dependencies, and environmental and system information. I could tell you how it was created, right? All this information is all here. And once again, even Docker images could have their own release history. You could have every stage of your SDLC, but also too, because we’re here and we’ve captured this information, I can go from the Docker image into the actual build that was produced.
Then I actually see, here’s the TAR-GZ I created in step two, right? Here’s my node front end. I can show you how it was built, it’s MPM information and blah, blah. But once again, let’s go over here because we can actually see, here’s build node, here’s step number two. We can actually correlate the application at the Docker image to the application that created it. And I can show you every single container that’s ever consumed it for hosting. Thus, the reason why it’s important to understand all the steps that we do here.
Let’s talk about Helm. We only have a little bit left. So the thing is, when we talk about helm, we talk about Kubernetes. You understand that Helm is the instruction set for the Kubernetes architecture to do what it does. It’s where you define your pods, how you scale. I’m not going to go into all this because you guys should understand it if you’re here, if not, deep dive into Kubernetes and all the things I’m about to talk about will make sense.
But the important thing to remember is we are a package manager for Kubernetes. We actually have a Helm repo. You can even version, you can go ahead and even promote your Helm Charts through their own cycles. And the thing is that we actually have a lot of precondition ones that we use for our own services. The thing is that using us as a helm repository, you could have multiple helm repositories. Like you could have multiple container registries, you can have fine grain access controls, you could use the promotion API. So you can actually go ahead and resolve all of your third party Helm Charts through us. You can create your own Helm Charts. The thing is that we are a virtual helm repository with everything you need in one place. And the best part is, like I said before, with our other products, you can have replication and shoot them wherever they need to go.
But the thing is, is that when you are doing this, also keep in mind that you should be version doing versioning and changing of your Helm Charts and incorporating those ideals into even creating the Helm Charts themselves. And like I said, you could even create your own helm and build and build and publish them here so you have all that information. So that’s what we’re here to show, right? Step four and step five, these are the Helm Charts. So let’s talk about that and let me show you an example.
So first of all, my next example I want to show is me dynamically creating a Helm Chart. Yes, you heard me. So the thing here is I’m actually going to be hoeing ahead. I’m actually downloading the JFrog CLI. I’m actually configuring it ’cause I’m actually use the JFrog CLI to publish the information.
But one of the interesting parts here is if you take a look, I have a section here where I’m actually going ahead and I’m saying do a said and update the value YAML in both the chart. And so I can actually go ahead and deploy the things I’m doing. And once again, if you look here, here’s my upload instructions here. I’m actually going to take the Helm Chart that I created. I’m actually going to capture how it was built. I’m actually going to download it so I can do a quick test. And I’m also going to go ahead and I’m going to publish it, right? So I’m actually going to go ahead and do a build publish. But the thing is that you need to understand is that when I say update chart file, which is actually if you take a look, you can see where I update chart file right here.
I’m going to set some values that I want, but I’m using, well again, and in this case I’m saying find me the latest Docker app from this Docker production repository and give me back the path created and the name. Why would you do that? Because I’m also going to have the version too. And what this does is going to use our API to go ahead and do a search a Q L. It’s going to return those values. And what’s awesome is when return those values, I’m actually going to go ahead and take those and put those values here. If you look, latest is going to be replaced by an image tag name, right?
Never use latest, you should never use latest. Use the image number, but we’re getting that image number and we’re getting the registry information to create this Helm chart from Artifactory, which means that I can actually use that data so when I do deploy or build stuff, this will allow me to go ahead and actually dynamically change and up upload those actual Helm Charts itself. So this allows me to go in and look at the builds that I created and allows me to go in and say, yeah, these are the things that I want to do. These are the things that I am going to create.
Let’s talk about the next step because we are running low. Once again, release bundles. Release bundles are a combination, right? They’re immutable. The G P G, it can be GPG sign, right? They can be distributed, but it’s a way for you to actually go ahead and create these release bundles that might contain multiple things, right? Such as also release properties and also edge no properties. You can actually, I have deeper dives on all this stuff, but this is like to cue your interest in saying what else can I dive into? And the example in this case that I’m just going to show you quickly is that when I create a release bundle, I have another Jenkins job I’m doing here, but once again, I’m actually going to be using, in this case, I am going to be using the J Froog API for this.
I’m also going to be using AQL again, right? Where I’m going to try to get the Helm Chart. I want to, I get the specific Docker image that I’m going to use and package them up together. And if you look here, it says Helm Chart name and Helm Chart version, manifest an image. These are all queries below. These are all artifact queries. Here’s my Helm Chart item, fine repository, helm local, the name and the last name, the latest name. And this is actually done using specs that I have here where I’ve got these AQL queries. It’s going to return that information and once it returns all that information, like here’s the get chart version, right? So this one was again, helm local include, and give me the chart name and the chart version so I can use the metadata on the return or when I get any of these other queries, AQL is going to be the thing that I’m using for this.
And once I have that information, I’m going to create a spec in this case. Now the spec in this case also is going to be called Docker multi app chart. The chart version actually in this case is actually a value that I got out of the actual chart. The information returned from the AQL query and to create that release bubble because these are objects that are going to be pulled together inside of Artifactory that I already have there. I’m using our API called V1 release bundle in this case. And I’m passing in all that information in this file spec and Artifactory knows, and it’s actually, in this case, it’s our distribution product ’cause there’s actually a distribution URL, what this actually does is actually knows what those versions are and it’s going to create that immutable release itself, which is fantastic.
So what it means is that you can use all this information, all this API data that we have, to go ahead and dynamically create these Helm Charts to go ahead and distribute. And when I say that, we get down to the distribution portion. What’s awesome here is if you take a look, you can see where we can, once you’ve actually defined all these and you’ve actually gone ahead, you can use our replicator, GPG signing, I have a whole webinar based on this. But then you can, like I said, you can go ahead and you can distribute all the things that you want to distribute. So let’s go ahead and take a look, right? And this is the last bit that I want to show, but in these steps here, the last thing I want to show is this. So here’s my distribution.
Now in here, I already have some information I’ve gotten from the previous step. Actually, this is all standard groovy stuff where you can store object types and variables inside of Jenkins in this case. But I actually go ahead and I’m actually doing another AQL query that says, find me the builds, in this case here’s step four, create the help chart thing that I was doing. It’s going to go ahead and query and get me, in this case sort of I create it and give me the last one. Once it grabs all that information that I’m going to use, it’s actually going to grab that release bundle that’s part of that query. It’s going to bring it down. And then I’m going to create a thing here where I can specify either all edges, whatever you knew your naming conventions for Edge Nose, there’s a whole webinar based on that, and it’s going to go ahead and grab all my distribution information and the chart versions I’m using.
And it says here, it says at API V1, distribute this thing. And this is the chart bundle I created and the version, and it’s based on the fact that I’m going to distribute to every edge note. Even deploying it and getting it out to the world is all automated, even to the point where even in my last step, this is only partially Artifactory, but the thing is actually is once again, this is actually using Kubectl, but in this case, I’ve actually already set up, and if you look here, I’m using the Helm install. I’m actually using Native Helm commands because I’ve actually set up Artifactory as my Helm Chart, repo as my end, and so this way, when I’m using either an Edge note or Artifactory itself, this allows me to get the Helm Chart, instantiate it, and actually even go ahead and deploy it if I want to.
I know this is a quick overview, but this is a understand build information, AQL queries, all the tool sets that are there. There are massive deep dives on everything I talked about today. And the thing is the more you automate, the faster you become, the less, also more precision actually with less human intervention. So understanding all these key components is essential. So remember, utilize this for all your builds and anything you produce. Use this as your Docker framework for your base level container images and the application hosting images that you want to do.
Use this for your Helm Charts and use the metadata from all the pieces and components that are inside of Artifactory that you’re using for your services. You can actually query and get those from Artifactory and you can go ahead and pull those and even create multiple applications and even deploy those out using our distribution with our edge nodes and using our release bundles. Thank you so much today for your time, and I hope this has been insightful.
Great. Thanks Bill. That was a whirlwind of information, but super useful stuff. As Bill mentioned, we have plenty of resources available on the JFrog website that you can double click into any of those topics on how you can leverage Artifactory and the JFrog platform for your full software development lifecycle and software supply chain management.
We’re going to skip questions today just because it was, it’s been a bit long, but like I said, if you plopped anything in, we did have a couple, those will be answered and we will shoot you an email and connect you to one of our experts to answer any questions that you have. So Bill, thanks again for presenting and thank you everyone for joining us. We will see you next time.


