Snakes on a Car @Deserted Island Devops

Speaker: Kat Cosgrove, Developer Advocate

May 4, 2020

< 1 min read

Snakes on a Car: Overengineering a Toy
Like a lot of engineers, I like to tinker. I also like hardware hacking, video games, and over-engineering the hell out of something. When my team at work decided to build a proof of concept demonstrating the possibility of fast over-the-air updates for edge devices, we settled on using a car as the example of an edge device. It’s flashy, you know? This also presented me with an opportunity to do all of the things I love, and call it work: build a self-driving RC car, and then let people race it around a track using a repurposed USB racewheel, a handful of open source tools, and whole lotta Python. DevOps, but make it fun.

View Slides Here

Video Transcript

KATY: Our next speaker is Kat Cosgrove. The charity is Electronic
Frontier Foundation. Which will be featured in the Discord later. And Kat has a hidden
talent. Kat is a cyborg. So, I would take that to heart. And the title of Kat’s talk
today is Snakes on a Car. We are bursting with curiosity. Please give a warm chat welcome
to Kat Cosgrove. KAT: Hello, everyone. I assume if you can’t
hear me, one of the organizers will tell me that you guys can’t hear me. So, I think we’re
good. But, hello. Thanks for having me. And welcome to Snakes on a Car. Or, overengineering
a toy. So, first, a little bit about myself. My name is Kat Cosgrove. And I’m a developer
advocate at JFrog. Before that, I was actually an engineer here on the IoT team. And once
upon a time, we built a really flashy complicated demo proving that updating the software on
a car doesn’t have to be as time consuming and inconvenient as it currently is. Now,
some cars can be updated over the air. Teslas are a good example of that. Though, it can
take a couple of hours and the car isn’t usable during installation. Most cars require you
to physically take the car to a service center for the update. I have a whole, like, technical
deep dive talk on like how we built that proof of concept. And I give it a lot. But there
isn’t room in that talk for my favorite thing about the work that I did for that proof of
concept. Building a miniature self driving car. It was super fun. And you can build one
too! Before I get into the talk, if you want to get a hold of me later, I’m on Twitter
@dixie3flatline. And my slides will be up there. Plus, a raffle of Switch for anyone
watching on Twitch who doesn’t have a Switch. We couldn’t get a full size normal Nintendo
Switch, but we’ve got Switch Lites. So, what is this demo? For JFrog’s conference last
summer, we built this proof of concept showing fast proof of concept for edge devices. We
went with a car for our example because it’s really flashy and not something a lot of us
think of as an IoT or edge device even though it totally is. You hear IoT device and think
of something really small. You think of like your smart lightbulbs or whatever. But the
reality is that there are three or four computers in your car. The brakes are probably fly by
wire. It’s not being handled manually. A computer is doing that. Your transmission has computer,
your infotainment system is a computer. A scar a data center on wheels now. And since
JFrog very reasonably wouldn’t buy us a car to brick. We had a hackathon I had run a few
months earlier for a coding boot camp. I will spare the details, but we took updates on
the car forking that that required hours. And physically flashed the device like Jaguar
did when they had the F Pace to fix a problem with the braking system. Terrifying. To around
45 seconds for an application update and 5 10 minutes for a full firmware update without
interrupting the driver. It could happen silently, not that it should but, it could. And the
numberware update was mostly in the background, even while the car was being driven and actually
took place when the car restarted. So, it didn’t really interrupt the driver. We had
a pretty robust pipeline in place. So, everything was automated from the moment a developer
pushed code. It relied on Helm, k3s, Mender for over the air updates portion, Yocto and
Artifactory to speed thing up more. It might sound easy from this description that we glued
open source projects together. But it’s a shockingly difficult problem to solve for.
Especially taking into account things like differing hardware or network unreliability.
So, from a technical perspective, it was pretty cool. But it also looked really cool. So,
we had a racing simulator set up in the middle of a huge track. Complete with pedals, a racewheel,
a screen for the driver and a greenscreen around the perimeter of the track. And that’s
me making sure everything was set up before the conference opened the first day. I was
super, super nervous. I’m like clenching my jaw in that picture. We allowed people to
interact with it in one of two ways. As a developer, writing and pushing updates for
the car. Or driving the car while someone else updated it. And I know doing live coding
demos is always risky, but we were outrageously confident in what we built. So, we let actual
randos off the conference floor write code and push it to the car. It only barfed once
the first day. We rolled back and fixed it. Here’s what you need to build your very own
miniature car, teach it to drive itself, and make cool modifications to make it easier
to harass your partners, roommates or pets. So, let’s start with the basics. Our car began
its life as something called a Donkey Car. And they’re pretty fun on their own. They’re
also pretty accessible for a lot of people. It’s not super difficult to build one. If
you aren’t familiar with Donkey Cars, I super was not when I heard about them at a Python
Meetup. It’s a miniature RC car that’s been modified with a Raspberry Pi and a camera.
The library that enables it to do its thing is called Donkey, hence, Donkey Cars. And
in the most basic form, you can build one for like 250 bucks in parts and a couple of
hours of your time. Once everything is set up, you just record 10 or so laps. Takes at
least 10 to be able to reliably not just veer off into the distance on a track marked with
brightly colored masking tape. Or if you have a dark floor, you can lie down printer paper.
You just need high contrast. Then dump the recorded images and steering data back to
your computer and train a model. donkey has a CLI that makes this as easy as possible.
But it is well documented. If you want to dig in and get weird with it, you can. We
did. It’s fun. A whole communicate exists to modify with bigger batteries and more powerful
motors and nicer wheels to race them against each other. The standard camera is a regular
Raspberry Pi cam, they’re cheap. Some do add a lighter camera for better depth perception.
Ours was only than a standard Donkey Car. But it was not by much. We swapped out the
Raspberry Pi 3B for a Raspberry Pi 3B with a compute module. That’s what’s pictured here.
So, I’m kind of extra. And we wanted a setup and wanted the driver to like they were in
a racing game. We had concerns that the person participating a developer would be having
like more fun. I really wish I had an air quotes in Animal Crossing. That was like a
perfect air quote opportunity. But we wanted to beef up the driver experience because we
were concerned that the developer experience would be what people were really going for.
We were super wrong. Everybody just wanted to drive it. But this meant that we would
need to be able to control the steering with an actual wheel and the throttle and brake
with actual pedals. So, we knew we were going to have to modify the Donkey library. We didn’t
want to mess with manually dumping the images and steering data during a live demo. It’s
time consuming and you have to shut it down. We were going to automate that and move to
GCP. And I wanted to drive the feed from the car’s camera. And since things are not complicated
enough, throw in computer vision and put a greenscreen around the track. So, to start
on updating the controls, the standard Donkey Car is easiest to control with a web app on
your phone. That’s kind of what it wants to do by default. It wasn’t interactive enough
for us and didn’t give us the driving experience we were looking for. The library calls the
various moving pieces parts. And it does have experimental support for a number of different
physical controllers. PS4 controllers work pretty okay. These have been fleshed out more
since then though I haven’t messed with them. But the one that it came with for a racewheel
didn’t quite work like we wanted with the Logitech G29 we had. I think our racewheel
was a little bit too new. However, there is documentation on adding my parts. Donkey explicitly
supports this. So, we wrote our own. I know the code is hard to see in the like little
box. But that’s okay. I will hand out the code for this. The racewheel part requires
zmq and Pi zmq to work. It requires the racing wheal and pedals via a zmq running on the
machine that it’s plugged into. We had an Intel Nook under the driver’s seat and a screen
Dev to watch the race wheel. Actually, a whole lot of the demo ran because of the zmq proxy.
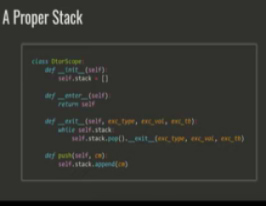
This is a snippet of the wheel on the car. It has a couple more methods on it for running
threaded and pulling for updates. But it’s way too much code for a slide deck. And again,
I’m totally happy to provide the complete code for this part for anybody who wants to
do this themselves. Once the part is added, swapping out the standard controller is a
one liner. You just need to SSH into the Raspberry Pi on your car. Open up manage.py and add
it as the controller instead of the default joy strike controller object. So, in our case,
joy stick controller was replaced with wheel. To make it feel like an actual car, we are
doing processing on the values from the racewheel before they get sent to the car. The standard
library does not really account for things like throttle scale or steering veer. So,
we have two helper functions here doing that math for us before sending the values over
to the car. Otherwise, the throttle feels really awkward. It’s like super touchy. If
you just tap it, it’s going like full speed ahead and you’re absolutely going to crash.
And the steering feels like, I don’t know, kind of jerky. It just didn’t didn’t work
super well. We did also allow for customization of force feedback on the steering wheel to
make it feel easier or harder to turn. What we found was that typically people loved screwing
with that while somebody else was driving it. Like they almost always wanted to push
an update that makes the wheel like super loose or super, super hard to turn. Usually
they wanted to mess with a co worker. So, that was always fun to watch. But without
this math here, driving the car using the wheel and pedals is still totally doable.
It’s just awkward and unintuitive compared to the way you drive a real car. Let’s talk
about the driver’s seat. The track is circular. So, obviously the driver needs a way to see
what the car sees to know when and how to turn the wheel. Otherwise you’re gonna be
blind half the time. It’s also necessary if you want to drive the car to the other side
of your office and bang it into a co worker’s door repeatedly, which is incredibly fun.
And I very much recommend it. To accommodate this, the NUC under the driver’s seat is going
to need to do a little bit more work. What we ended up with is a Sanic webserver doing
most of the heavy lifting for the backend and a VueJS for the frontend. Instead of storing
the training data on the Pi, we routed through the zmq proxy through another topic. An async
function subscribes to that topic as well as others handling our CI/CD pipeline, the
racewheel data and other things required for updates and according to whatever the current
customizations are in the config file processes the data. At the bare minimum, our VueJS app
on the driver’s screen is supplying the raw data from the car, the build, and buttons
to upload new training data. This is the overhead view for the crowd that’s also showing how
many artifacts the build number, vulnerabilities and the most recent build time. How long it
took to get an update on to the car. I will not show you the code for the VueJS app. Because
it’s possibly the single ugliest VueJS to be written. I never expected it to see the
light of day and never expected to write this part of the demo. That’s going to stay in
the dark. It’s a VueJS app. Nothing revolutionary about it. It was an open web socket to continually
redraw the images from the camera topic on our zmq proxy to a camera element. At this
point the car itself functions the way we want it to. You can use it the way we want
you to be able to use it. But it doesn’t look as cool as we think it should. So, let’s make
things a little bit harder and give the driver some nice scenery to look at. Otherwise they’re
just staring at people’s feet. Nobody wants to do that. Stand a bunch of green poster
board around the perimeter of the track and do a greenscreen. I will admitted that this
was not part of the original plan for our proof of concept. It was feature creep from
an executive who thought it sounded cool. I was very, very new at the time and full
of imposter syndrome and very eager to impress my boss. So, of course, when he asked for
that, I was like, yeah. I can totally do that. No problem. I did not have any idea how to
do it. I had to learn as I went. It turned out okay. It worked. And here’s what it looked
like and how you can do something similar. It’s actually it’s super, super fun, whether
you’re building a greenscreen for a car or something else. Computer vision was really
cool learn. So, in its simplest form, a script like this works by using open CV to read in
a frame, convert it from RGB to HSV, hue, saturation, value, and create an image that
falls within a range of HSV value that is you define. Set a high and a low. You then
use that mask to crop the background image you want and replace the corresponding spaces
in the original image. To get the edges closer to perfect, you can erode and dilate the mask,
blur and smooth it a little bit as well. You can see I did that a few times. There’s a
little bit of guesswork involved in finding the right high and low ends of your HSV range
and lighting does affect it. These steps help you fudge it a bit. The lighting in the office
where we tested this was way better than the lighting inspect conference center where we
did the actual demo. It looked much nicer in our office than it did on the conference
center floor. But we did what we could with some fudging. Then you just convert it back
to RGB and return the frame. It’s way less complicated than it looks, honestly. It turns
out that leaving it static is actually crazy disorienting, though. We needed it to simulate
scenery on a drive. And if the image didn’t appear to move as if you were driving past
it, it’s super, super disorienting. It made it actively difficult to drive the car around
the track. So, to make it look like it’s moving, we used the current angle of the steering
wheel and starting X and Y coordinates to calculate how far we needed to move the area
to crop for the background from one frame to the next. Because remember, we’ve got all
of the steering data and everything in our zmq proxy. So, we have all of the data we
need to do this. We used the scale variable to increase or decrease the scale of the pan.
Which made it feel like the driver was going faster or slower. And we did also allow for
things like image filters and different backgrounds to be applied as some of the updates people
could push. These also were in the greenscreen strip. Going from the desert to the countryside
to outer space. Inverting the colors, flipping the image making it nearly impossible to drive.
People really loved to do that once they saw a co worker do it and going fast. They almost
immediately crashed. All of these were built into open CV. There is no magic or hard work
there. But let’s automate the process of training a model in case we want the car to drive autonomously.
It can do that. Most people wanted to drive it manually. But it can drive itself. In the
current state, the process looks like this. You enable mode to start recording. Drive
laps, start the car, dump the images and throttle info to your laptop, use the donkey CLI to
move it, and then manually move it back to the car. It was a pain. Automating it was
relatively low effort once we got over hurdles related to TensorFlow on GCP. Since we were
getting the steering data from the car zmq proxy, we passed it on to a TubWriter utility.
And then to the NUC and pass it up to GCP to train the model there. Whenever the new
model was available, it updated to reflect and allowed the user to use that instead of
driving manually. We mapped something 8,000 buttons on Logitech, turn on training, turn
off training, self driving mode, manual mode. This was actually pretty slow. It took up
to like 10 minutes. But it still is faster and easier than stopping the car, manually
moving the data over, waiting for the model to train on a laptop instead of on a dedicated
server and then moving the model back. So, at this point, there is pretty much no reason
to stop the car unless you need to swap out one of its batteries. It’s got two. And now
we’re mostly automated at this point. It’s maybe more complicated than it needed to be.
We didn’t really need to automate the training. But it was fun. So, that’s how the flashy
bits work. Like I said, it’s not revolutionary. But it is fun to build and it’s a great opportunity
to teach yourself about hardware, machine learning, messaging queues and computer vision
all in one project. Personally, I did a lot of learning and growing as an engineer while
building this. And I hope you try it and learn something too. If any of you are happen
to be experts in all of these different disciplines, I guess call me. Because I’ve got questions.
I don’t know anybody who is an expert in all of these things. So, there should be something
for everybody to learn when trying to do this and I don’t know about you, but I need I
need fun wholesome tinkery projects to keep me busy at home right now. I can’t play Animal
Crossing literally all day. So, I can’t publish the entire codebase for this demo. But I am
more than happy to share the code for the components I talked about here. The racewheel,
the zmq proxy and the greenscreen so you can build something similar yourself. If you do
decide to take a crack at it and have questions, DM me on Twitter or email me. It’s not like
I have anywhere to be here. If you make it cooler, or find a horrific bug in my code,
please tell me. I would love to see what you do. And also, I wrote most of this code 9
months ago and I have some regrets about how I did some of these things. If you have complaints
about it, also DM me your complaints. Again, my name is Kat Cosgrove, and my @is Dixie3flatline.
And again, my slides will be at the by the literacy link as well as a raffle for a Switch
Lite and a raffle for Animal Crossing. Thank you for paying attention to me and thank you
to the organizers for putting this together and babysitting all of us and spending your
personal time setting up something that maybe was a gamble. Whether or not it would take
off. But it seems wildly successful. And everything has gone so smoothly. And I really appreciate
it. Thank you. KATY: Thank you, Kat. That was so amazing.
I’m I’m in over my head in the best way. We have a couple questions from the Q&A. The
first one, how long did it project take? KAT: It took four engineers well, three
and a half engineers. Our boss was trying to was trying to help. But he didn’t actually
have that much engineering time to dedicate to it. It took three and a half engineers
about two and a half months to build the whole demo. Which included the fixing over the air
update for the edge devices portion. That was the bulk of our time. The first time I
built a Donkey Car, the Donkey Car alone took me like two hours to build and get a functioning
model. Since I had to teach myself things like messaging queues and computer vision,
the parts of the demo that I talk about here took me I think it took me about a month
of spending like maybe half of my engineering time each day working on these.
KATY: And how long did it take you not to say Donkey Kong. That’s for me. I hear it
even when you’re not saying it. KAT: I think I got over it halfway through
the first day of the conference. We were all saying Donkey Kong. It was a joke. And we
got to the conference and had to remind ourselves to be adults for a moment.
KATY: Fair enough. One more question, since you mentioned it, how do you push back on
feature and scope creep? KAT: I think it depends. Now since I’m a developer
advocate, I’m fairly independent. I don’t have like a team leader that I need to go
to most of the time if there’s a problem. On that team, we did have a team lead who
is fantastic. And if he had been in the room for that meeting, he would have stopped me.
KATY: I’m sure, yeah. KAT: Yeah, he would not have let that happen.
That was entirely my fault. I should have known where the line was. But, again, I was
very new, and I didn’t know where the line was or how to recognize what’s an unreasonable
request. But KATY: Yeah, it’s a tough that’s a tough
question on any project, I feel. KAT: It is. I think step one is have a good
team leader that you trust to have your back. But if you can’t do that, then realize that
setting boundaries is a good thing. And going above and beyond to please, just like saying
yes to feature after feature after feature because you want people to like you. You want
management to think you’re capable, can actually hugely come back to bite you.
KATY: Yeah. Absolutely. KAT: You’re gonna take on a whole bunch of
you’re gonna look good for a minute. When you first say yes. Sure, we’ll add that.
KATY: That might be when you feel the best too.
KAT: Yeah, you’re going to say yes and you’re gonna look good to management then. But then
when you ultimately can’t do it, or you have to start canceling things, cutting features
a few weeks later because you realize you have more on your plate than you can handle,
you’re going to look real bad. Step one is learning. But setting boundaries is good for
both you and management’s perception of you. KATY: Yeah, absolutely. Thank you so much.
People had many questions in the Twitch chat and maybe some of them will make their way
into the Discord. KAT: Okay.
KATY: Amazing job. Thank you so much. KAT: Thank you.
KATY: Everyone, just give a very warm round of applause to Kat for that really amazing
presentation. I always like a I don’t know about y’all, but I love a talk that’s about
something that’s so far out of my wheel house. Like, I don’t know anything about it. And
that is what I appreciate, I suppose. Because it’s a way for me to learn about something
new in the most fun way. And I kind of like once I saw the picture of the sort of driving
game, that’s all I wanted to do. Like, ah, man, I like a good driving game. But only
when well, I think the chair helps. You know? Maybe I should get a gaming chair, get
like a full race car setup. Race car bed? No. That’s too much. That’s not shaped like
the right. But as soon as I saw that photo, I really wanted to play a driving game. But
that you know what? Maybe I will as soon as I’m done on my island. But I’m currently filling
my Animal Crossing with just garbage. Turns out you can make garbage. I can thank my friend
Aaron for telling me that. And I have been crafting garbage and it’s a delight. so,
if you want to frighten people off of your island, I have a dream to make it look abandoned.
Someday. Someday I will complete this. Yes. Someone in the chat says there’s there’s
a whole wall paper and floor. It’s just yep. Make your villagers put the trash in
their house. It’s just I don’t know why it amuses me so. I just love the that’s
the joy of Animal Crossing. So, well, enough talk about trash. We have the exact opposite
of this coming up now.
Snakes on a Car